
This article provides instruction and information on the following:
- How to set up Paladin to send email invoices
- How to email an invoice
- How to email an invoice at checkout
- Emailed invoices show the invoice number in the subject line
- How to customize a message on emailed invoices
How to set up Paladin to send email invoices
- In Paladin, from the main menu, select File > Setup.
- Select the Forms tab.
- In the Email Options pane, enter information in the following boxes:
| Name | Information |
| Enable SMTP Server | Check this box if using SMTP (see SMTP values below). |
| From Email Address |
Emails will be sent from this email address, and replies will be sent to it. This includes statements and purchase receipts. |
| From Email Address (Purchase Orders) | Emailed POs will be sent from this email address, and replies will be sent to it. |
| BCC Email Address |
This email address will be copied. The recipient will not see this email address. |
| SMTP Server Address | The Internet Service Provider can provide this information. |
| SMTP Server Port | The Internet Service Provider can provide this information. |
| SMTP Server User Name | Typically, this is the username used to sign in to their email account. Contact the Internet Service Provider if needed. |
| SMTP Server Password |
Typically, this is the password used to sign in to their email account. Contact the Internet Service Provider if needed. Gmail users: If the client is using Gmail, they must generate an App password to be used. Learn more. Note: 2-step verification should NOT be turned on when setting up an App password for Yahoo and AT&T email. Yahoo email users: If the client is using Yahoo email, they must generate an App password to be used. Learn more. AT&T email users: If the client is using AT&T email, they must generate an App password to be used. Learn more. |
| Enable SSL |
Secure Sockets Layer (SSL) is a type of security for web browsers, web sites, and email accounts. |
| Compress (Zip) Email Attachments |
The statement, transaction report, and invoices can be compressed (to decrease file transfer time on the email server) and zipped into a folder to be sent as an email attachment. To see the files, open the zip folder. |
| Enable Advanced Email Logging |
Logs email steps. Logs Success/Fail information in the EmailLogging.txt file at Local Disk(C:) > PaladinPOS > Export
Important: This must be unchecked after review is made because the log file can grow indefinitely. |
| Use Company Name in Emailed Statements | If you want your company name to be included on statements, check this box and enter your company name in the associated box. |

- In the Send Test Email To box, enter your email address and click Send Test Email To. If your settings are correct, you will receive an email message from Paladin.
- Click Save, then click Close.
Note: Email messages can be sent through a Simple Mail Transfer Protocol (SMTP) server via two types of Secure Sockets Layers (SSL)—explicit or implicit.
-
- Explicit SSL: Paladin only supports sending email messages via explicit SSL. This means that an unencrypted connection to the SMTP server issues a command to start using encryption before it authenticates the server and sends the email. Port 587 is usually the default port. However, your Internet service provider (ISP) may provide other ports.
- Implicit SSL: Paladin does not support sending email messages via implicit SSL. If you are trying to send email messages via port 465, it indicates that your ISP is probably set up to communicate implicit SSL to the SMTP server. This process is similar to HTTPS (a web browser) encrypting communication before it is transmitted via the email client and the server.
If you receive an email message stating that you use an SMTP server with SSL on port 465, try to use port 587 instead. If using port 587 does not work, contact your email provider to see if they have an alternative SMTP port with Explicit SSL enabled.
How to email an invoice
- In Paladin, on the top ribbon, select the Customers module.
- Enter or select a customer account in the Customer list.
- In the Contact Information pane, in the Email box, enter an email address.
- In the Form Control pane, check Email Invoice Copies?
- Open the Credit tab.
- In the Sales History section, click the Customer Friendly magnifying glass.
- Click an invoice, then click Email to send the invoice to the customer.
How to email an invoice at checkout
- After the sale has been made and payment type is select, press Enter. The Transaction Complete window opens.
- Select 6 Email Receipt.
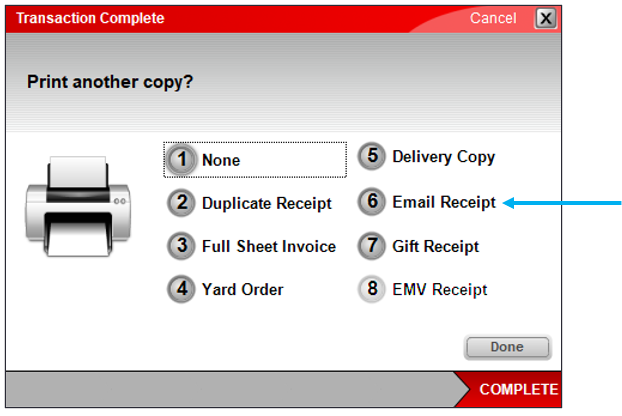
Figure 2: Transaction Complete window/6 Email Receipt
- The Email Invoice window opens. There are four buttons: Send Once, Add and Send, Send Selected, and F12 Close.
Note: The Send Once or Add and Send buttons will be grayed out and unavailable if the Enter Email box is empty.
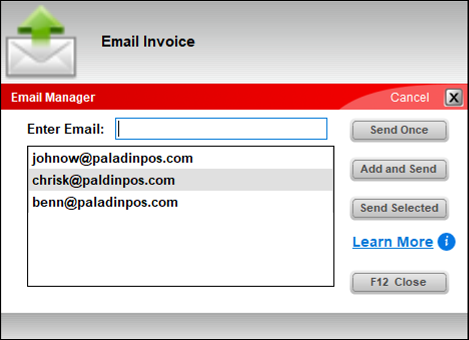
Figure 3: Email Invoice window
- Pressing Send Once will only send the email to the address in the Enter Email box; it will not save it to the customer’s profile or add it to the data grid view below.
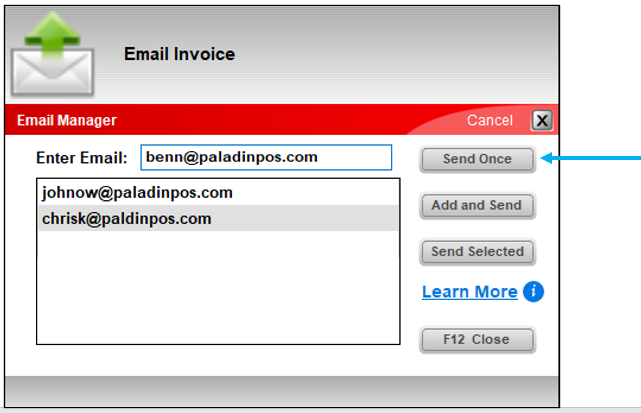
Figure 4: Email Invoice window/Send Once option
- Pressing Add and Send will send the email, add the email in the data grid view, and save it to the customer’s profile.
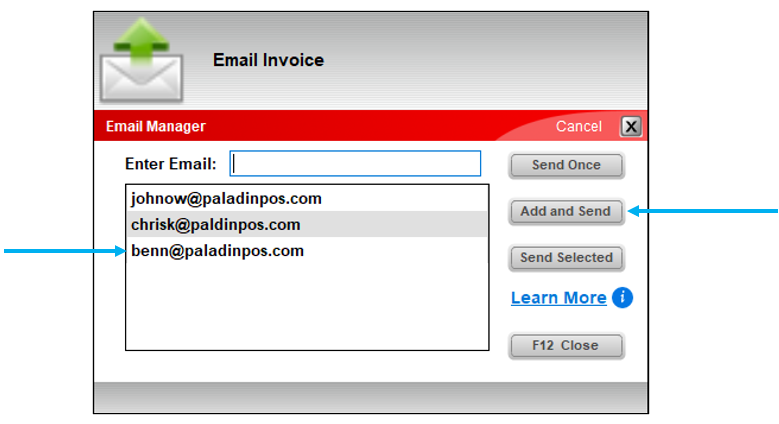
Figure 5: Email Invoice window/Email added
- Pressing Send Selected allows the user to send an invoice email to one or more selected email addresses in the data grid view.
Note: Email addresses can be multi-selected by clicking on an email address and holding the Ctrl key while selecting other email addresses.
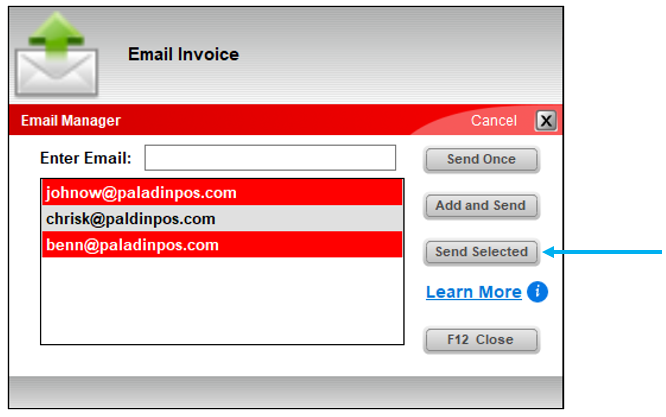
Figure 6: Email Invoice window/Send Selected email chosen using the Ctrl key to select email addresses
Note: Email addresses can be multi-selected as a group by clicking on an email address and then holding the Shift key while selecting the last email address of the desired grouping.
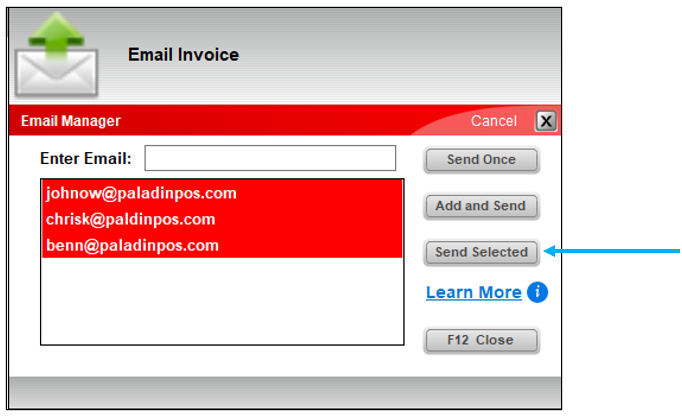
Figure 7: Email Invoice window/Send Selected email chosen using the Shift key to select email addresses
After Send Selected is pressed, at the bottom of the Email Invoice window is a message stating how many emails were sent.

Figure 8: Email Invoice window/Emails sent
There is also the Learn More link, that when pressed, opens the Learn More window, which provides instruction on multi-selection of email.

Figure 9: Learn More window/Selecting multiple email addresses
Emailed invoices show the invoice number in the subject line
When a customer receives an emailed invoice, the subject line will contain the invoice number.
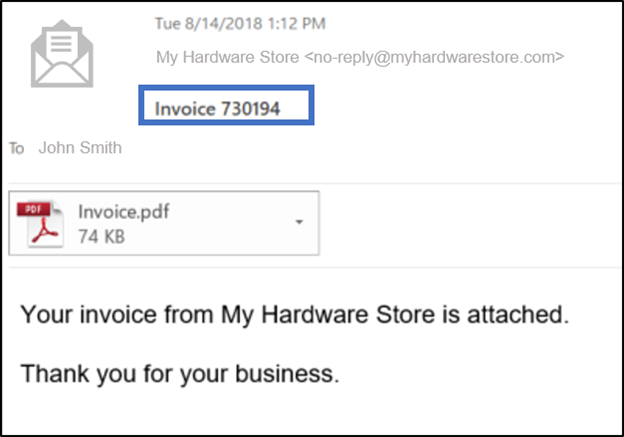
Figure 10: Invoice number in email subject line
How to customize a message on emailed invoices
You can customize the email message that your customers receive when they opt for an email receipt.
Your custom message will replace the default text:
Your invoice from <your store> is attached.
Thank you for your business
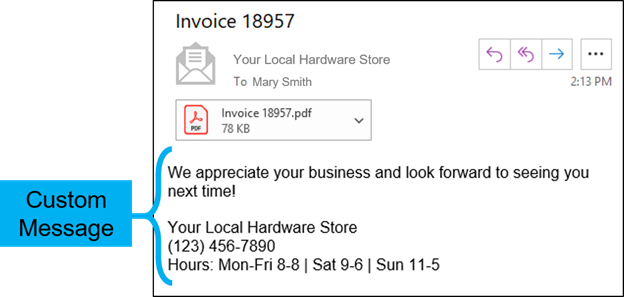
Figure 11: Custom email message for emailed receipt
To set up a custom email message:
- In Paladin, from the main menu, select File > Setup.
- Select the Forms tab.
- In the Invoice Email Message box, enter your custom text.
- Click Save, then click Close.
If you have questions or suggestions about this information, contact support@paladinpos.com.
