
Clients not utilizing rewards programs, such as RepeatRewards, Rich Rewards, etc., can still take advantage of using coupons in Paladin by creating their own store-issued coupons.
Store-issued coupons can:
- Drive customers to your business.
- Introduce your store to new shoppers.
- Entice existing customers to make unplanned purchases.
- Coax past customers to return to your business.
- Introduce new products and product lines to your business.
- Increase store/brand awareness.
- Boost a store’s profit margin.
This article provides instruction and information on the following:
- Coupon versus promotions
- Creating a coupon department
- Creating a coupon dump SKU
- Serializing coupons for counterfeit protection and tracking
- Making creative coupons with scannable barcodes
- Issuing store coupons
- Redeeming store coupons
- Circular ad coupons
- Reporting on coupons
Coupons versus promotions
A coupon is an instant credit that’s applied to all items on an invoice by using a dump SKU that contains a negative price value. These coupons are usually issued in-store and redeemed by scanning a barcode at checkout.
Promotions are activated using a supplier’s reward program, a sales list and/or pricing plan, and may be applied to a single, few, or many inventory items on an invoice. They may be presented as a Buy One Get One (BOGO), percentage discount, or a dollar off amount and may be assigned to a single customer, group, or all transactions.
Creating a coupon department
To create a department for coupons:
- In Paladin, from the main menu, select File > Setup.
- Select the Dept tab.
- In the Departments pane, click New.
- In the Name box, enter Coupons.
- In the Department label number box, assign an unused department ID.
- Optional: Select any of the following non-taxable options:
- Dept non-taxable
- State non-taxable
- County non-taxable
- City non-taxable
- Click Save, then click Close.
Creating a coupon dump SKU
To create a coupon dump SKU:
- In Paladin, on the top ribbon, select the Inventory module.
- On the bottom ribbon of the module, select F2 Add Item.
- In the Add New Item window:
-
- Enter a part number or identifying code in the Part# box. Make it short and memorable, for example C10.
- Enter a description in the Description box. For example, Ten dollar coupon
- Set the cost to 0.00 in the Cost box.
- Enter the coupon credit amount in the Sell Price box. For our example, -10.00.
Note: The Sell Price must be a negative value.
-
- Select Coupon from the Department list.
- Click F12 Add.
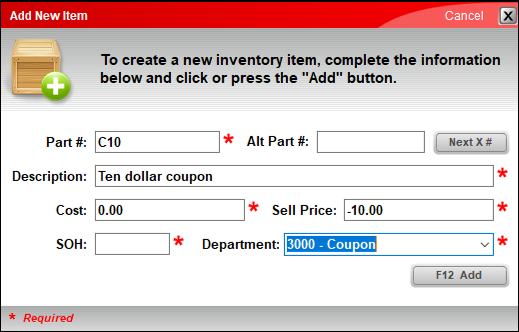
Figure 1: Add New Item window/Coupon
- Select the General tab.
- On the top right of the Item Information pane, check Non-Inventory.
- Optional: You can create a coupon Class for more refined searching and reporting.

Figure 2: Inventory module/Item Information pane/Non-Inventory
- Select the Pricing tab.
- On the top of the Pricing Levels pane, make sure Taxable is not checked.

Figure 3: Inventory module/Pricing tab/Taxable checkbox unchecked
- Press F12 Save.
- The Average cost window opens. Click Yes.
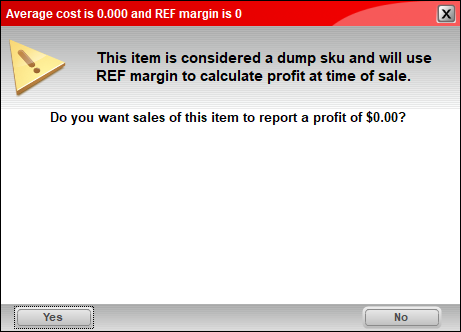
Figure 4: Average cost window
Serializing coupons for counterfeit protection and tracking
To verify that serial number management is activated:
- In Paladin, from the main menu, select File > Setup.
- Select the Company tab.
- In the Inventory pane, check Enable Serial Number Management.
- Click Save, then click Close.
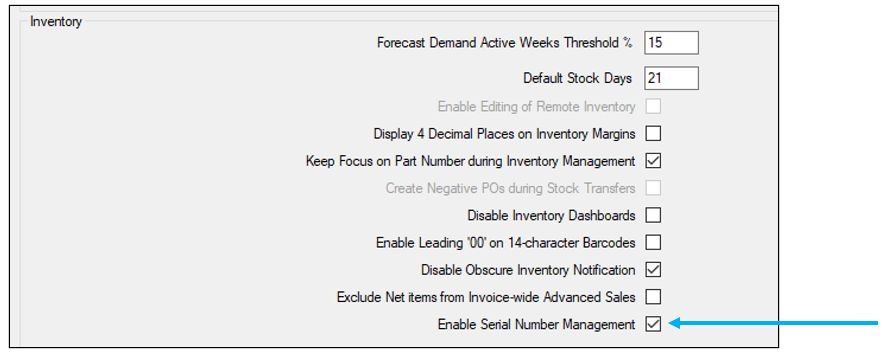
Figure 5: Company tab/Inventory pane/Enable Serial Number Management
- In Paladin, on the top ribbon, select the Inventory module.
- Select the General tab.
- On the top right of the Item Information pane, check Serial#.

Figure 6: Inventory module/Item Information pane/Serial#
- On the bottom ribbon of the General tab, select F6 Serial# & Alt Part#.
- In the Alternate Part # & Serial # window, enable Serial #.
- In the Enter Serial # box, enter a series of alphabetical or numerical values. For example: C12340
- Click Add. Do this for all serial numbers for the coupons you are creating.
- When done, click F12 Finish.
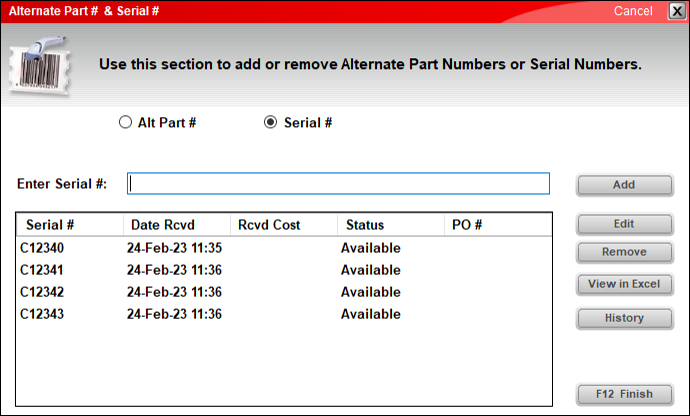
Figure 7: Alternate Part # & Serial # window
- On the bottom ribbon of the General tab, select F4 Count.
- In the Count/Adjust SOH window, in the New SOH box, enter the number of coupon serial numbers you created.
- Click F12 Update SOH.
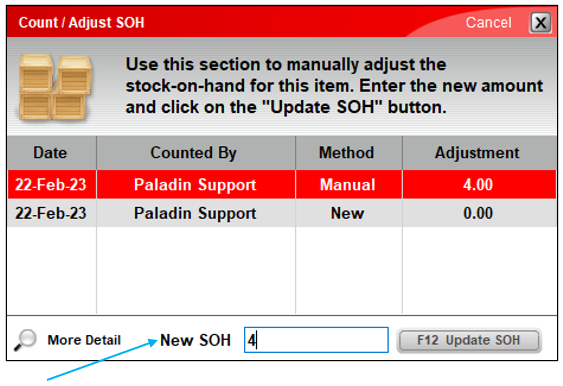
Figure 8: Count/Adjust SOH window/New SOH
The Stock On Hand will now reflect the number of coupons created and serialized.

Figure 9: Stock On Hand
Making creative coupons with scannable barcodes
To make your store’s unique coupon with a scannable barcode:
- Open Microsoft Word.
- Create any size of coupon you want.
Note: Using 3 inches high by 8.5 inches wide makes for easy formatting and cutting on a full sheet of hard stock paper.
Step 1: On the coupon design, add the alpha/numeric Part Number of the coupon.
Step 2: Add an asterisk at the beginning and at end of the Part Number. For example, *C10*
Step 3: Highlight the number (with the asterisks), and from Word’s font list, select either the Code39L or Code 128 font.
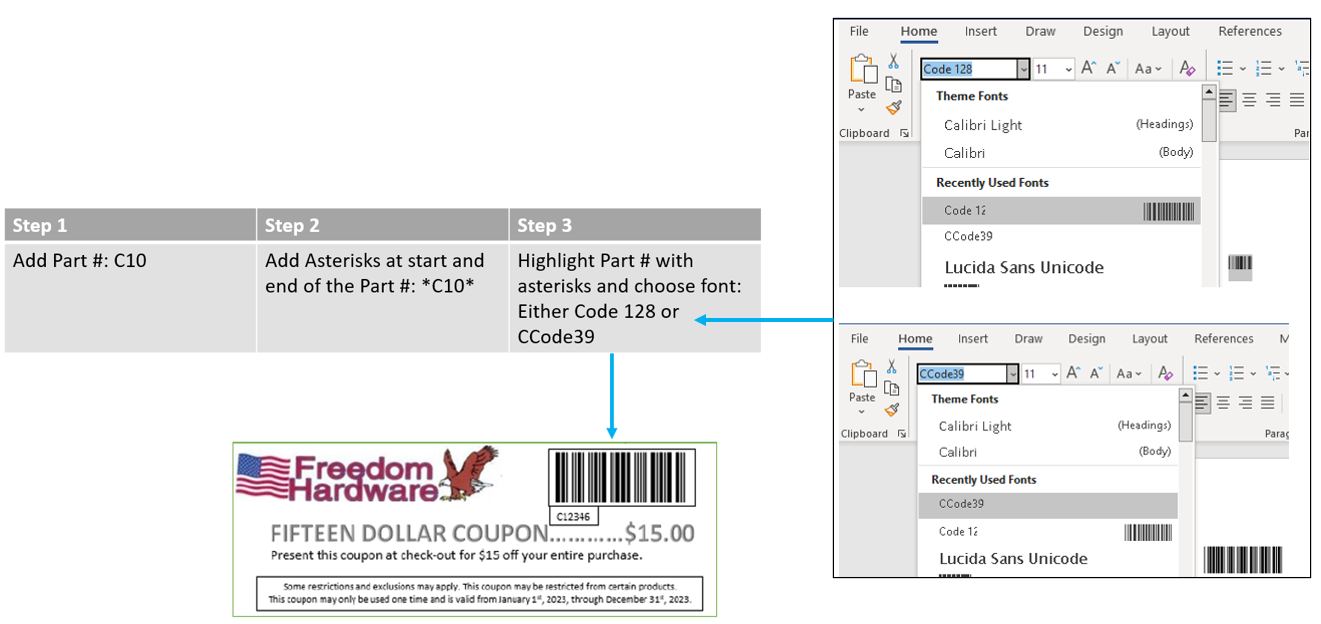
Figure 10: Creating barcode
Note: Below the barcode you will want to display the unique serial number for security and tracking purposes during the checkout process.
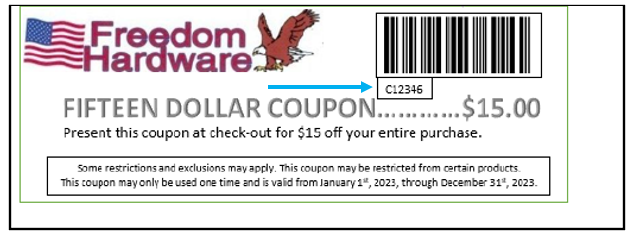
Figure 11: Unique serial number
- Replicate the coupon design three times to fill the page.
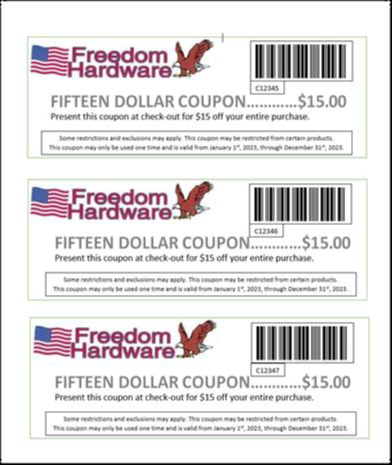
Figure 12: Custom coupon example
- Cut each coupon using a paper cutter for uniformity.
Issuing store coupons
Coupons can be issued and distributed to customers for any number of reasons:
- When purchasing certain products, for example, buy a lawn mower and receive a $50 coupon.
- Customers can buy them and give them as a store gift coupon.
- Give to customers to incentivize them to return to your store.
- Conduct a drawing once a week for a free coupon give away.
Redeeming store coupons
To redeem store coupons:
- At any time during the checkout process, scan the barcode on the coupon, and the appropriate discount will be applied to the entire invoice in the form of a credit.
- The Add Serial Numbers window opens. Select the serial number shown on the coupon.
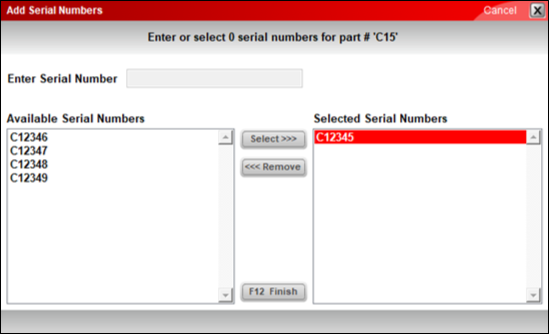
Figure 13: Add Serial Numbers window/Coupon serial number
The coupon is added as a line item displaying the full credit and the serial number of the coupon. The coupon is limited to a one time use unless the serial number is properly added back to inventory.
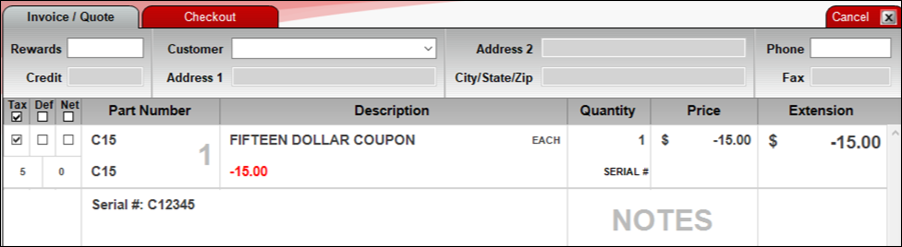
Figure 14: Invoice/Quote module/Coupon applied
For more information, refer to: Serialization: Managing products with serial numbers
Circular ad coupons
Cut out coupon barcodes may be added to your print advertisements.
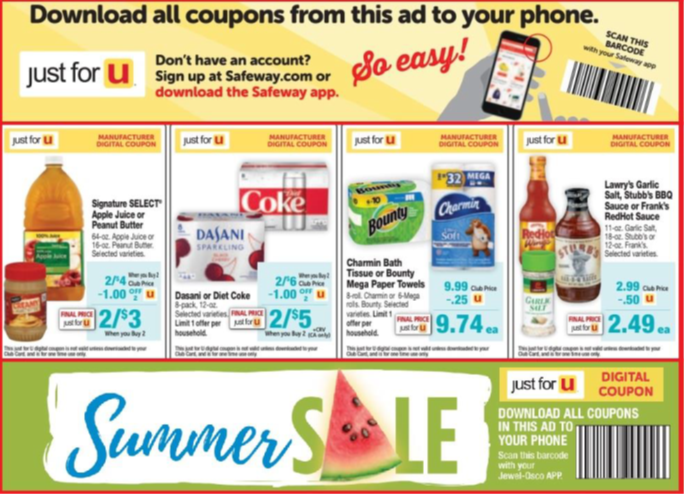
Figure 15: Store flyer with coupons
The coupon on the print ad will contain one barcode per coupon, and in this case, there is no reason or purpose for serializing the barcode.
For identifying each sales campaign, the dump SKU coupon can contain a Campaign code on the Autotext line in the Item Information pane of the General tab in Paladin’s Inventory module.

Figure 16: Inventory module/General tab/Autotext
Reporting on coupons
There are multiple reports you can run for coupons.
In Paladin, on the top ribbon, select the Reports module:
- Reports > Inventory > History
- Items Sold Report: History sold
- Reports > Sales Analysis > What I Need To Know
- Transaction Report: Detail report
- Reports > Inventory > General
- Inventory Count List: Summary
- Serial Number List: Coupon status
In most cases you can search by SKU, Serial #, Department, Date Range, and/or Class.
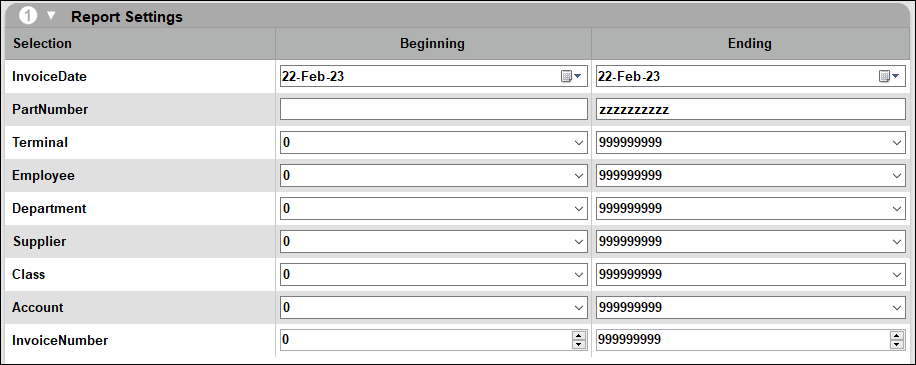
Figure 17: Report Settings
If you have questions or suggestions about this information, contact support@paladinpos.com.
