
Setting Paladin Configuration
For external synchronization, the following must be done in Paladin Configuration by a Paladin TSR:
- In Paladin, from the main menu, select File > Setup.
- Select the ExternalSync tab.
- In the External Sync Configuration pane, select integration type from the Select Type list.
- In the General Settings pane, check Enable Synchronization.
- Click Save, then click Close.
Important: You must backup your database before running this process.
This article provides instruction and information on the following:
Single store external sync of inventory
- In Paladin, from the top menu, select Maintain > Data Viewer.
- In the Data Viewer window, select the Inventory tab.
- Select the Export tab.
- In the Export Options pane, select Active Inventory from the Inventory Type list.
- Select a supplier from the Suppliers list.
- Leave Show Weekly Sales unchecked.
- Leave Include Deleted Items unchecked.
- Select Excel from the File Type list.
- Click View.
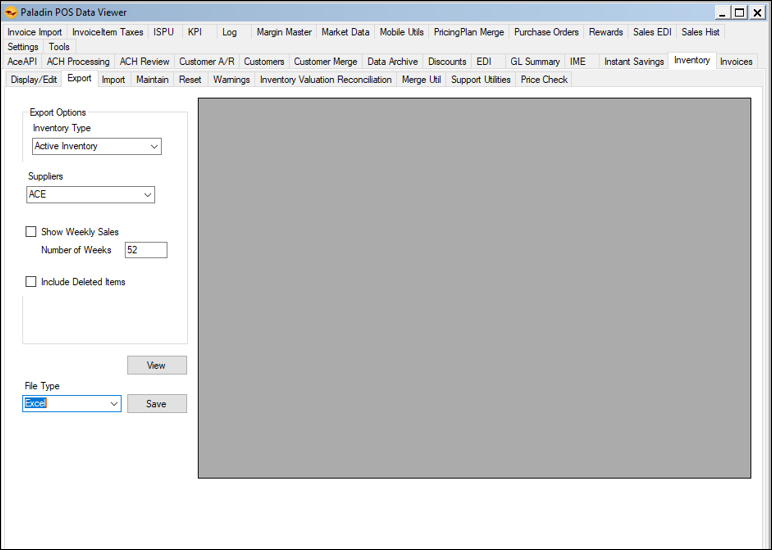
Figure 1: Paladin Data Viewer/Excel File Type
- When the Inventory field populates, click Save.
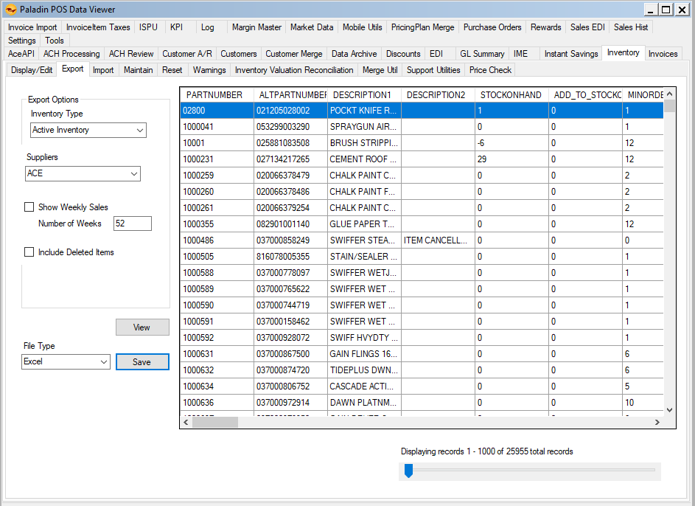
Figure 2: Paladin Data Viewer/Inventory field
- Select a location for the file and provide a file name.
- Click Save.
- Open the Excel file.
- Remove part numbers that will not change.
- Remove all columns except PARTNUMBER and EXT_SYNC.
- In the Excel worksheet, change the 0 to 1 under EXT_SYNC.
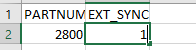
Figure 3: Excel file/EXT_SYNC column
- On the lower right-hand corner of the cell (B2), double-click click the small square. This will change the value of all EXT_SYNC cells to 1.
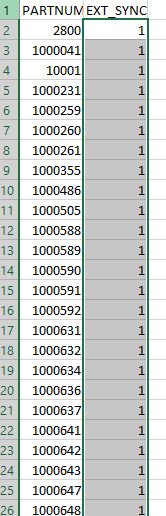
Figure 4: Excel file/EXT_SYNC value set to 1
- Click Save.
- In the Data Viewer window, select the Inventory tab.
- Select the Import tab.
- Ensure Excel is selected from the list box.
- Press Load File.
- In your explorer, highlight the .xlsx file.
- Click Open.
- Under Import Options, from the Inventory Type list, select Active Inventory.
- Make sure Add New Items is not checked.
- Check Update Existing Items.
- Press Import.
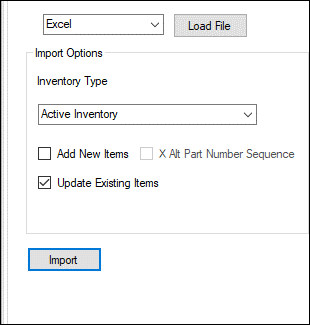
Figure 5: Paladin Data Viewer/Import option
- Under Progress, the top text box gives a message of which Inventory line is being imported. The second box shows a green task bar indicating the progress of the import.
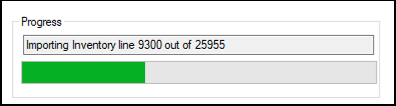
Figure 6: Progress status
- When import is complete, the inventory.log – Notepad file opens on your desktop.
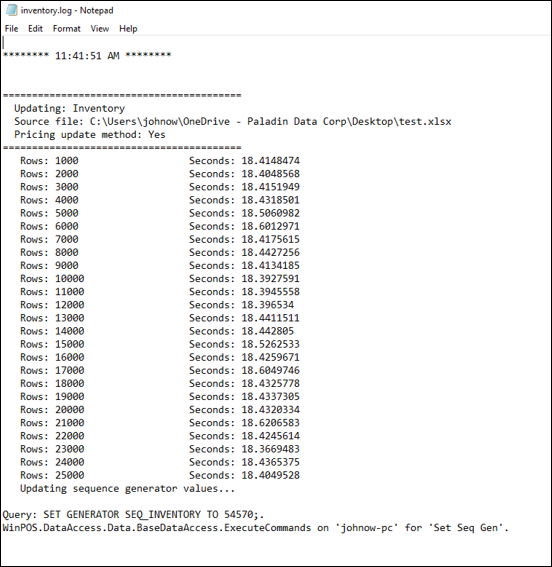
Figure 7: inventory.log Notepad file
- Save the file.
To check if Ext Sync is set for parts:
-
- In Paladin, on the top ribbon, select the Inventory module.
- In the Part # box, enter a part number that was synced.
- Open the General tab.
- On the top of the Item Information pane, Ext Sync will be checked.
![]()
Figure 8: Item Information pane/Ext Sync checked
Multi-store external sync of inventory
- Make sure that external synchronization is set up in Paladin Configuration. Refer to: Setting Paladin configuration
- In Paladin, from the top menu, select Maintain > Data Viewer.
- In the Data Viewer window, select the Inventory tab.
- Select the Export tab.
- In the Export Options pane, from the Inventory Type list, select Inventory.
- Select Excel from the bottom list.
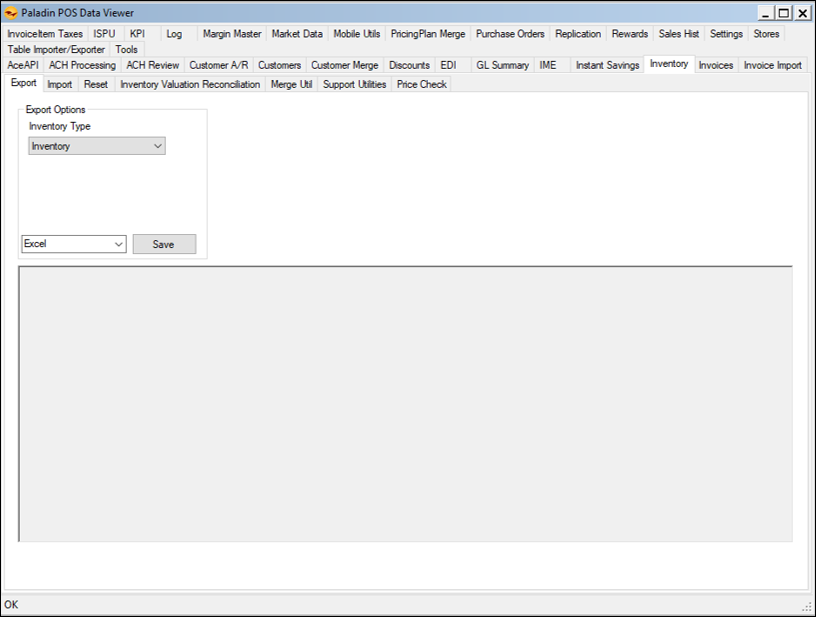
Figure 9: Paladin Data Viewer/Export Options pane/Inventory Type/Inventory
- Click Save.
- Open the Excel file.
- Remove part numbers that will not change.
- Remove all columns except Partnumber, StoreId, and EXT_SYNC.
- In the Excel worksheet, change the 0 to 1 under EXT_SYNC.
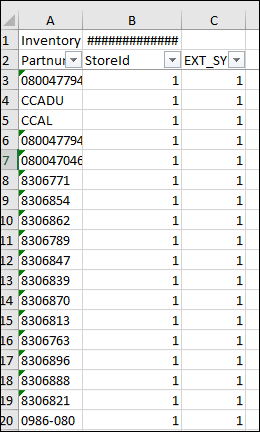
Figure 10: Excel file/EXT_SYNC value set to 1
- Click Save.
- In the Data Viewer window, select the Inventory tab.
- Select the Import tab.
- Select Inventory from the Inventory Type list.
- Select Excel from the File Type list.
- In the Import Mode pane, check Update Existing Records.
- Click Import Table.
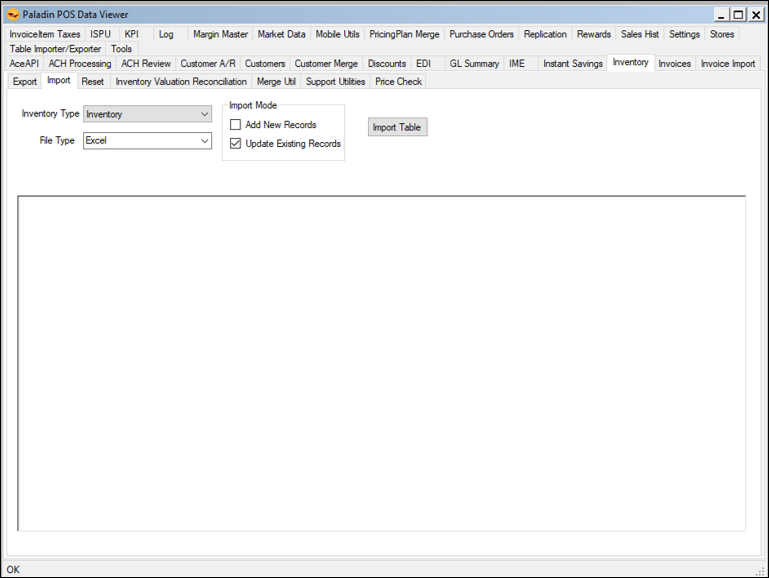
Figure 11: Paladin Data Viewer/Import Options pane/Inventory Type/Excel
- In the Inventory Price Update Mode window, the default is set to no price update. Click OK.
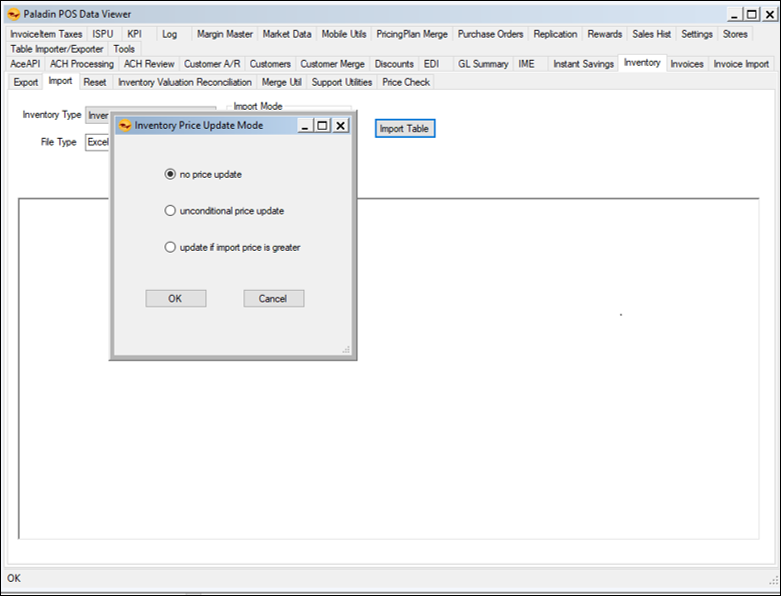
Figure 12: Inventory Price Update Mode window/Default set to no price update
To check if Ext Sync is set for parts:
- In Paladin, on the top ribbon, select the Inventory module.
- In the Part # box, enter a part number that was synced.
- Open the General tab.
- On the top of the Item Information pane, Ext Sync will be checked.
![]()
Figure 13: Item Information pane/Ext Sync checked
If you have questions or suggestions about this information, contact support@paladinpos.com.
