
Paladin integrates with FastBound so you can receive and sell firearms in Paladin while simultaneously updating FastBound. Learn more about the FastBound integration
This article provides instruction and information on the following:
- How to receive firearms in Paladin and automatically acquire them in FastBound
- How to sell a firearm in Paladin and automatically dispose of it in FastBound
- How to add a firearm inventory item in Paladin
- How to handle a transferred firearm that was purchased at another Federal Firearms License dealer
- How to add a firearm supplier
For help with FastBound tasks, contact FastBound.
How to receive firearms in Paladin and automatically acquire them in FastBound
When you receive firearms that are tracked in FastBound, Paladin collects information for each firearm and automatically acquires it in FastBound.
Note: This procedure assumes you have an open PO in Paladin for the received items.
- In Paladin, on the top ribbon, select the PO module.
- On the bottom ribbon of the module, toggle F5 Mode to F5 PO Receive mode.
- In the Receive PO tab, click F6 Find PO, and open the purchase order with the received firearms.
- For each acquisition and disposition (A&D) firearm that is tracked in FastBound:
- Enter the quantity received in the Receive column.
- Right-click the line item and click Add Serial #.
- in the AddRemove Serial Numbers window
- Enter a serial number in the Enter Serial # box for the received item, then click Add.
- When done entering serial numbers, click F12 Finish.
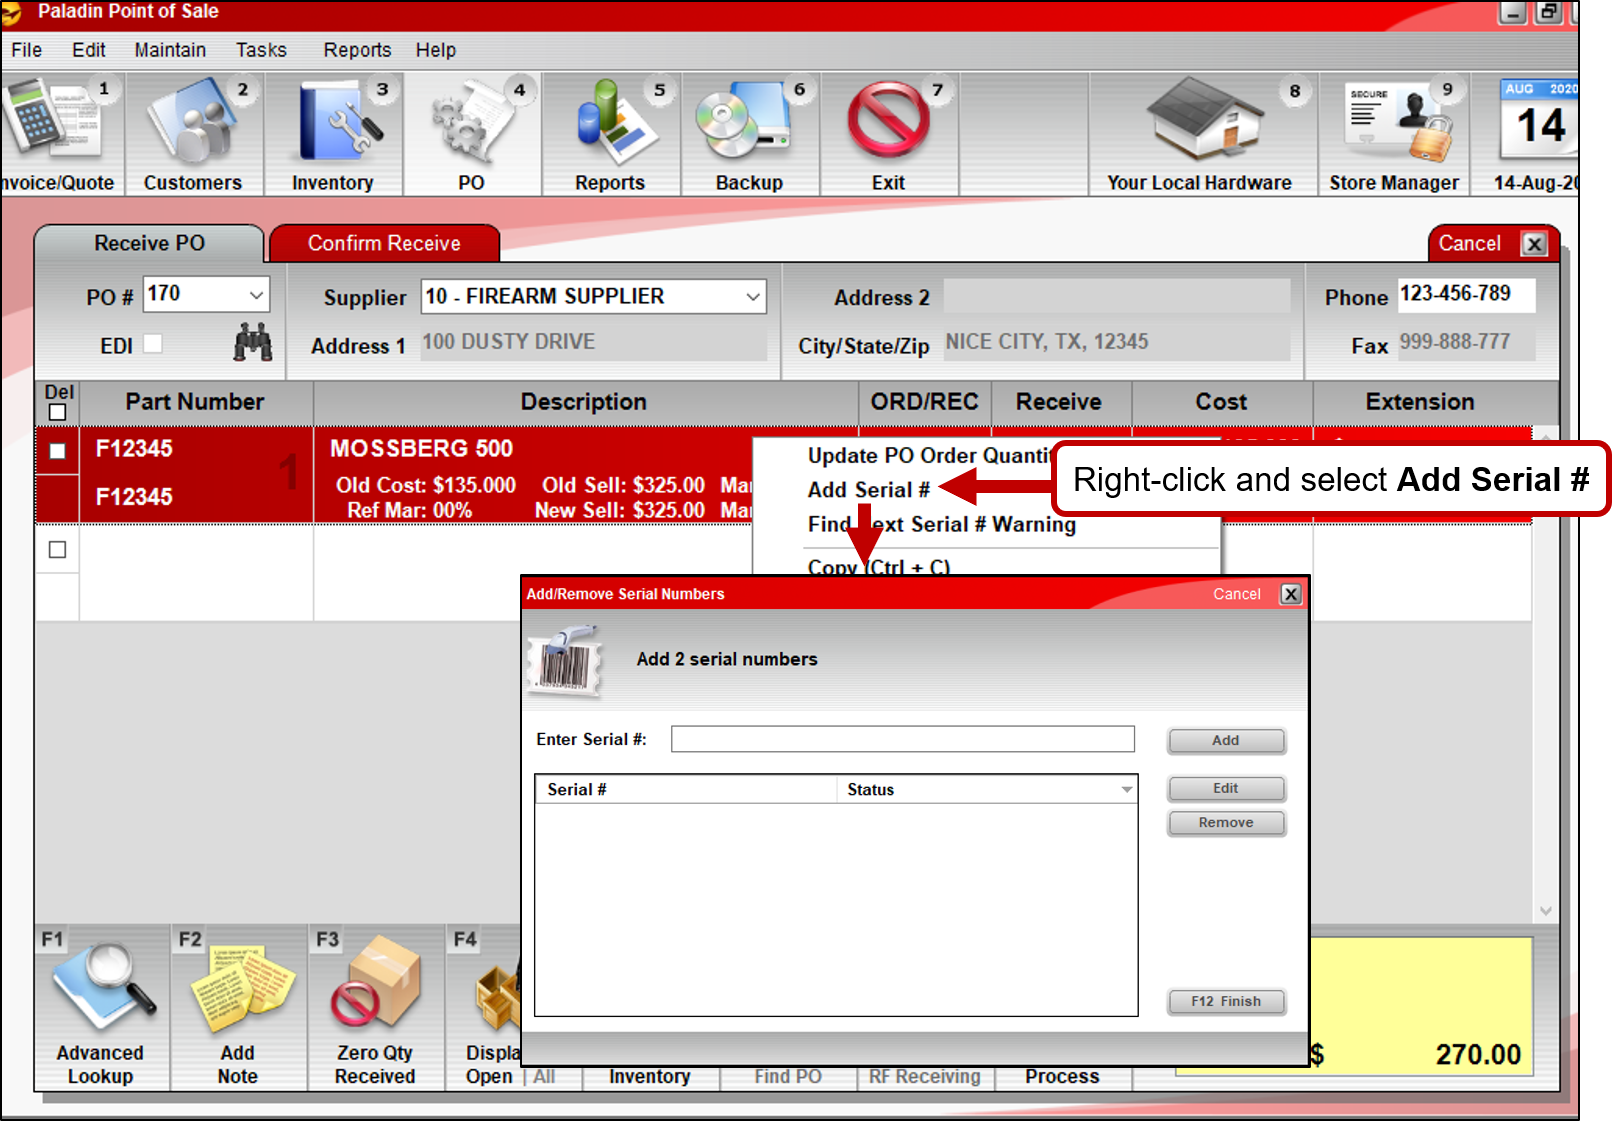
Figure 1: Add/Remove Serial Numbers window
- In the Receive PO tab, click F8 Process twice.
- In the FastBound Acquire window, enter the acquisition details for each received firearm by serial number. Required values have a red asterisk (*).
Note: Many values have lists that are pre-populated with values from FastBound. For consistency, look for the value in the list. If needed, you can enter new values for some firearm details, such as Caliber.
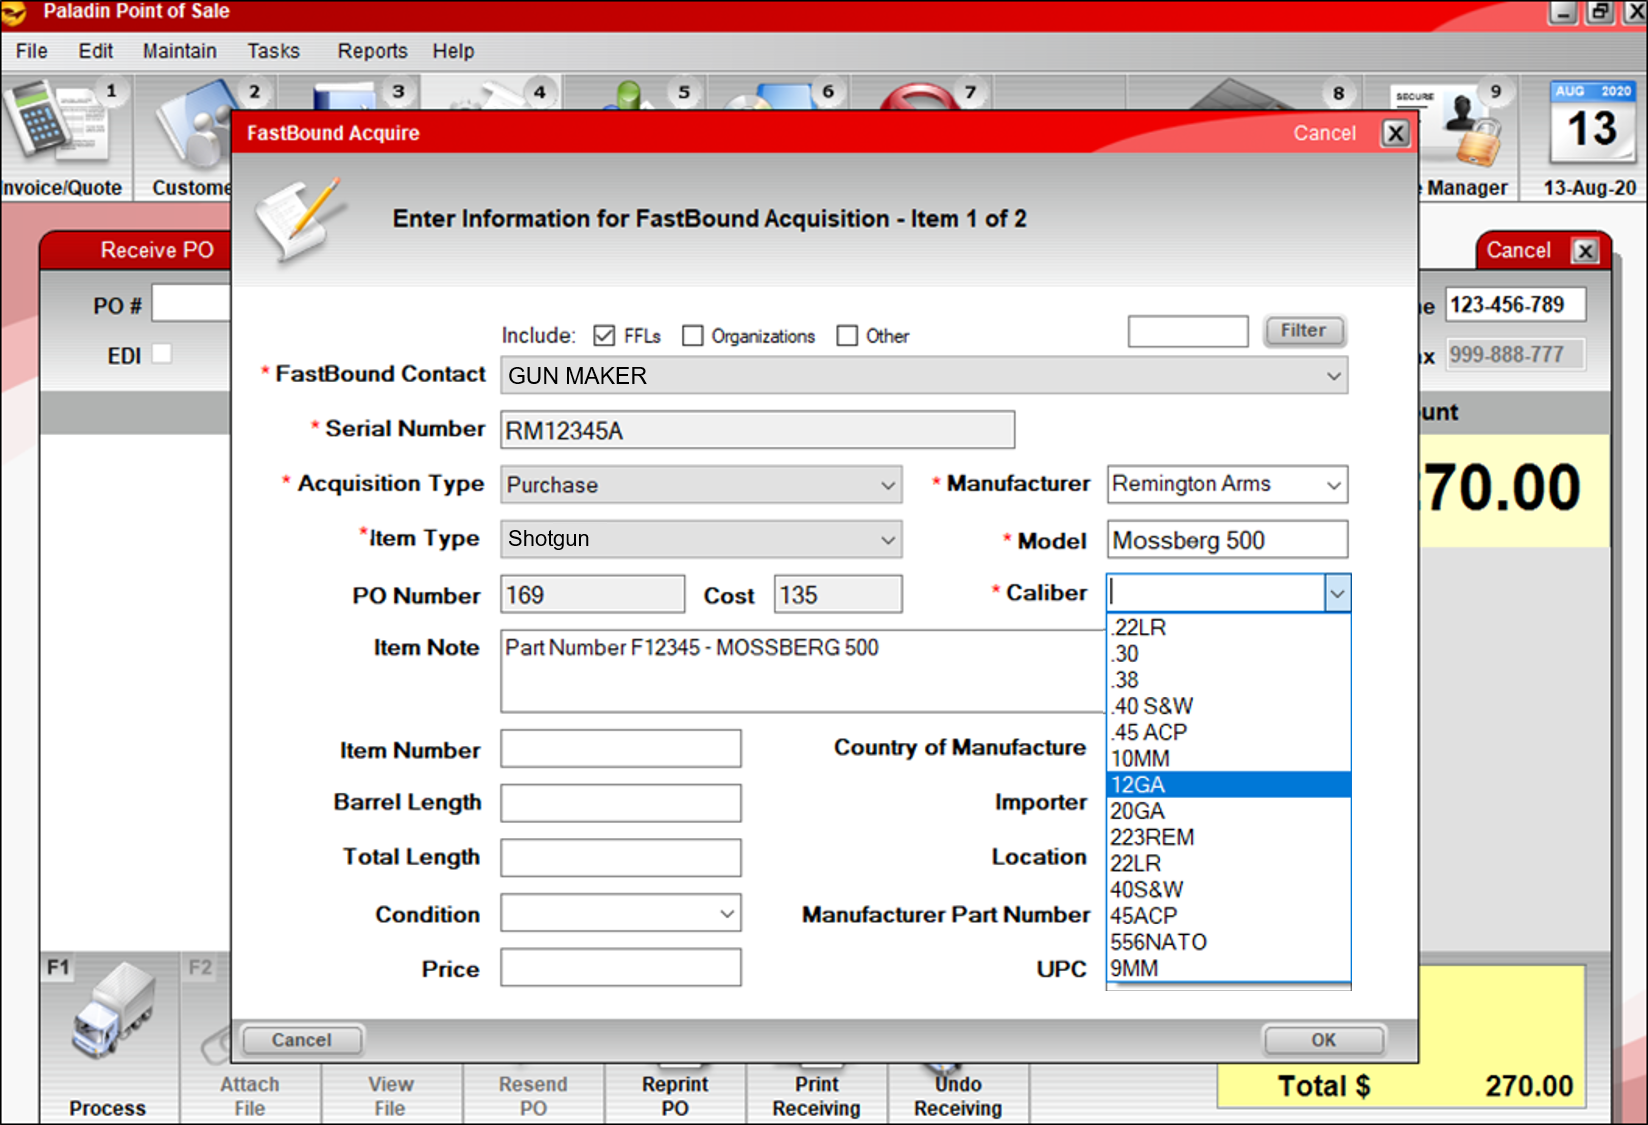
Figure 2: FastBound Acquire window
- Each time you enter the details for a firearm and click OK, that firearm is automatically acquired in FastBound.
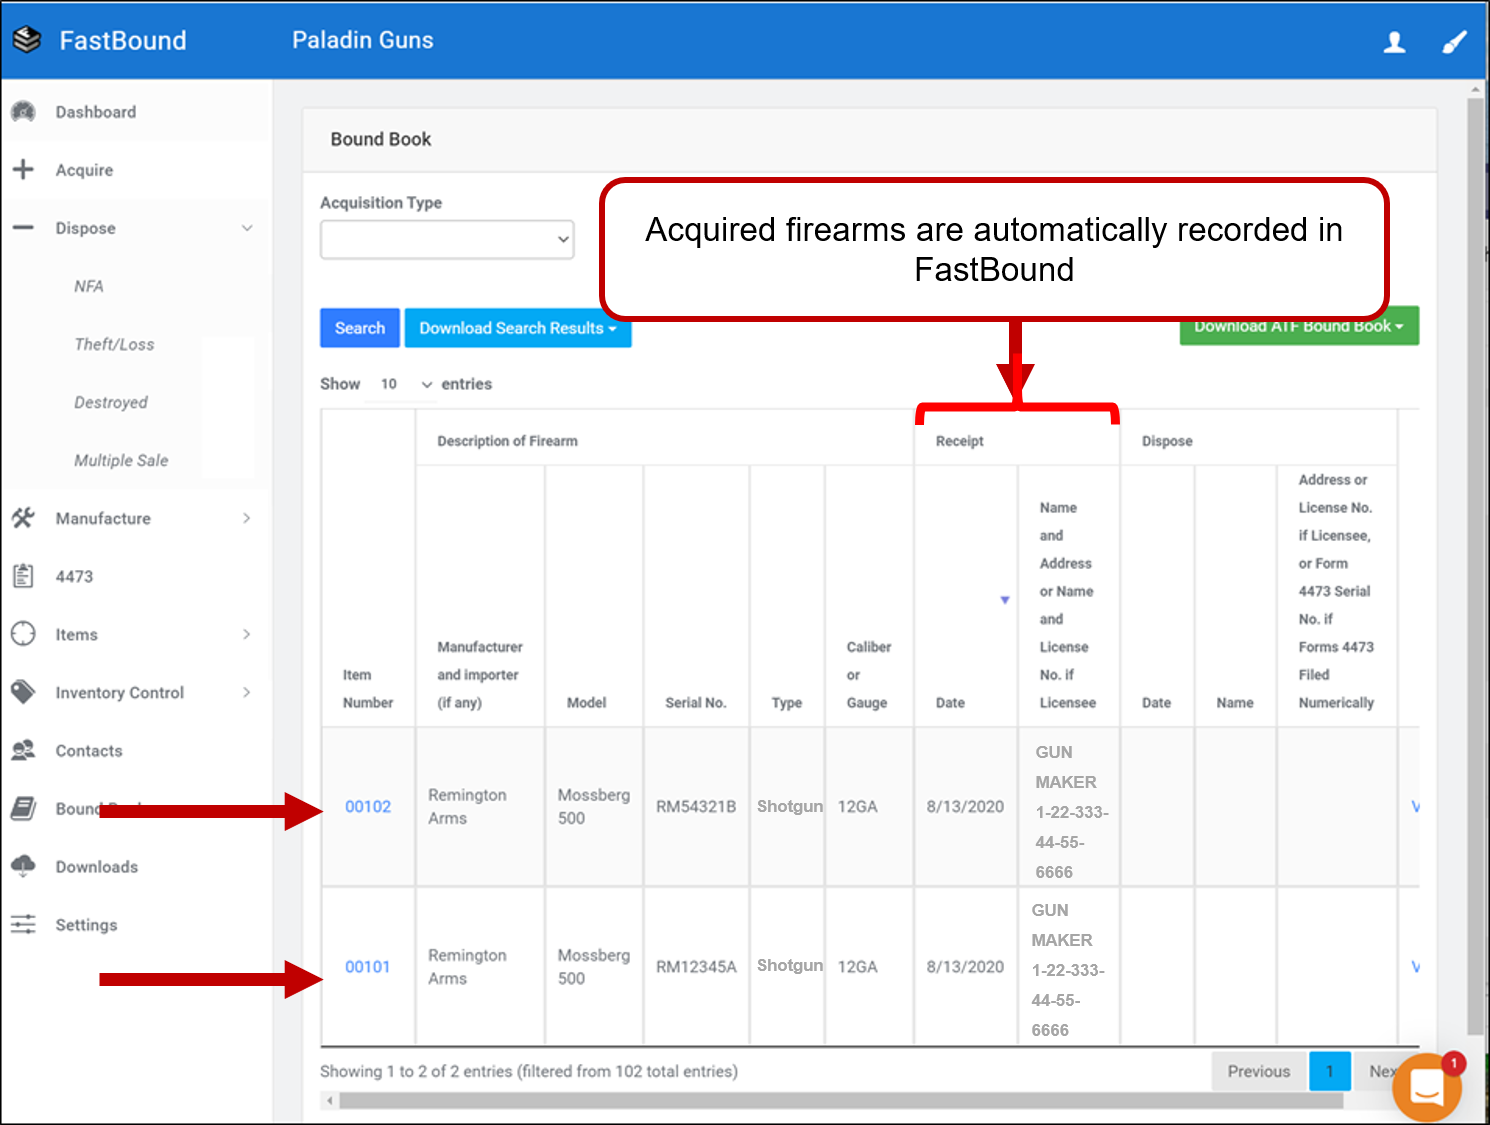
Figure 3: FastBound/Acquired Firearms
How to sell a firearm in Paladin and automatically dispose of it in FastBound
When you sell a firearm, unless there is a waiting period, Paladin collects disposition information for each firearm sold and automatically disposes it in FastBound.
- In Paladin, on the top ribbon, select the Invoice/Quote module.
- In the Part Number box, enter the firearm’s part number.
- Press Enter until you are out of the first line.
- Right-click the line item and click Add Serial #.
- In the Add Serial Numbers window, enter the serial number in the Enter Serial Number box or select the serial number from the Available Serial Numbers field.
- Click F12 Finish.
- Proceed with the sale.
Note: You can add additional items as well as background check fees, etc. to the invoice.
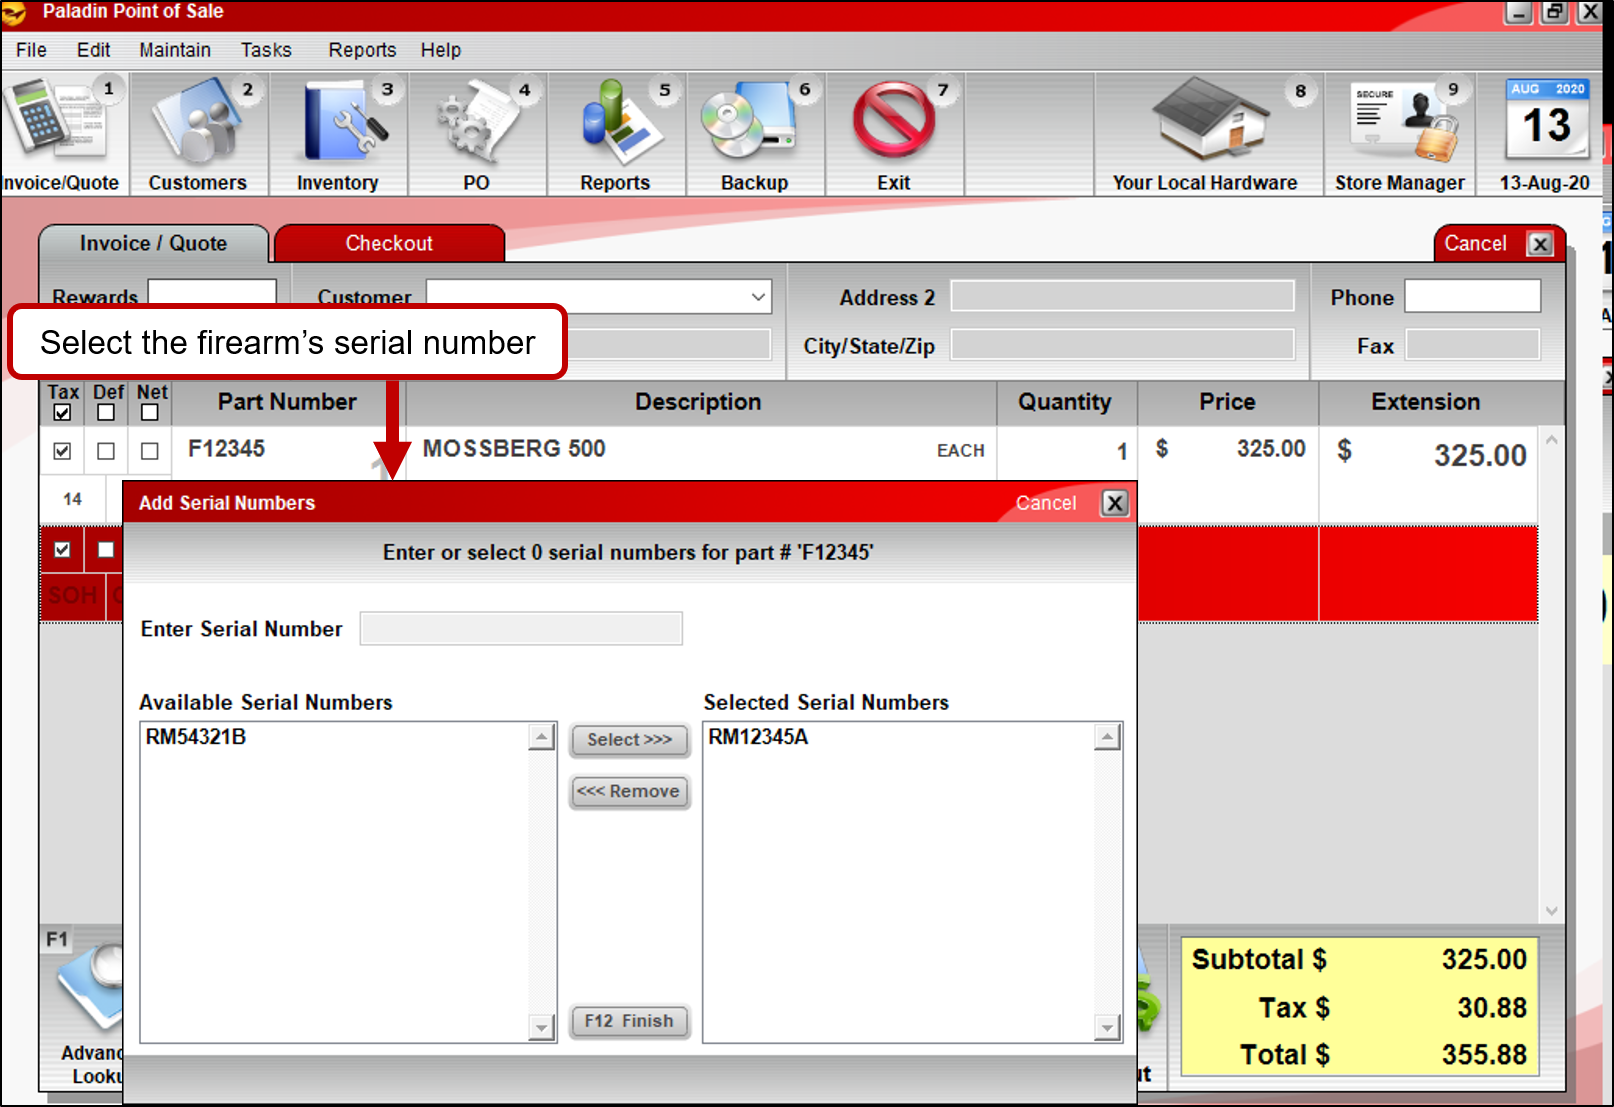
Figure 4: Add Serial Numbers window
- When the payment has been made, you are prompted to enter disposition details for each firearm sold. You can also associate an electronic 4473 and enter a Transferor’s Transaction Serial Number
(TTSN) or Other Transaction Serial Number (OTSN). Note: OTSN is only applicable to the state of California. - If you need to add a new contact, click New Contact.

Figure 5: Disposition details
- After the you enter a firearm’s disposition details, the firearm will be automatically disposed of in Paladin unless there is a waiting period. If you are set up to choose whether to dispose now or wait (integration setting), another window opens asking if you want to dispose immediately or manually dispose later.
Note: If a waiting period is required, or you choose to defer, you must manually dispose of the item in FastBound when the customer picks up the firearm.
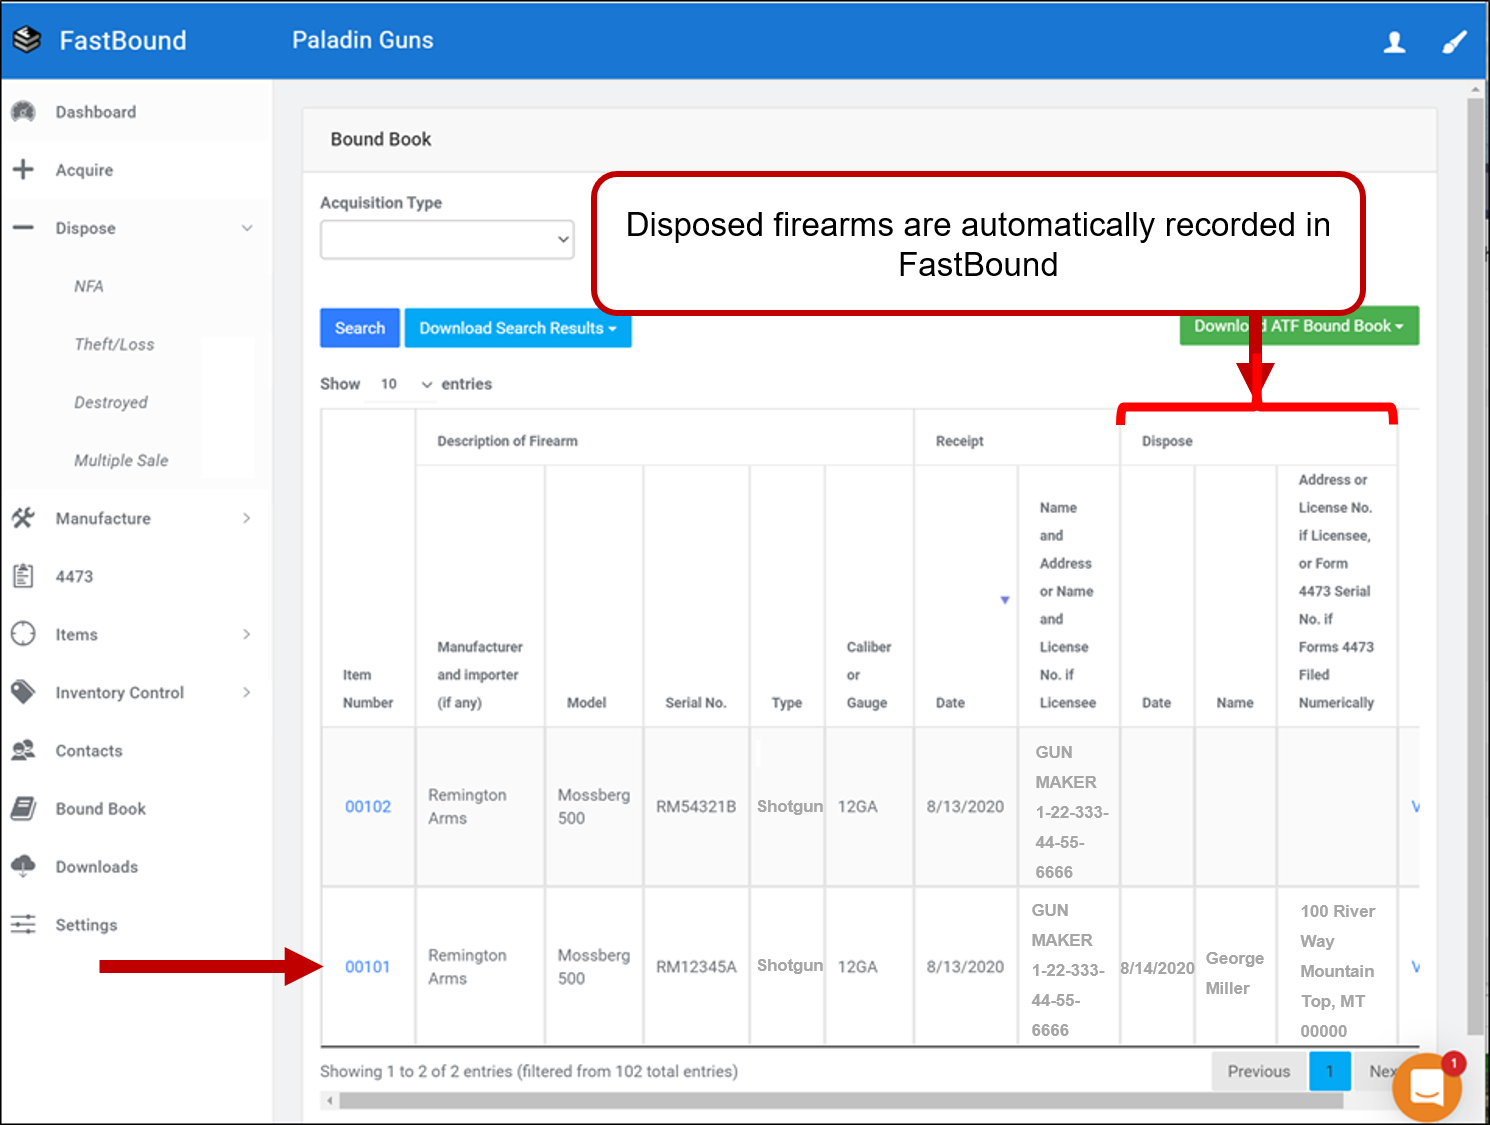
Figure 6: FastBound/Disposed Firearms
How to add a firearm inventory item in Paladin
- In Paladin, from the top ribbon, select the Inventory module.
- On the bottom ribbon of the module, select F2 Add Item.
- Enter the following values, then click F12 Add.
|
For this value |
Enter this |
|
Part # |
Part number |
|
Alt Part # (optional) |
UPC or other alternate part number |
|
Description |
Short description |
|
Cost |
Supplier cost |
|
Sell Price |
Sale price |
|
SOH |
0 (zero) Note: If you have non-zero inventory, use the PO module to receive the items. |
|
Department |
Select the firearms department |

Figure 7: Add New Item window
- Click the General tab.
- In the Class pane, select the designated A&D firearms class. You can select this class in any of the three Class columns.
Important: This class must match the designated Firearms Class in your FastBound settings. To view the Firearms class:
-
- In Paladin, from the main menu, select File > Setup.
- Select the Firearms tab. The Firearms Class is the first setting.
- In the Item Information pane (gray title bar), check Serial# to turn on serialization for this item.
- Click F12 Save to update the item.
How to handle a transferred firearm that was purchased at another Federal Firearms License dealer
When a firearm that was purchases through another Federal Firearms License (FFL) dealer or online is transferred to your store for pick up, it is not a sale for your store. Therefore, we recommend that you acquire and dispose of the transferred firearms in FastBound directly. Transfer fees or other charges are still processed in Paladin.
- Sign in to the FastBound website.
- If one does not exist, create a contact for the entity that sold and transferred the firearm.
- Acquire the firearm in the FastBound website.
- If required, have the person receiving the firearm fill out a 4473.
- Dispose of the firearm in the FastBound website.
- If you need to collect a fee, open Paladin and add the fee to an invoice and process the payment.
How to add a firearm supplier
Important: A Paladin supplier is required to create purchase orders and receive firearms in Paladin. However, the supplier you create in Paladin is not connected to a FastBound contact. To acquire firearms through Paladin, the supplier must appear as a contact in FastBound before you start the receiving process in Paladin.
- In Paladin, from the main menu, select File > Setup.
- Select the Suppliers tab.
- In the Suppliers pane, click New.
- Enter the supplier Name.
- Enter an unused Supplier Number.
- Optional: Enter additional supplier details.
- Click Save, then click Close.
If you have questions or suggestions about this information, contact support@paladinpos.com.
