
In the event a store’s EDI does not get an Ace Buy More and Save (BMAS) sale, Ace support advises clients to create the sale manually. With this, Paladin’s Ace BMAS Sale wizard enables clients to create the sales manually; therefore, avoiding user errors with manually created sales.
Paladin’s Ace BMAS Sale wizard walks users through creating a BMAS sale manually based off information Ace provides to the store in the BMAS PDFs. There are four BMAS sale types, each with specific fields and instructions:
- Spend Amount Get Part Number Free
- Spend Amount Get Dollar Off
- Spend Amount Get Percent Off
- Spend Amount Get Gift Card
To use Paladin’s Ace BMAS wizard:
- In Paladin, from the top menu, select Maintain > Utilities > Ace Utilities > Create BMAS Sale.
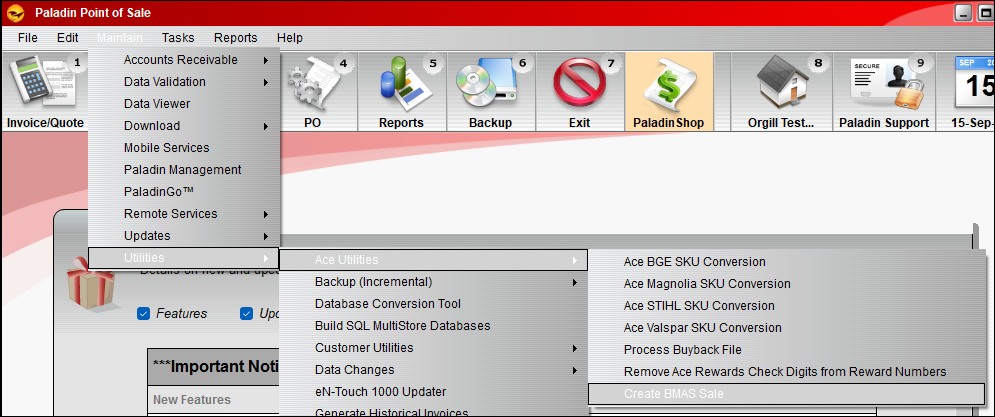
Figure 1: Path to Ace BMAS Sale wizard
The Create Ace BMAS Sale wizard opens.
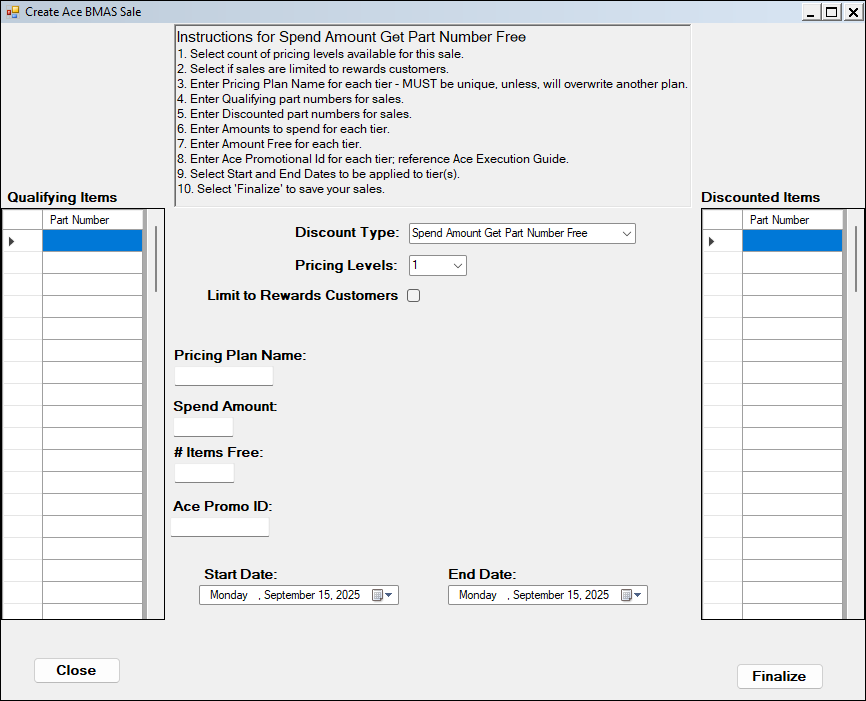
Figure 2: Ace BMAS Sale wizard
When a discount type is selected from the Discount Type list, instructions for applying each type is given at the top of the wizard.

Figure 3: Discount Type and instructions
All values must be entered into the wizard before the BMAS Sale can be finalized. Fields for the missing values are highlighted in light red, and red text appears at the bottom of the wizard explaining what is needed.
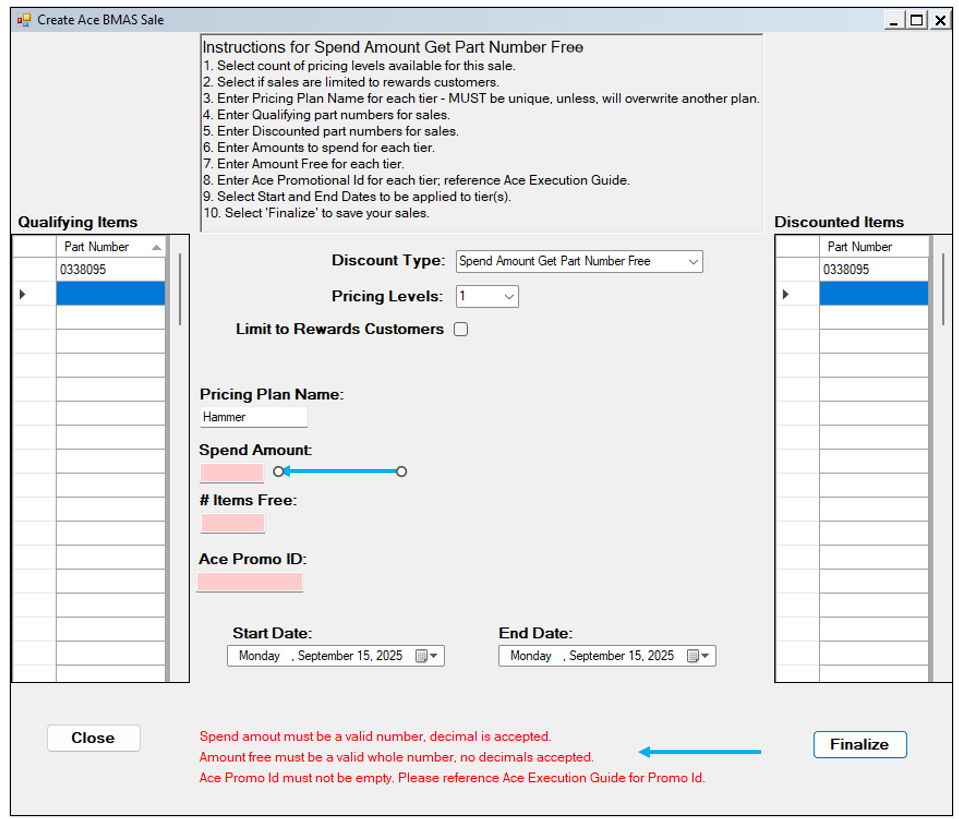
Figure 4: Required fields
- When all fields have been filled in, select Finalize.
The Create BMAS Sale window opens stating that the sale was created successfully and to close and re-open the form to create another sale.

Figure 5: Create BMAS Sale window
This message is also given at the bottom of the wizard.

Figure 6: Sales created successfully message
- Press Close.
- Close and restart Paladin.
If you have questions or suggestions about this information, contact support@paladinpos.com.
