
Paladin provides four tag types:
- Bin tags
- Shelve tags
- Barbell tags
- Item tags
Although similar, each has its own characteristic. This article is strictly for item tags. To view item tags provided by Paladin, refer to the LTSR catalog.
To be distinct, Item tags measure 1 inch-by-1 inch and have an adhesive back.
This article provides instruction and information on the following:
- How to set PO item tags for stock on hand
- How to set up item tags on a full sheet from a purchase order
- How to print a full sheet of item tags from a purchase order
- How to set up item tags on a dedicated label printer
- How to print individual item tags from a dedicated label printer
- RF printer: Item tag style
- How to set up item tags on a mobile printer
- How to print item tags from a mobile printer
How to set PO item tags for stock on hand
When receiving a purchase order, you can not only receive the item tags for your order, but item tags for all the stock already on hand for items that have had a retail price change (as indicated by their tag “print later” checkbox in inventory). Remember that PO Receive has the ability to establish new retail prices based on a stated reference margin and rounding scheme. Also, some EDI data streams from suppliers contain new retail prices. In all cases, anytime a retail price is changed, the Print Later flag is set.
Printing labels fall into two groups. The first group matches your purchase order (PO), and the second group applies to your stock on hand (SOH). The two groups of labels will generate in a single output but will be separated with a label displaying the message of “SOH”. This indicates all labels following the SOH label are for your existing stock on hand.
It is common for the second group to not have labels for every item on a PO. A zero SOH condition, or no price change having occurred, or the Item Tag Required box not being checked, will prevent any PO line from not generating SOH Item tags.
Item tags will impact what is produced. Both Print Item Tags and Generate Item Tag File are functional as soon as the PO is created. If Item Tags are requested before a PO is received, you will receive Item Tags to match the exact quantity of your order and nothing for current SOH. If you request Item Tags after a PO is received, you will be presented the quantity of Item Tags to match your received quantity plus any Item Tags necessary for SOH.
To set PO item tags to include stock on hand:
- In Paladin, from the main menu, click File > Setup.
- Select the Company tab.
- In the Purchase Orders pane, check Force PO Item Tags to Include SOH.
- Click Save, then click Close.
How to set up item tags on a full sheet from a purchase order
- Verify that Microsoft Access is installed on the computer.
- In Paladin, from the top menu, select Maintain > Download, then click MS Access Templates (Signs, Labels). A Download Successful message opens.
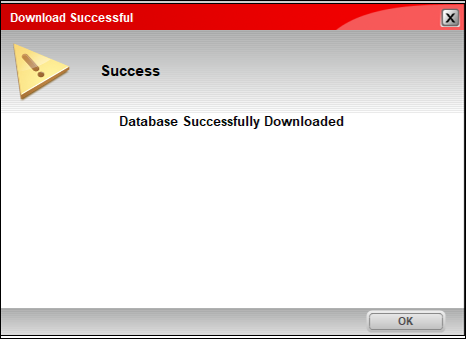
Figure 1: Download Successful message window
- In Paladin, on the top ribbon, select the Inventory module.
- Open the General tab.
- Enter a part number in the Part # box.
- Press Enter.
- In the Item Information pane, check Item Tag Required.
- Click Print Item Tag.
- In the Print Item Tag window, select a tag style from the Tag Style list.
- Select the number of copies to print from the # Copies list.
- Click Print.
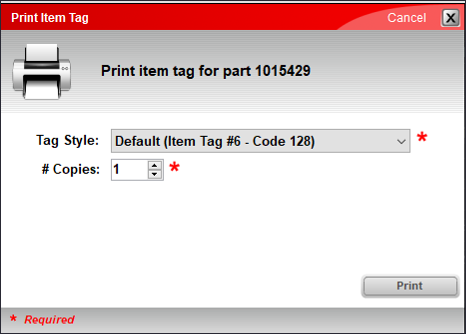
Figure 2: Print Item Tag window
How to print a full sheet of item tags from a purchase order
Note: To print an item tag, an item must be selected in the Inventory module.
- In Paladin, on the top ribbon, select the Inventory module.
- Enter a part number in the Part # box.
- Press Enter.
- Open the General tab.
- In the Item Information pane, check Item Tag Required.
- On the top ribbon of Paladin, select the PO module.
- On the bottom ribbon of the module, toggle F5 Mode PO to F5 Mode Receive.
- On the bottom ribbon of the Receive PO tab, click F6 Find PO.
- In the Find PO window, in the PO Details pane, enable All POs.
- In the Matching Purchase Orders pane, under PO #, select the purchase order for item tags.
- In the Matching Purchase Orders pane, click the purchase order that you want.
- On the bottom of the Find PO window, click Create Item Tag File. When the confirmation message appears and indicates that the export was successful, click OK.
- In the Find PO window, click Cancel.
- From the top menu of Paladin, select Reports > MS Access Templates.
- In the Access Report window, click ITEM TAGS.
- Under ITEM TAGS, click the tag that you confirmed as your default preference.
- On the top ribbon of the Access Report window, click the Print.
How to set up item tags on a dedicated label printer
- Open Paladin’s LTSR catalog: LTSR Catalog
- Determine which item tags you want.
- In Paladin, from the main menu, select File > Setup.
- Select the Company tab.
- In the Tag Styles pane, in the Default Item Tag Style list, select the Item Tag Format # that you want.
- Click Save.
- Select the Network tab.
- In the Network pane, click the ellipsis […] at the end of the Item Tag Printer box.
- From the Print window, select a printer and press OK.
- Click Save, then click Close.
How to print individual item tags from a dedicated label printer
- In Paladin, on the top ribbon, select the Inventory module.
- In the Inventory tab, in the Part # box, enter the part number, then press Enter.
Note: If you do not know the part number, you can search for it in Advanced Lookup.
- Open the General tab, in the Item Information pane, check Item Tag Required.
- Click Print Item Tag.
- In the Print Item Tag window, select a tag style from the Tag Style list.
- Select the number of copies to print from the # Copies list.
- Click Print.
Figure 3: Print Item Tag window
RF printer: Item tag style
During login to the RF, there is the option of Item Tags. This option is displayed anytime Setup has defined a default RF Item Tag, and the print output device was selected as either the Attached Printer or the Desktop Label Printer.
When Item Tags is selected as the printing method, a prompt is displayed after the Sell Price prompt. The prompt labeled Print is asking for the number of Item Tags to print. Pressing ENTER without a numeric entry will cause one Item Tag to print. You must input 0 if you wish no tags generated for the scan item.
To set up the RF printer:
- In Paladin, from the main menu, select File > Setup.
- Select the Company tab.
- In the RF Terminals pane, select a format from the RF Printer Item Tag Style* drop down. There are six Item Tag formats for use with an RF printer:
-
- Item Tag #6
- Item Tag #7
- Item Tag #9 – Code 128
- Item Tag #10 – Code 28 /w Price
- Item Tag #11 – Code 39
- Item Tag #12 -Code 39 /w Price
- Click Save, then click Close.
How to set up item tags on a mobile printer
- Open Paladin’s LTSR catalog: LTSR Catalog
- Determine which tags that you want.
- In Paladin, from the main menu, select File > Setup.
- Select the Network tab.
- In the Network pane, in the RF Attached Printer lists, select a printer.
- Click Save.
- Select the Company tab.
- In the RF Terminals pane, in the RF Printer Item Tag Style list, select the Item Tag Format #.
- Click Save, then click Close.
How to print item tags from a mobile printer
- Make sure that the portable printer is connected to the RF unit.
- To sign on, press 1.
- Select Overwrite SOH or Append to SOH.
- When the Bin Tag Output Devices Attached Printer prompt appears, press Enter.
- Select 3 for item tags.
- To start scanning, follow the prompts.
- Enter values for SOH and Sale price.
- When the PRINT prompt appears, enter the amount of tags you want to print.
If you have questions or suggestions about this information, contact support@paladinpos.com.
