Do you have customers with purchases who want to pay over time? What if you could schedule automatic payments and not worry about managing the customer’s balance? By offering a fixed number of payments on large purchases, you can make your customers happy and increase your sales opportunities. Paladin’s Wells Fargo Automated Check Handling (ACH) scheduler will do just that.
It’s quick and easy to create a Wells Fargo ACH payment plan for a customer in Paladin. Once the plan is in place, the monthly plan payments will be automatically deposited in your checking account. It’s a win-win situation for everyone. You don’t need to worry about getting paid, and both you and your customer are clear about the payment strategy.
This article provides instruction and information on the following:
- Set up the Wells Fargo ACH feature
- Verify customer is set up for ACH payments
- Set up payment plan for the customer
- View payment plan invoices
Set up the Wells Fargo ACH feature
To use this feature, you must have an account with Wells Fargo. To turn on this feature, contact Paladin Support (1-800-725-2346, option 2 or support@paladinpos.com).
Verify customer is set up for ACH payments
To create a payment plan for a customer, the Paladin customer account must have ACH information on file. To verify this, in Paladin’s Customers module, open the customer account, then click the Electronic tab. In the ACH Check pane, if the customer’s bank information appears, they are set up for ACH payments.
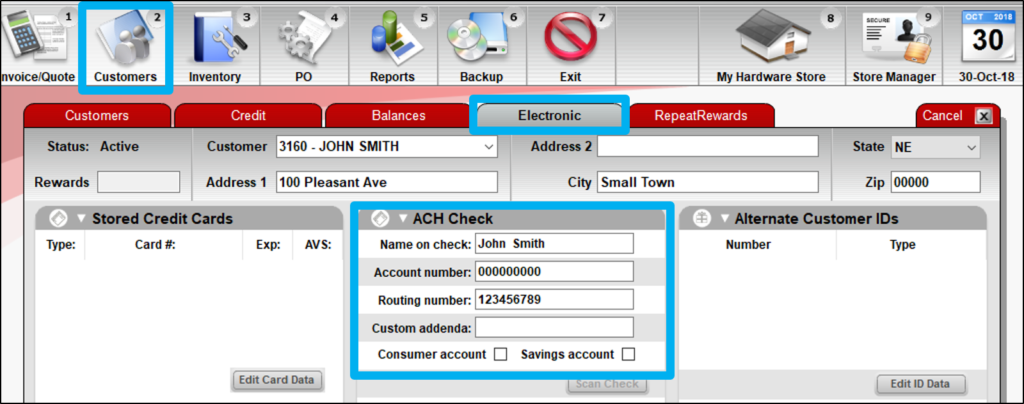
Figure 1: Customer module/Electronic tab/ACH Check pane
Set up payment plan for the customer
- In Paladin, on the top ribbon, select the Customers module.
- Enter or select a customer account from the Customer list.
- Press Enter.
- On the bottom ribbon of the module, select F5 Account Payment.
- On the top of the Account Payment window, enable Schedule ACH payments.
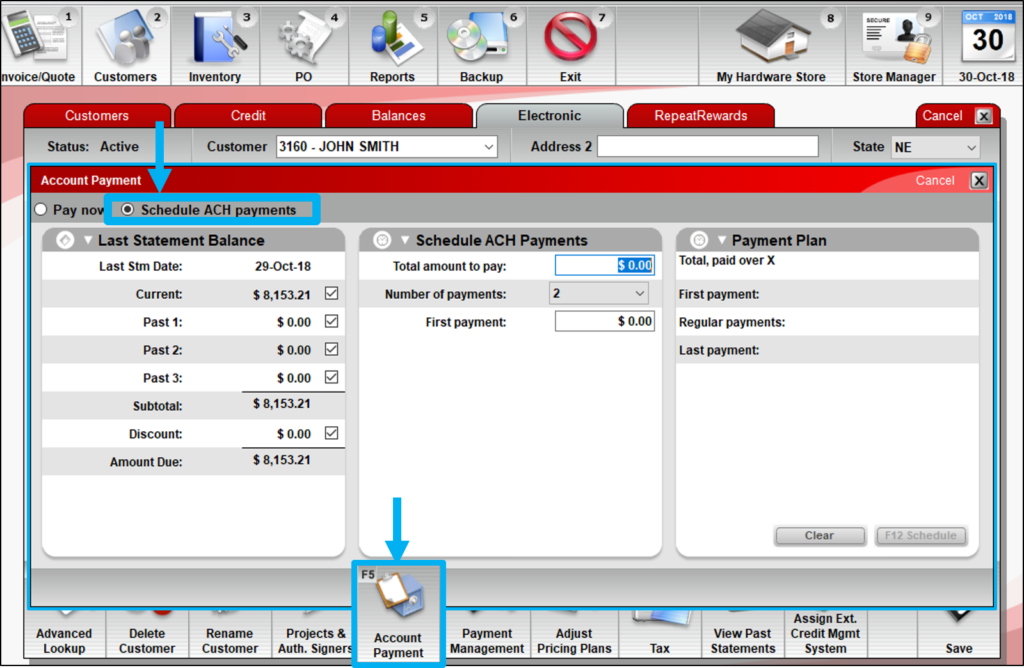
Figure 2: Customer module/Electronic tab/Account Payment window/Schedule ACH payments
- In the Schedule ACH Payments pane, enter the payment plan details.
-
- In the Total amount to pay box, enter the total amount to be paid by the payment plan.
- In the Number of payments list, select the number of monthly payments for the payment plan. You can select from 2 to 24 months.
- In the First payment box, enter the initial payment amount. This payment will be processed on the same day that you put the payment schedule in place.
When you enter the payment plan details, calculated payment amounts appear in the Payment Plan pane. The calculated values adjusts as you change the plan details.
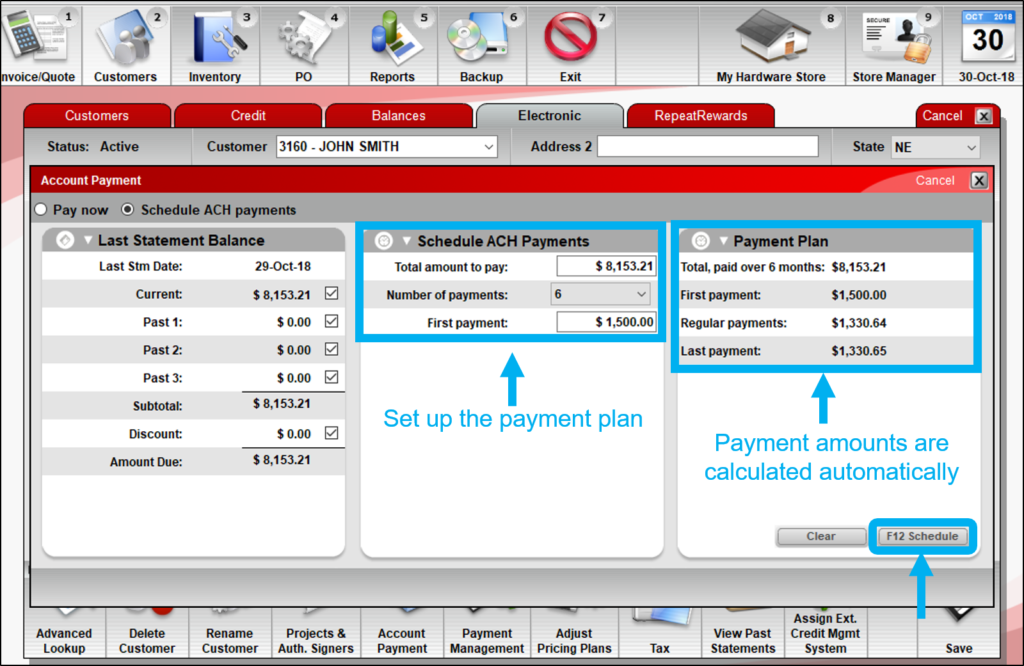
Figure 3: Payment Plan pane
- When payment plan is complete, click F12 Schedule.
- Before the plan is initiated, an informational message appears. Click OK to initiate the payment plan and schedule payments.
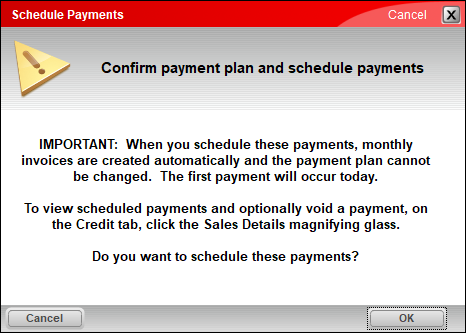
Figure 4: Schedule payments window/Confirm payment plan and schedule payments message
Note: After you click OK, invoices for all scheduled payments are created. On the date of each invoice, the corresponding payment is automatically transferred to your Wells Fargo bank account. Payments are intended to occur on the same day each month. If one of these dates falls on a weekend, Paladin automatically adjusts the date to a weekday.
View payment plan invoices
To view payment plan invoices:
- In Paladin, on the top ribbon, select the Customers module.
- Enter or select the customer account from the Customer list.
- Press Enter.
- On the Credit tab, click the Customer Friendly magnifying glass.
- In the Recent Sales History viewer, ACH payments appear in the list with the following column values:
-
- PO #: Payment
- Pmt Type: ROAACH
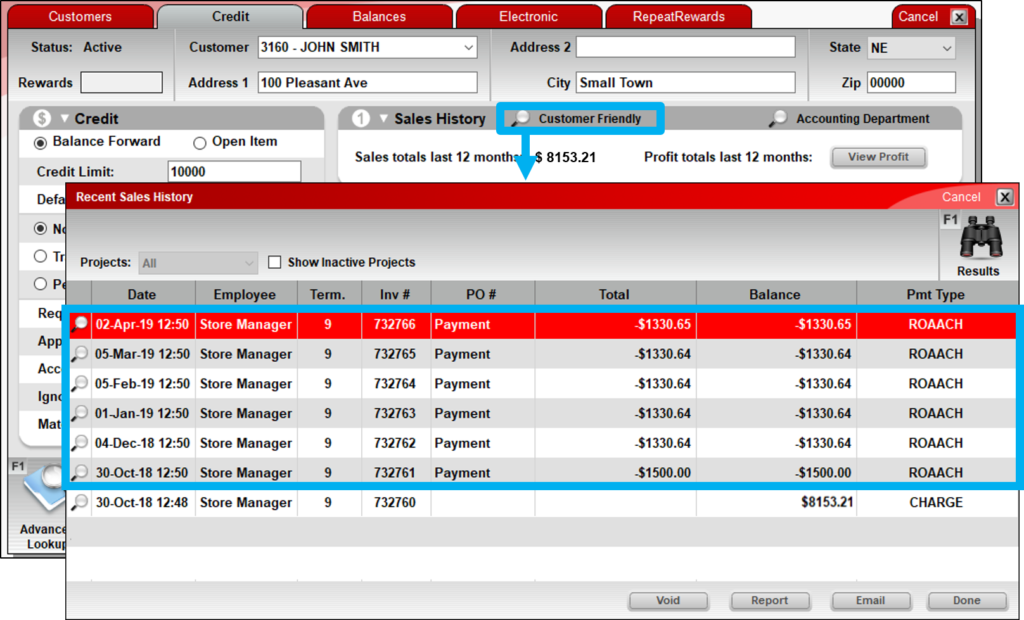
Figure 5: Recent Sales History window
- To view an ACH payment invoice, click its magnifying glass.
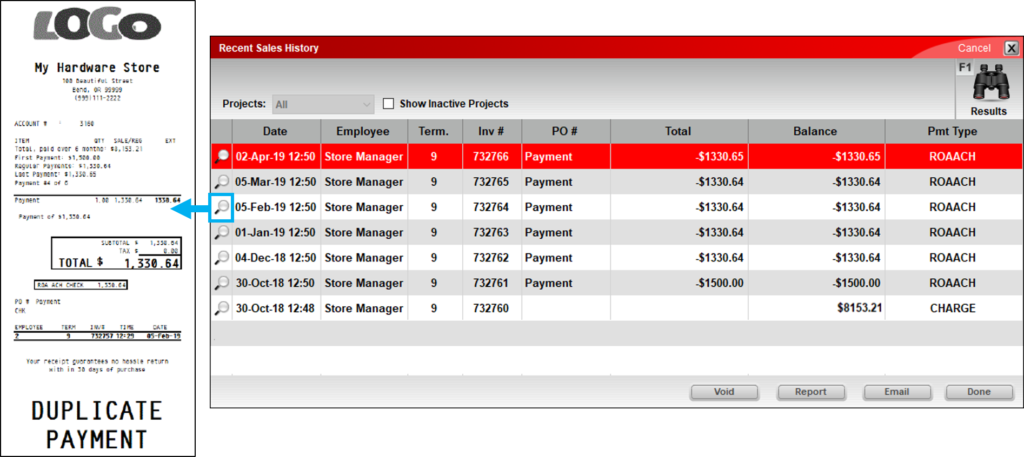
Figure 6: Payment invoice with ACH payment
If you have questions or suggestions about this information, contact support@paladinpos.com.
