Up to 31 days of transaction data can be viewed in an Excel spreadsheet with the Transaction Report – Excel report option. If you want to analyze, sort, or filter transaction data, this report is designed for you.
This article provides instruction and information on the following:
Set up
To set up the report:
- In Paladin, on the top ribbon, select the Reports module.
- In the Report Area pane, select Sales Analysis > What I Need To Know.
- In the Report List pane, select Transaction Report – Excel.
- In the Choose Report pane, click F12 Next.
- In the Transaction Report – Excel window, set your criteria in the Report Settings pane (this is limited to a maximum of 31 days).
- In the Additional Settings pane, select your criteria. Note: Checking Include customer phone numbers will include the customer’s phone and cell phone in two columns after the Account Name column.
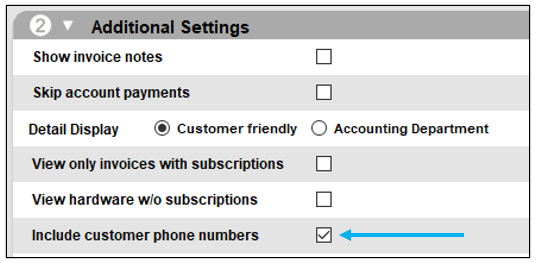
Figure 1: Include customer phone numbers

Figure 2: Phone/Cell Phone columns
Note: To include invoice notes, check Show invoice notes.
- In the Sorting Options pane, click F12 Run Report.
Report values (columns)
The report includes the following values for every transaction in the maximum 31 day time period that you specify:
- INVOICE ID
- LINE NUMBER
- DATE
- ACCOUNT NUMBER
- ACCOUNT NAME
- PHONE NUMBER (if Include customer phone numbers is checked)
- CELL PHONE (if Include customer phone numbers is checked)
- AUTHORIZED SIGNER
- PROJECT
- MEMO/PO
- TERMINAL
- CASHIER
- SCANNED PARTNUMBER
- PARTNUMBER
- DESCRIPTION
- QTY SOLD
- SOLD PRICE
- TAXABLE
- LINE EXT.
- STATE TAX
- COUNTY TAX
- CITY TAX
- PAYMENT METHOD
- Rewards Type 1
- Rewards #1
Note: The PAYMENT METHOD column reflects the type or types of the method used for payment.
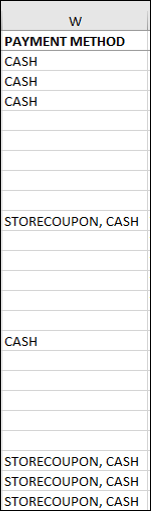
Figure 3: Payment method(s)
Schedule a Transaction Report – Excel (report preset)
To schedule a Transaction Report – Excel, a report preset can be created
To set the report preset:
- In Paladin, on the top ribbon, select the Reports module.
- In the Report Area pane, select Sales Analysis > What I need to Know.
- In the Report List pane, select Transaction Report – Excel
- On the bottom of ribbon, select F11 Edit Preset.
- In the Create Report Preset window, in the Report Preset Setting pane, select a Report Preset (there are nine available).
- In the Additional Settings pane, in the Preset name box, enter a name for the preset.
- Add a name in the Button name box (note that this is restricted to 14 characters).
- From the Schedule report list, select from the following options:
-
- None
- Daily
- Daily – Exclude Weekends
- Weekly – Monday
- Weekly – Tuesday
- Weekly – Wednesday
- Weekly – Thursday
- Weekly – Friday
- Weekly – Saturday
- Monthly
- Click F12 Next
- In the Transaction Report – Excel window, enter parameters in the Report Settings pane.
- In the Additional Settings pane, select from the various checkboxes and radio buttons.
- In the Sorting Options pane, click F12 Save Preset.
The report preset will now appear on the bottom ribbon of the Reports window.
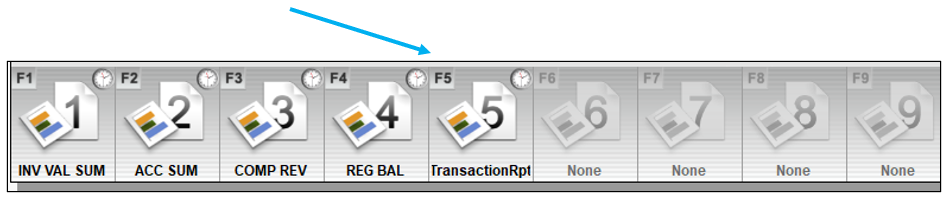
Figure 4: Report presets
If you have questions or suggestions about this information, contact support@paladinpos.com.
