
VusionGroup is a specialist in electronic shelf labeling systems. VusionGroup designs and markets all of its system’s components (software, radio-frequency infrastructure, labels, and mountings).
When a retail price changes on an inventory item, the electronic tag linked to that product updates in seconds to a minute (depending on the size of the tag) to the new retail price, completely removing the need for physically printing/placing bin or shelf tags. Electronic display modules are attached to the front edge of retail shelving.
Integrating Paladin with VusionGroup’s electronic shelf label (ESL) system, product pricing is automatically updated whenever a price is changed in Paladin.
This article provides instruction and information on the following:
- VusionGroup Toolset
- Signing up with VusionGroup
- Set up in Paladin
- Managing tags through Paladin
- Linking VusionGroup Manager Pro account to the VUSION Link phone app
- How to match an item to an electronic tag with the VUSION Link phone app
- How to unmatch an item to an electronic tag with the VUSION Link phone app
VusionGroup Toolset
VusionGroup provides two tools that clients use to create their tags and to monitor the status and performance of their tags throughout their store. These tools are:
VUSION Manager
Manage and monitor your store from anywhere, at anytime
VUSION Manager ensures that prices and promotions are always synchronized online and in-store. Thanks to various dashboards and statistics, it is now possible to have real-time access to your store’s activity and the status of its infrastructure as well as ESLs. VUSION Manager includes a monitoring tool to help identify and spot unusual device or infrastructure behavior to reduce Mean-Time-To-Resolution and ensure accurate pricing in-store.
VUSION Studio
Create, update, and edit electronic shelf tags
VUSION Studio software is a fast and easy template designer to empower your in-store marketing department. VUSION Studio’s main goal is to help manage and display all types of data with a quick, simple, and attractive template designer.
Signing up with VusionGroup
- When a client is interested in using this integration, direct them to VusionGroup
- Click the Contact us in the upper right-hand corner of the site.
- On the Contact us page, have the client enter the following information:
|
For this command |
Do this |
|
First Name, Last Name, Email, Phone Number, Company, Job Title, Country, City |
Have the client fill out their personal information. |
|
What topics are you interested in? |
Have the client select these boxes:
|
|
MESSAGE |
Have the client enter the following: I am using Paladin Point of Sale in my store and would like to setup your integration with them. |
|
How did you hear about us? |
Paladin Point of Sale |
- When complete, click Send Form.
Ask the client to contact us when they have done the following:
- Successfully signed up with VusionGroup and ordered all their electronic tags and router(s)
Note: More than one router may be needed depending on the square footage of the store.
- Received all their equipment and have set up the VusionGroup router(s) in their store.
Note: It takes 24hrs for the VusionGroup router(s) to set.
Set up in Paladin
Before VusionGroup setup can occur in Paladin, the client must have a contract with VusionGroup. Paladin will reach out to the client to get confirmation that they are set with VusionGroup. Paladin will contact VusionGroup to have them provide the following:
- Vusion Cloud Subscription Key
- Vusion Pro Subscription Key
- Vusion Cloud Store Id
Important: The client must have their tags at the location and must have installed their in-store VusionGroup frequency router (allow 24 hours for the router to set). The client can check the status of the router through VUSION Manager’s Infrastructure window as shown in Figure 1. The status can also be checked in Paladin (refer to Get Transmitter in the Managing tags through Paladin section).

Figure 1: VUSION Manager’s Infrastructure window/Status
When Paladin has all information, setup is done as follows:
- In Paladin, from the main menu, select File > Setup.
- Select the ExternalSync tab.
- In the External Sync Configuration pane, select VusionGroup from the Select Type list.
- In the SES-imagotag pane, enter the keys and ID provided by VusionGroup.
- Press Verify Key at the end of each key box.
- Press Verify Store Id at the end of the Vusion Cloud Store Id box.
- Check Enable Vusion Cloud Synchronization.
- Click Save.
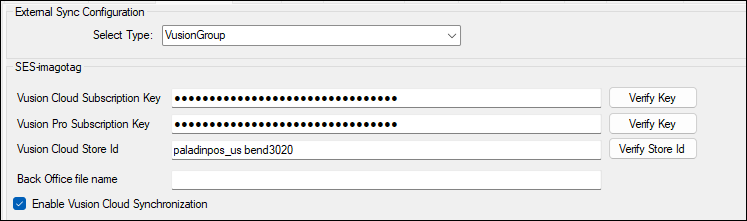
Figure 2: Paladin Configuration/ExternalSync/SES-imagotag setup
In the Manual Upload pane, you have the option to:
-
- Sync Matched Items: Matches items to labels in the system
- Sync All Items: Goes through entire inventory (10,000 items at a time). Can be time consuming.
Note: These actions can be done through Paladin’s Data Viewer (refer to the Managing tags through Paladin section).
Note: Paladin ensures 10-minute upload intervals, and Vusion Group hardware can take up to 10 minutes to refresh the tags. Shorter times are possible, but the supported lag between making a change in Paladin and seeing the tag update averages 20 minutes.
A message of the progress appears on top of the progress bar. The progress bar turns green as the sync progresses.

Figure 3: Sync progress status
Note: A Stop button is available to stop the sync. When the sync is complete, the Stop button becomes the Clear button to clear the sync before closing out of Paladin Configuration.
Note: Syncing in Paladin is mirrored in VUSION Manager. That is, what is done in Paladin is observable in VUSION Manager. Figure 3 above shows items processed/synchronized in Paladin, while Figure 4 reflects this in VUSION Manager.
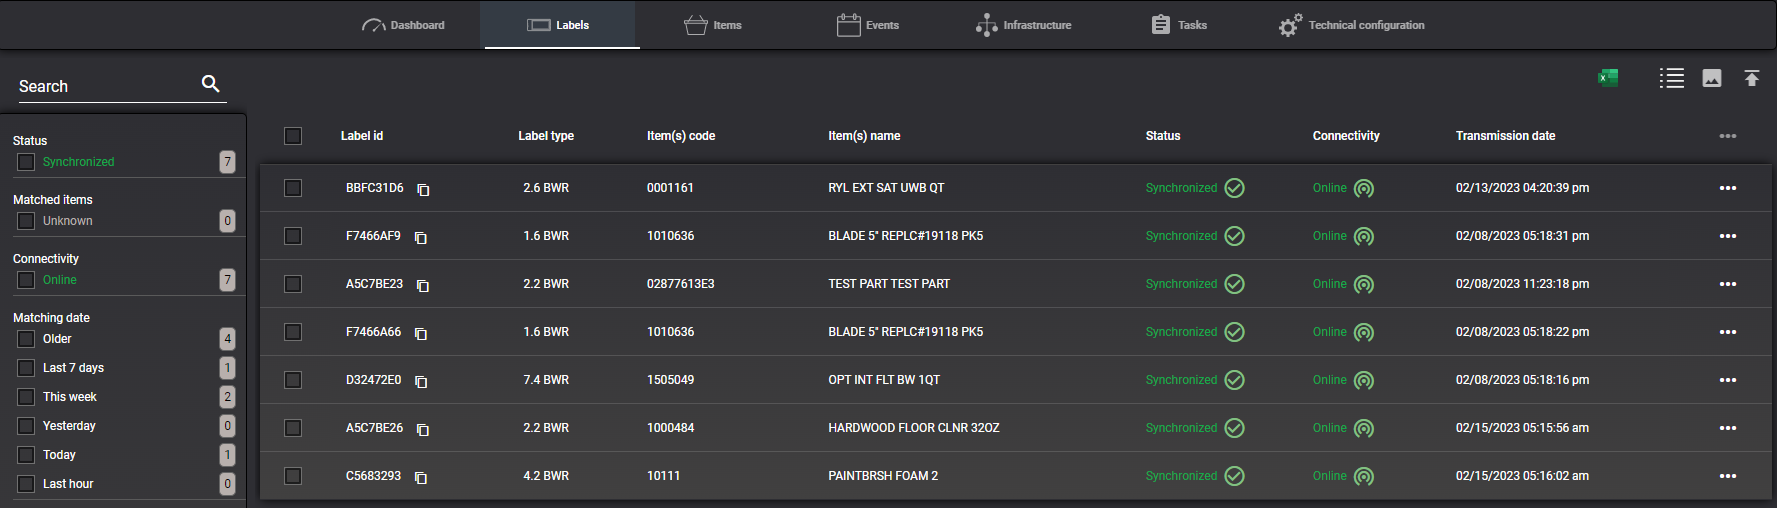
Figure 4: VUSION Manager/Synced items match to Paladin
Managing tags through Paladin
VOLUSION provides stores with VULUSION Manager to monitor and update tags. Paladin’s Data Viewer mirrors VUSION Manager. That is, what is done in Paladin is observable in VUSION Manager.
Note: Paladin ensures 10-minute upload intervals, and Vusion Group hardware can take up to 10 minutes to refresh the tags. Shorter times are possible, but the supported lag between making a change in Paladin and seeing the tag update averages 20 minutes.
To manage tags in Paladin:
- In Paladin, on the top menu, select Maintain > Data Viewer.
- Select the Electronic Labels tab.
Note: The Electronic Labels tab is only available when VusionGroup has been activated in Paladin Configuration’s External Sync tab.
When Get Store is pressed, the following buttons are available in the left column to work with tags in the store.

Figure 5: Navigation buttons
- Get Store
- Get Transmitter
- Get Scenarios
- Get Labels
- Get Matched Items
- Sync Matched Items
- Sync All Items
- Delete Unmatched Items
- Validate Label Matchings
- Match Labels
- Stop
- Clear
Get Store
When Get Store is pressed, the following areas are auto-populated on the top of the pane:
-
- Store Id
- Store Name
- Retail Chain Id
- Retail Chain Name
Detailed store information is provided in the open field.
Note: For a multi-store, each store is listed, and a space is given between each store’s information.
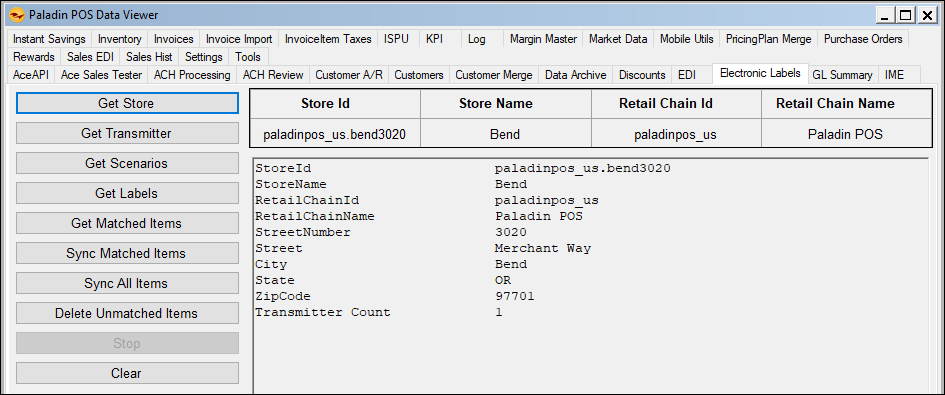
Figure 6: Get Store/Detailed store information
Get Transmitter
When Get Transmitter is pressed, the status of transmission within the store is shown. The most important value to observe is the Status and whether the store is online.

Figure 7: Get Transmitter/Status online
Get Scenarios
When Get Scenarios is pressed, information is provided on label types used in the store (label type and design are set up in VULUSION Studio).
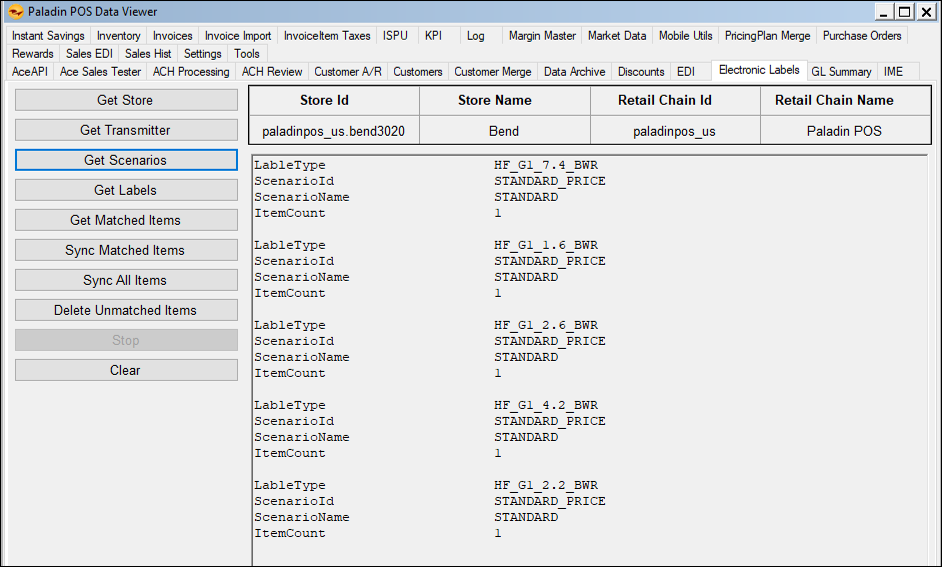
Figure 8: Get Scenarios/Label information
Get Labels
When Get Labels is pressed, you can search by:
-
- Part Number
- Description
- Label Id
- Label type
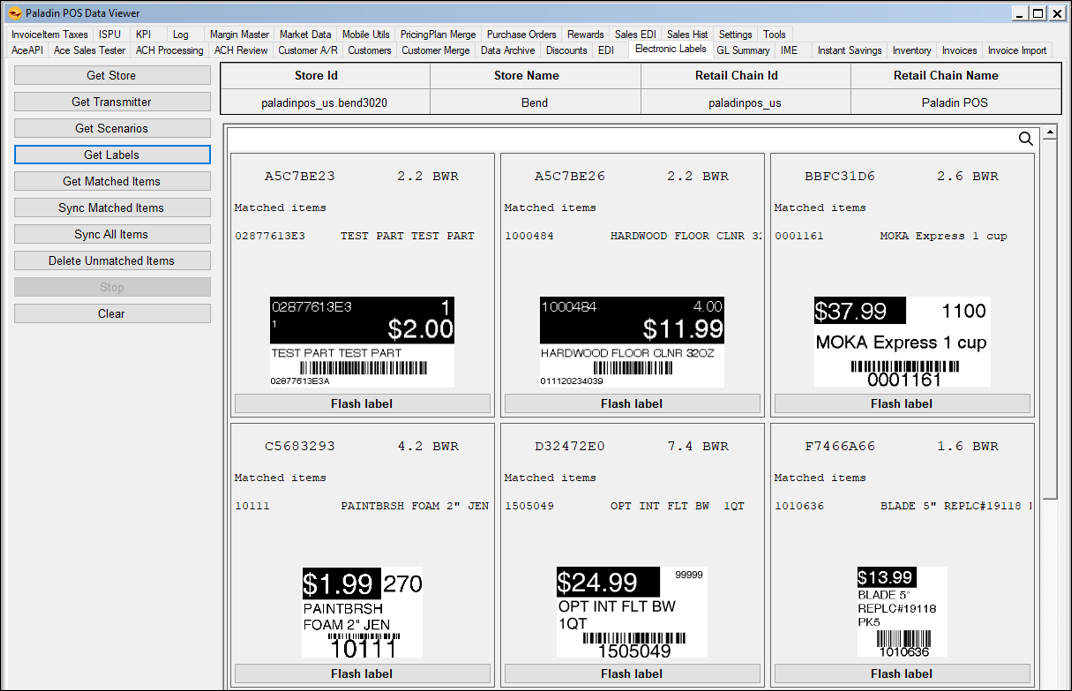
Figure 9: Get Labels/Search and Flash features
The exact display of the labels is shown. By pressing Flash, the label in the store will flash (a red button on the label) for easy identification when troubleshooting issues.
Get Matched Items
When Get Matched Items is pressed, every item in the store that is matched to a label is displayed. Multiple items can be matched to a single label (for example, larger labels showing multiple items, such as a display for reading glasses).
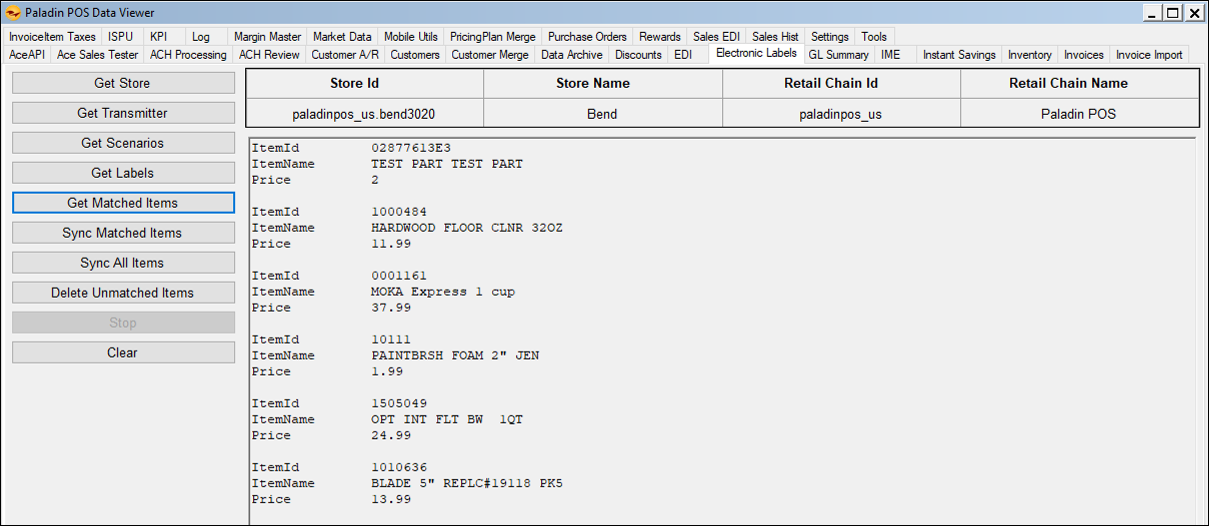
Figure 10: Get Matched Items
Sync Matched Items
When Sync Matched Items is pressed, Paladin finds and syncs all items that have tags in the store.
Note: Paladin ensures 10-minute upload intervals, and Vusion Group hardware can take up to 10 minutes to refresh the tags. Shorter times are possible, but the supported lag between making a change in Paladin and seeing the tag update averages 20 minutes.
Note: Performing this produces more information than the Sync Matched Items action in Paladin Configuration.
Progress of syncing matched items is shown, and when complete, you can click Clear to clear the field and the progress bar.
Note: You can click Stop any time during the sync; the sync function will end, and the field and progress bar will clear.
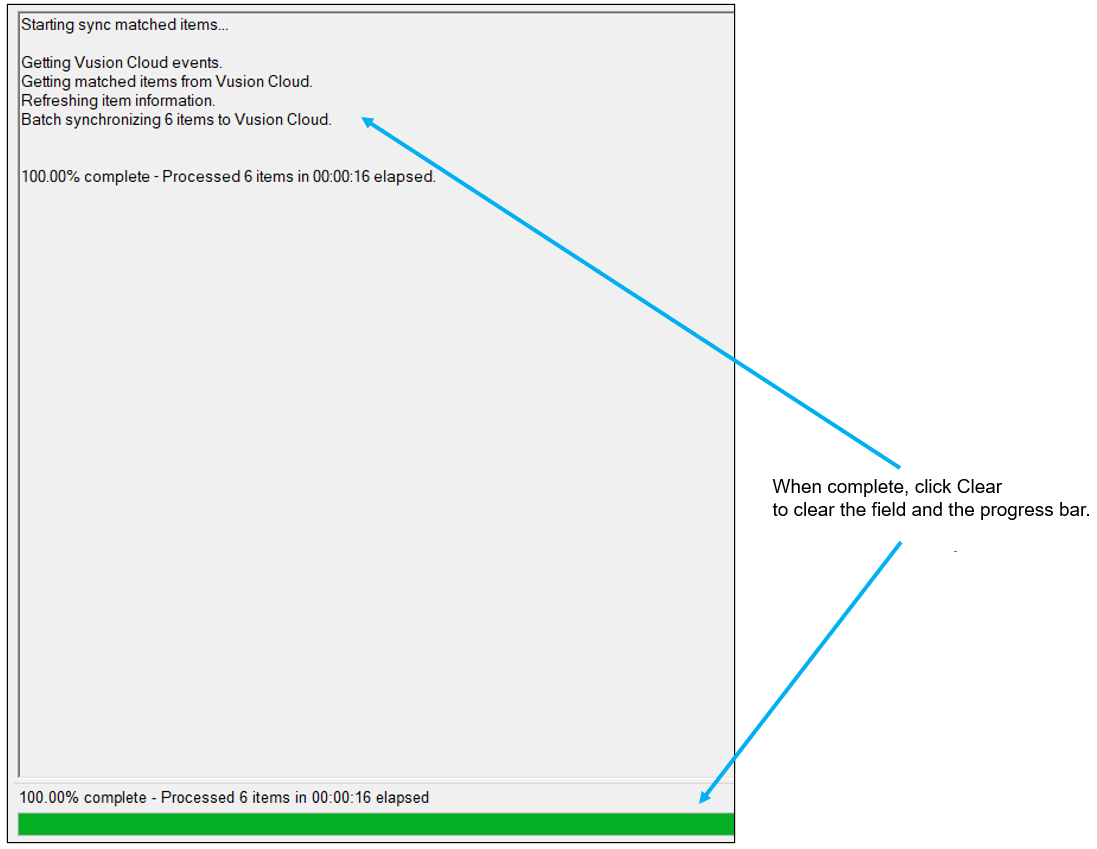
Figure 11: Sync Matched Items/Progress of the sync
Sync All Items
Important: Syncing all items is done in increments of 10,000. If a store has thousands of items, for example 765,000, the syncing will take some time, which is also dependent on the bandwidth strength of the store. Therefore, it is recommended to perform this when the store’s system is calm (before or after store hours).
Note: Paladin ensures 10-minute upload intervals, and Vusion Group hardware can take up to 10 minutes to refresh the tags. Shorter times are possible, but the supported lag between making a change in Paladin and seeing the tag update averages 20 minutes.
As with Sync Matched Items, progress of syncing all items is shown, and when complete, you can click Clear to clear the field and the progress bar.
Note: You can click Stop any time during the sync; the sync function will end, and the field and progress bar will clear.
Delete Unmatched Items
After you have synced all items, you will need to delete all unmatched items. When Delete Unmatched Items is pressed, the system runs in three stages:
-
- Gets item’s page number.
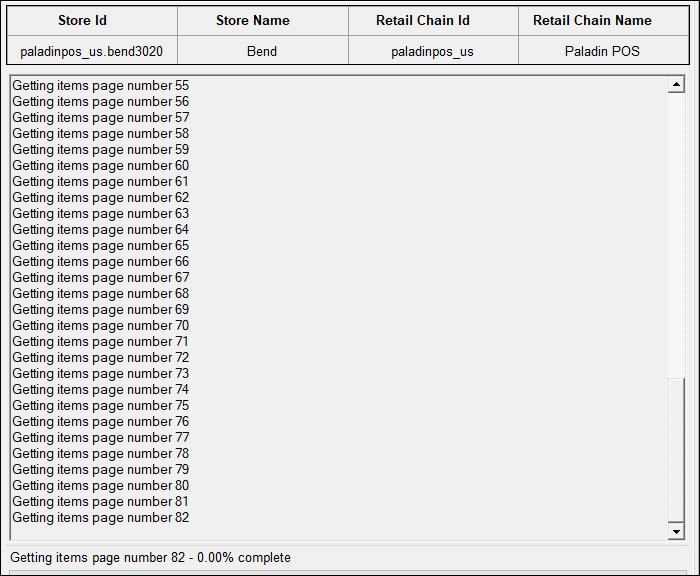
Figure 12: Delete Unmatched Items/Getting items page number
- Processes items in increments of 10,000 items.
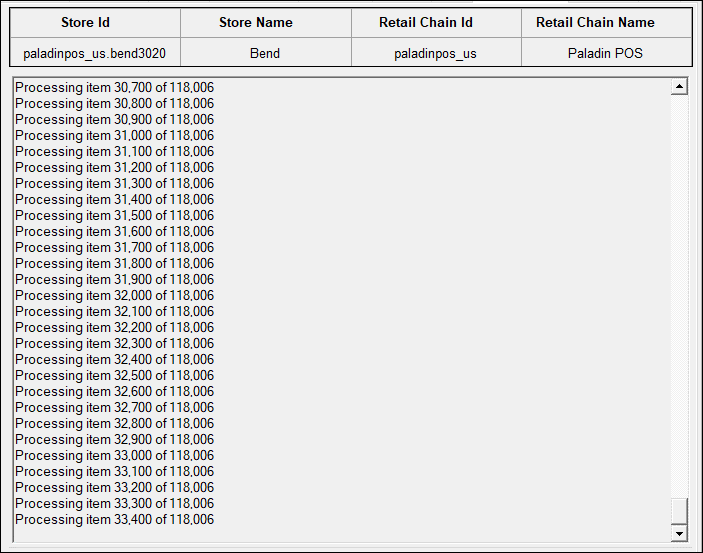
Figure 13: Delete Unmatched Items/Processing item
- Batch deletes unmatched items and provides number of items processed.
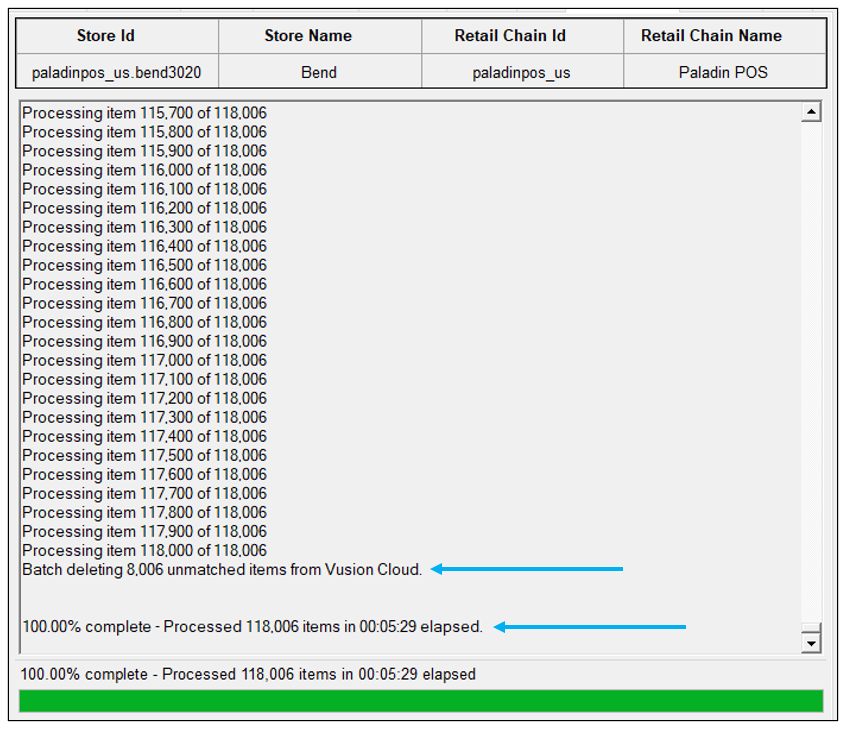
Figure 14: Delete Unmatched Items/Batch delete and processed information
The process stages are done to avoid spamming the system.
As with other syncing functions, pressing Stop stops any actions, and pressing Clear clears the actions and progress bar.
Validate Label Matchings
Pressing Validate Label Matchings, Paladin finds mismatched items (Alt part number found instead of part number) and fixes the label to show the part number.
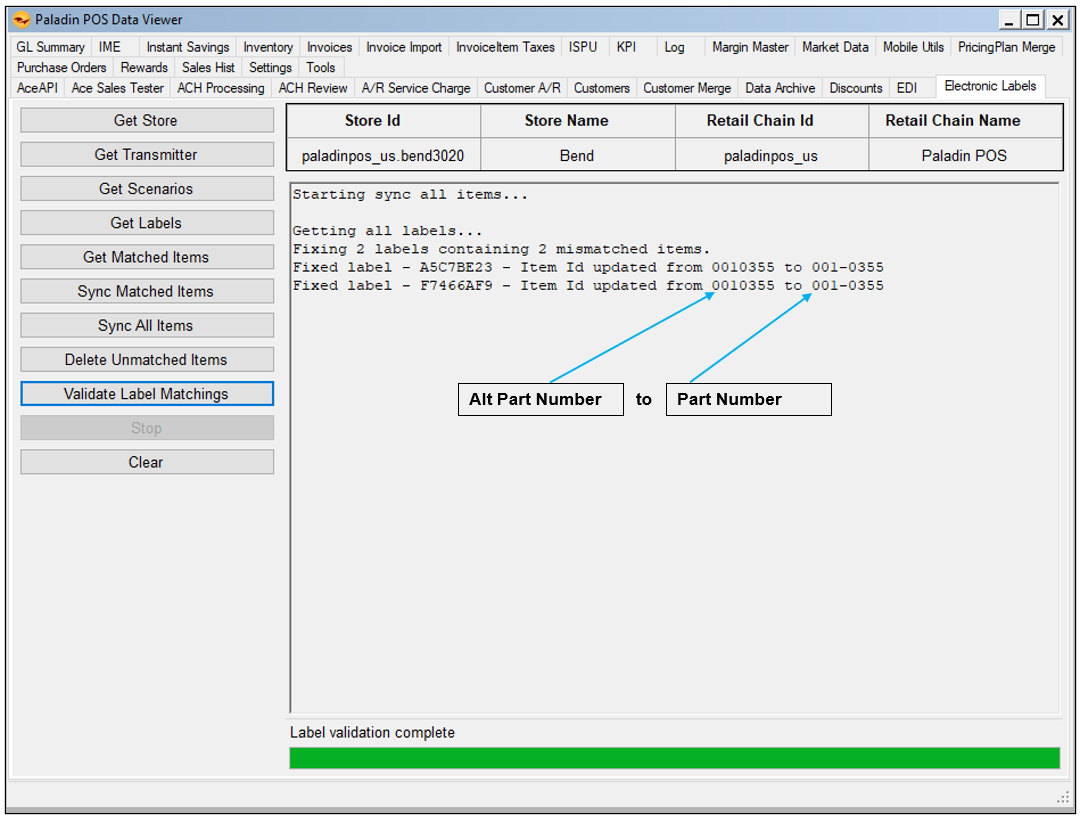
Figure 15: Validate Label Matchings/Alt Part Number to Part Number
Match Labels
Matches labels with items in Vusion Cloud via an import file.
Import file formatting:
1. Tab-delimited text
2. No Headers
3. Column 1 = Label Id
Column 2 = Part Number (Item Code)
Stop
Pressing Stop stops any sync actions.
Clear
Pressing Clear clears sync actions and progress bar.
Linking VusionGroup Manager Pro account to the VUSION Link phone app
After the integration is configured in Paladin, the client needs to assign electronic tags to all the items. To do this, the client needs to log into their VusionGroup Manager Pro website and download the VusionGroup’s VUSION Link app.
- Using their phone, direct the client to the application store (Apple’s App Store, Android’s Google Play Store, etc.), have them search for “vusion link” and download the application.
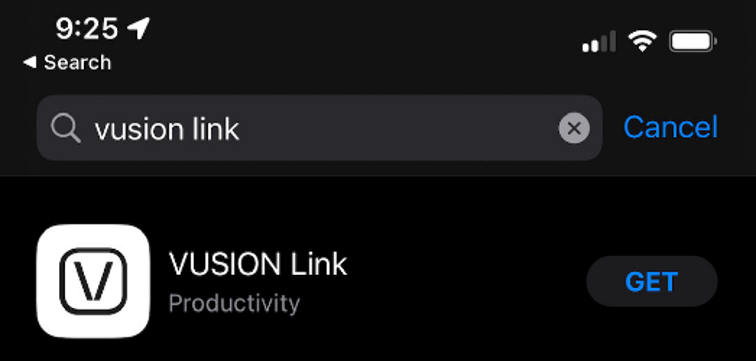
Figure 16: VUSION Link application
- Once the application is downloaded, have the client launch the VUSION Link application on their phone.
- When prompted to “Select a region,” have them tap usa.
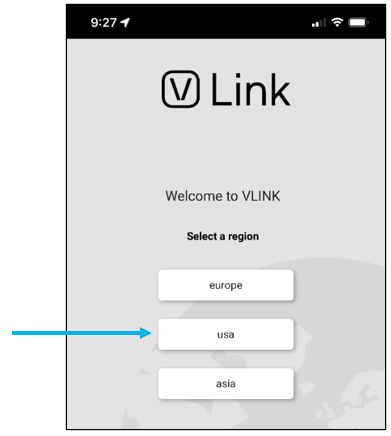
Figure 17: VLINK launch/Select a region
- When prompted to “Choose how you want to connect,” tap Scan QR code.
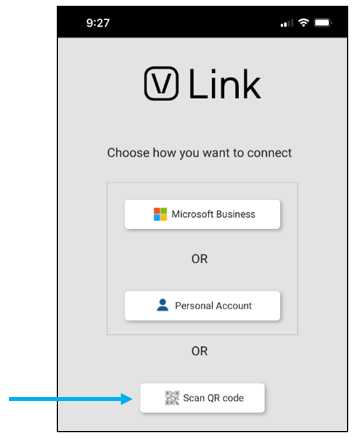
Figure 18: VLINK launch/Choose connection
- Have the client set their phone aside for a moment and log into their Manager Pro website page on their computer.
- Once logged in, have them click on the phone icon with the settings gear under their name in the top right-hand corner.
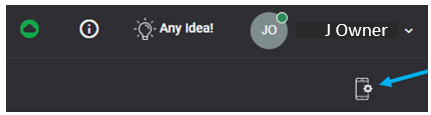
Figure 19: Manager Pro login
A QR code will appear on their computer screen.
- Have the client scan the QR code with their phone to link their SES-imagotag Manager Pro account to the VUSION Link phone app.
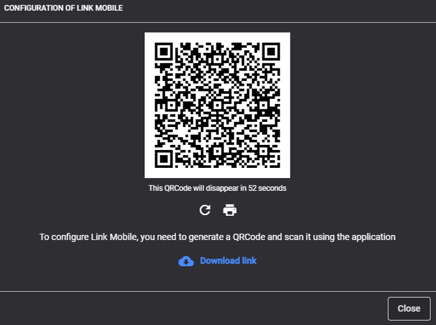
Figure 20: QR code for VUSION link
This procedure can be followed numerous times on multiple mobile devices if the store is going to have multiple employees linking items to electronic tags.
How to match an item to an electronic tag with the VUSION Link phone app
Once the client has their account linked to the phone app, they can begin matching items to electronic tags using the VUSION Link phone app.
- In the VUSION Link application on the phone, tap the Matching icon on the bottom left-hand corner.
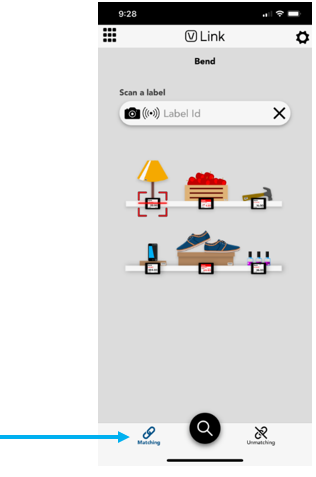
Figure 21: VLINK phone app
- In the Ready to Scan screen, line up the red line with the small barcode on the underside of the electronic tag.
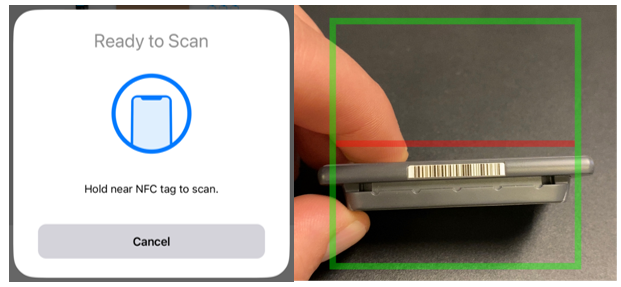
Figure 22: Ready to Scan screen/Electronic tag barcode
- When prompted to scan again, scan the 12-digit UPC of the physical product. Within a minute, the tag will flash several times and update with the product information for the item linked to that electronic tag.
Figure 23: 12-digit UPC of the product
- Attach the electronic tag to the SES-imagotag gondola adapters on the four-foot gondolas.
- Repeat this process for all electronic tags.
How to unmatch an item to an electronic tag with the VUSION Link phone app
If the store accidentally assigns the wrong item to an electronic tag, they can simply unmatch the item from that tag by performing the following:
- In the VUSION Link application on the phone, tap the Unmatching icon on the bottom right-hand corner.
- When prompted, scan the small barcode on the underside of the electronic tag.
- When prompted again, scan the 12-digit UPC of the physical product. Within several seconds, the tag will be disassociated from the item it was previously matched to. You can now match that tag to a different item.
If you have questions or suggestions about this information, contact support@paladinpos.com.
