
Using the PaladinNsight™ dashboard, clients can set up clearance items. PaladinNsight™ is located in Paladin’s Inventory module on the Inventory tab. If you are a manager or other high-level employee, it will automatically appear on your PaladinNsight™ dashboard.
This article provides instruction and information on the following:
- Paladin Configuration: Setting up Clearance
- Setting clearance items
- Remove an item from a clearance pricing plan
Paladin Configuration: Setting up Clearance
Before gathering items for clearance, a Clearance department needs to be created.
- In Paladin, on the top menu, select File > Setup.
- Select the Dept tab.
- In the Departments pane, under the list of departments, click New.
- In the Name box, enter Clearance.
- In the Department label number box, assign a number (it must be a new number).
- Click Save, then click Close.
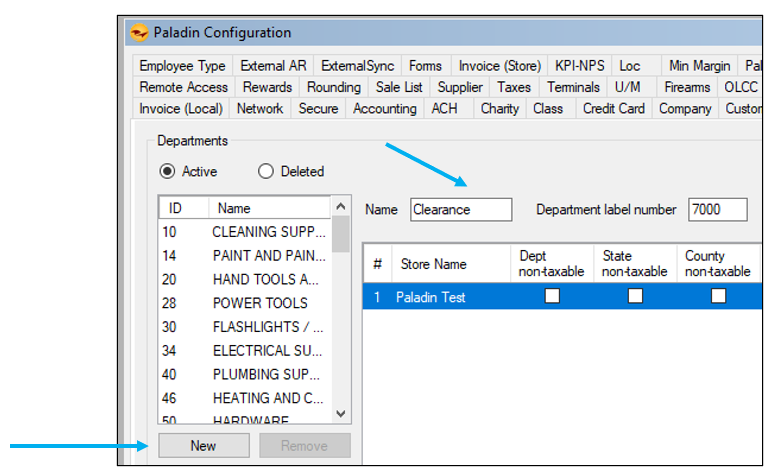
Figure 1: Creating a Clearance department
To enable the Clearance department and its variables:
- In Paladin, on the top menu, select File > Setup.
- Select the PaladiniNsight tab.
- In the Clearance pane, check Enable Clearance Department (this is optional).
- Select the Clearance department from the Department list.
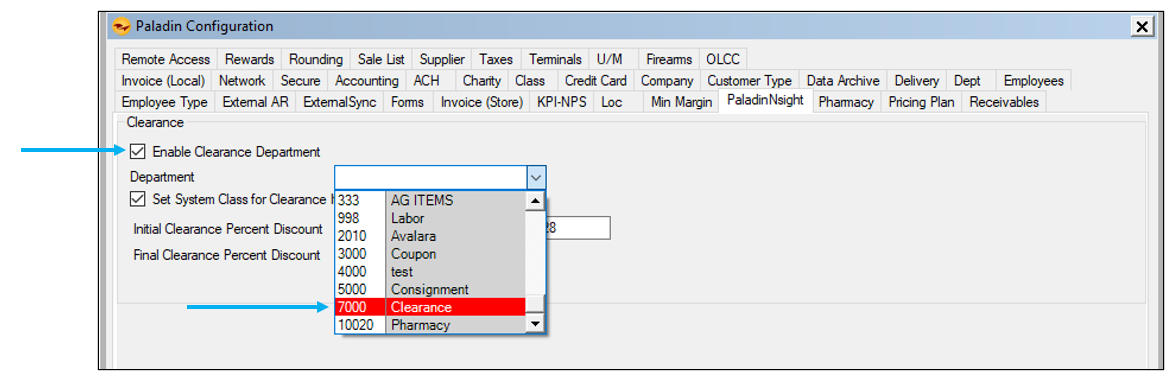
Figure 2: Enable clearance department
- Uncheck (see note below) Set System Class for Clearance items.
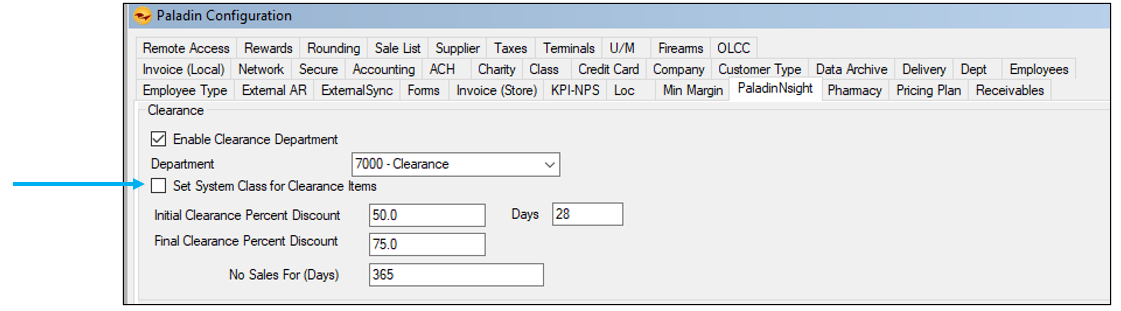
Figure 3: Uncheck Set System Class for Clearance items option
Note: By default, Set System Class for Clearance items is checked, and Class 3 will be assigned. If the client is using Class 3 and does not want it overwritten, uncheck Set System Class for Clearance items. Paladin will then create a new class for clearance.
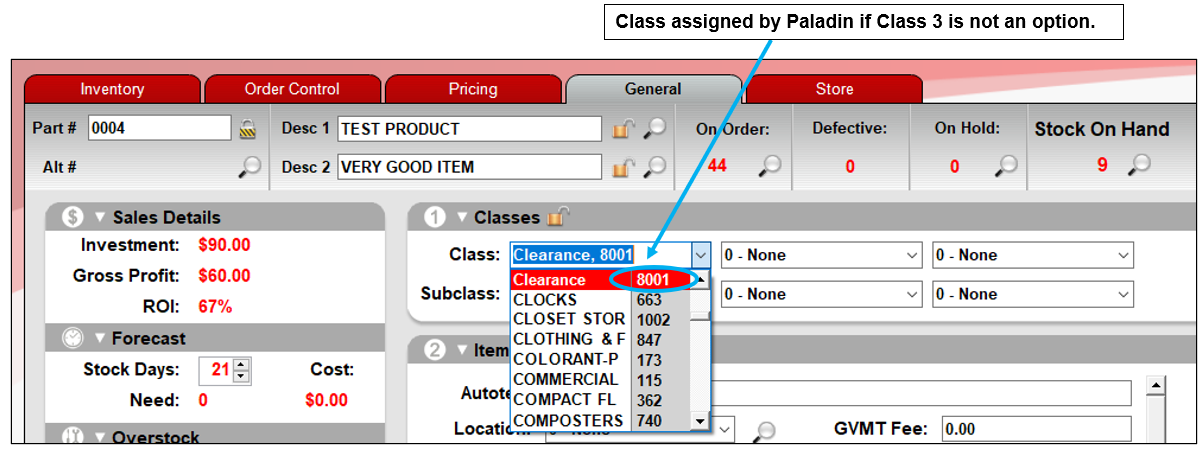
Figure 4: Class 3 not an option/Class assigned by Paladin
- Determine percentages and amount of days before percentage levels (see note below).
Note: By default, Paladin sets the initial clearance percent at fifty (50%) percent, then after the default of 28 days, the clearance percent goes to seventy five (75%) percent. If the item sells out, it is taken off of the clearance list, and clients can either restock the item or not; Paladin does not delete the item, that is up to the client. Clients can change the percentages and amount of days if desired.

Figure 5: Enabling Clearance department and variables
- Click Save, then click Close.
Note: No Sale values 721 or higher will restrict PaladinNsight dials from opening in the Inventory module; therefore, if No Sales For (Days) is set to 721 or higher, the following Input Error message opens:

Figure 6: Input Error message
Setting clearance items
To set up items for clearance:
- In Paladin, from the top ribbon, select the Inventory module.
- In the PaladinNsight dashboard, click any magnifying glass under the reviewer meters.
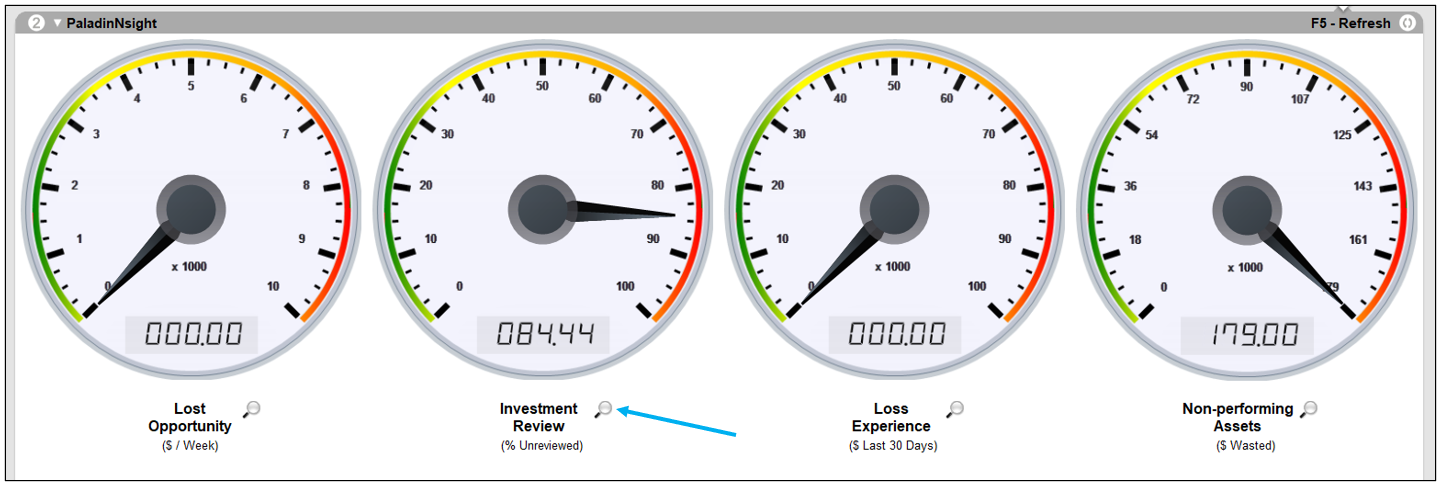
Figure 7: PaladinNsight
- In the Reviewer, select the Clearance tab.

Figure 8: Clearance tab
- In the Clearance tab, in the Order By field, enable Department.
- In the Display By field, enable # of Items.
- Click the magnifying glass next to the department you want to view items from.
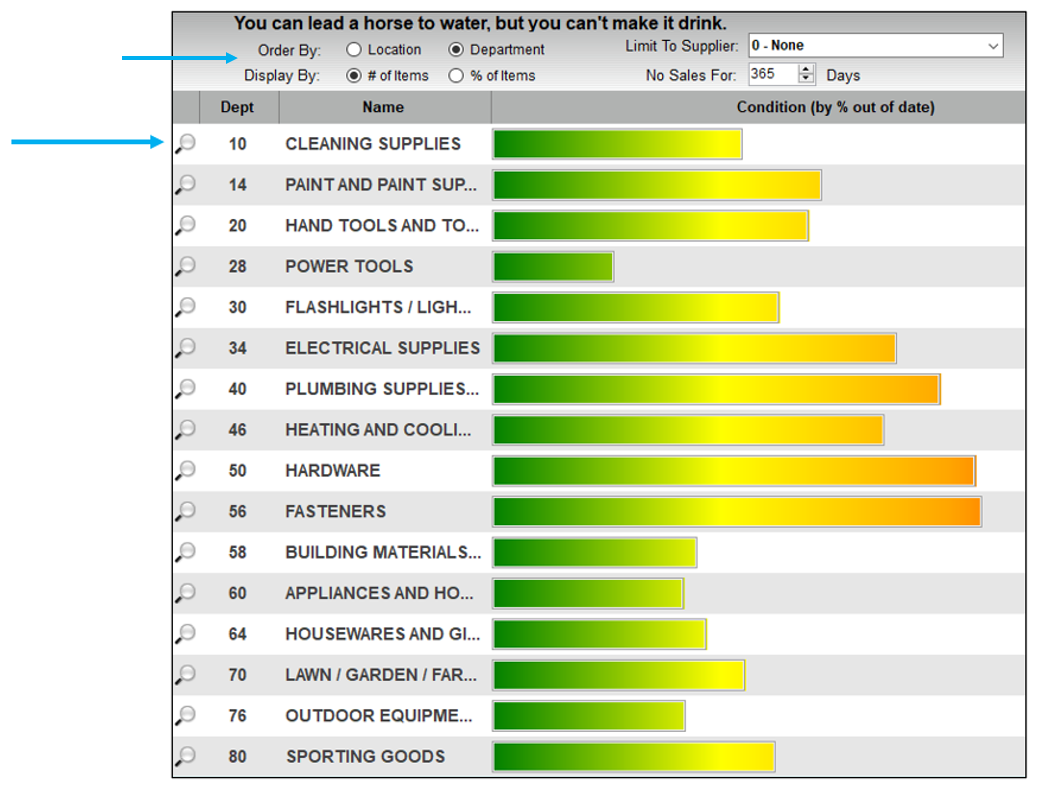
Figure 9: Department selection
- In the Inventory Closeout Details page, click the checkbox for each item you want placed into clearance.
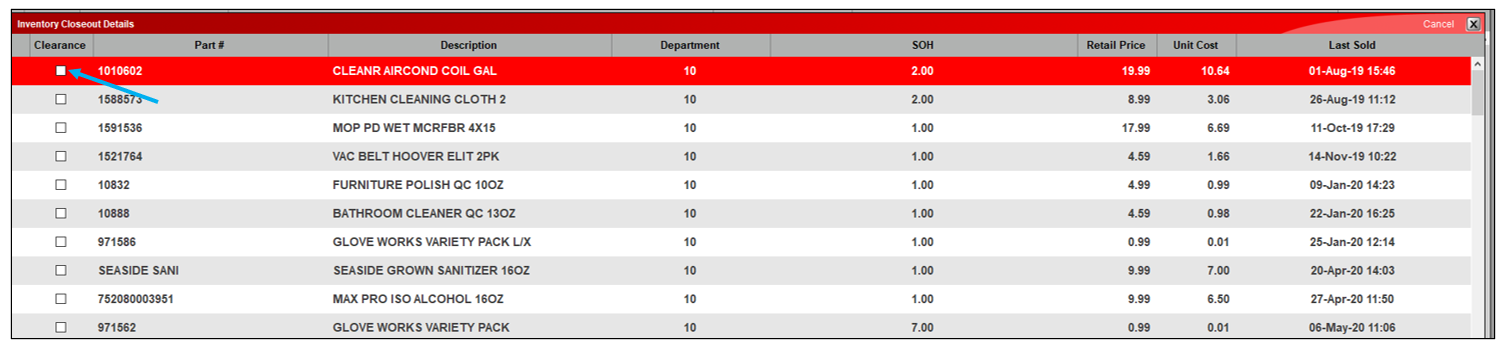
Figure 10: Inventory Closeout Details page
- On the bottom right-hand corner of the Inventory Closeout Details page, click Clearance.

Figure 11: Clearance button
- Cancel out of the Inventory Closeout Details page.
- Cancel out of the Clearance tab.
- Cancel out of the Inventory module.
Remove an item from a clearance pricing plan
To remove an item from a clearance pricing plan:
- In Paladin, from the top ribbon, select the Inventory module.
- In the PaladinNsight dashboard, click any magnifying glass under the reviewer meters.
- In the Reviewer, select the Clearance tab.
- In the Clearance tab, in the Order By field, enable Department.
- In the Display By field, enable # of Items.
- Click the magnifying glass next to the department you want to view items from.
- In the Inventory Closeout Details page, write down the Part # for each item you want to remove from clearance.
- In Paladin, on the top menu, select File > Setup.
- Select the Pricing Plan tab.
- In the Pricing Plans pane, find and highlight the clearance pricing plan.
- Click Go to Sale.
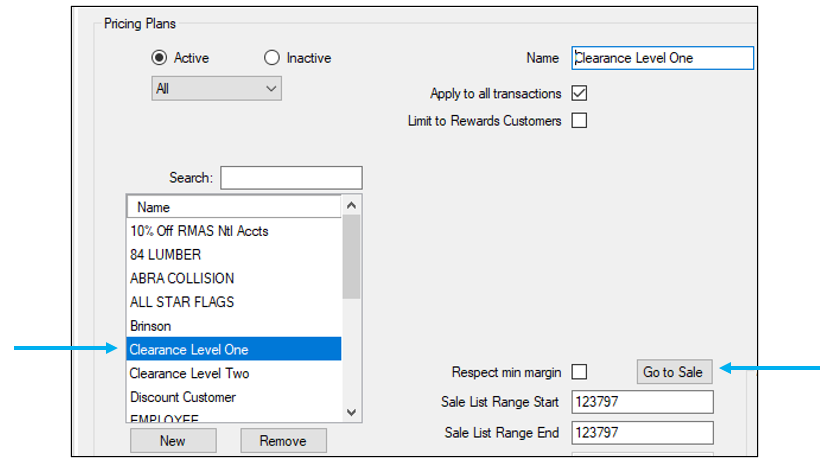
Figure 12: Pricing Plan/Go to Sale
This opens the Sale List tab.
- In the Sale Items pane, highlight the Part Number of the clearance item to be removed from the pricing plan/clearance.
- Click Remove.
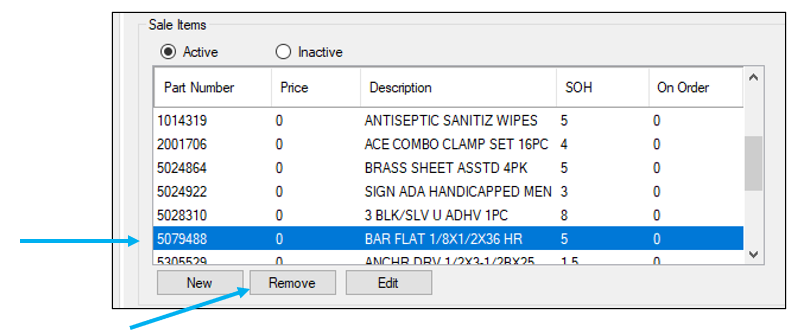
Figure 13: Sale Items/Remove
- Click Close.
- In Paladin, from the top ribbon, select the Inventory module.
- In the Part # box, enter the part number you removed.
- Pres Enter.
- Select the Order Control tab.
- In the Stock Information pane, click the padlock icon to unlock Max Qty.

Figure 14: Unlock Max Qty
- Select the General tab.
- In the Classes pane, change Class 3 from Clearance to whatever class you need to assign the item.

Figure 15: Class 3
- In the Item Information pane, use the right scroll bar to scroll down to the Description 3 box and remove any description for the item.
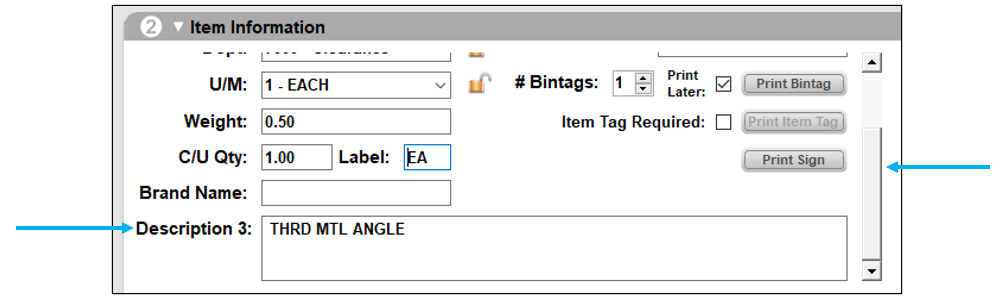
Figure 16: Description 3
- Click Save and close the Inventory module.
If you have questions or suggestions about this information, contact support@paladinpos.com.
