
This article includes the procedure for setting up a Buy One Get One (BOGO) discount when only a single item is involved.
- In Paladin, from the main menu, select File > Setup.
- Select the Sale List tab.
- In the Sales pane, click New. In the Name box, enter a name for the BOGO sale.
- In the ID box, enter a unique identification for the sale.
Note: No setting is required in the Source box.
- In the Type list, select Advanced Sale.
- If you live in a state that reduces taxable amounts on BOGO sales, check Sale Reduces Taxable Amount.

Figure 1: Sale ID
- Click Save.
- In the Sale Items pane, click New.
- In the Part Number box, enter the Part Number of the BOGO item.
- In the Price box, enter 0.
- Click Save.
- Select the Pricing Plan tab.
- Under the Name list, click New.
- In the Name box, enter the name of the BOGO sale.
- Check Apply to all transactions.
- In the Sale List Range Start box, enter the Unique Sale ID number.
- In the Sale List Range End box, enter the Unique Sale ID number.
- In the Discount or Markup list, select Discount Price.
- In the Advanced Settings pane, check Enable Advanced Settings.
- Select Buy One Get One from the Sale Type list.
- In the Advanced Settings pane, in each of the following boxes, enter the following information:
| Name of box | Enter this information |
| When a Customer Buys | 1 item |
| The Customer Receives a Discount on | 1 item |
| Discount Type | Select Free from the list. |
| Sale Limitations | Select Max Qty of Items Discounted from the list |
| Limit Quantity | Enter max amount |
| Description (Optional) | Customize the description for this BOGO sale. The character limit is 25. |
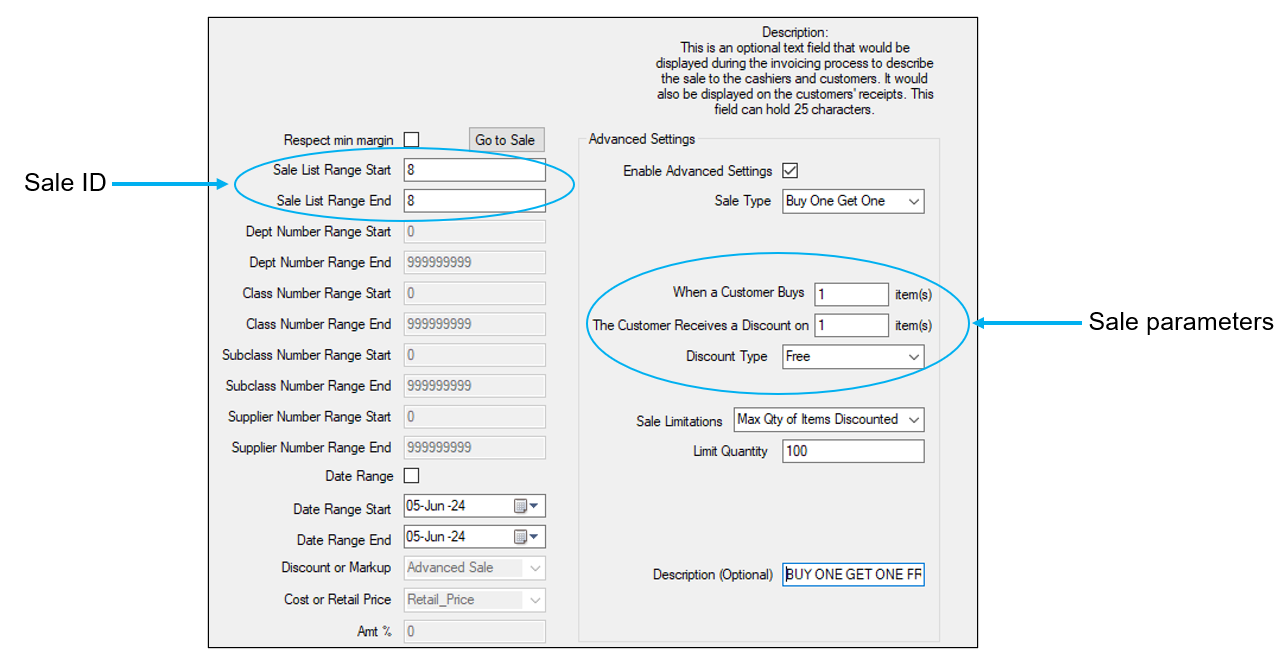
Figure 2: Advanced Settings for Buy One Get One sale
- Click Save, then click Close.
When the item is sold, its attributes are shown on the invoice as follows:

Figure 3: Sale shown on invoice
If you have questions or suggestions about this information, contact support@paladinpos.com.
*Content is subject to change. For the most recent version, visit the Help Portal.
Printed on: 4/03/26
