
Paladin provides the capability to create electronic files that can be attached to a purchase order (PO) and stored in Paladin Cloud™. This is done through scanning.
This article provides instruction and information on the following:
- How to scan and attach documentation to a purchase order
- Find PO function to view and/or attach scanned documents
- Additional Functions
How to scan and attach documentation to a purchase order
- Place the document in the device. Depending on the device, you will have an ADF(Automatic Document Feed) or a flat bed (lift lid on device usually used for single copying) or both.
Note: When a scan is run, the device will determine whether the ADF or the flat bed is being used.
- In Paladin, from the top ribbon, select the PO module.
- On the bottom ribbon of the Receive PO tab, toggle F5 Mode PO to Mode Receive.
- On the bottom ribbon of the Receive PO tab, click F8 Process.
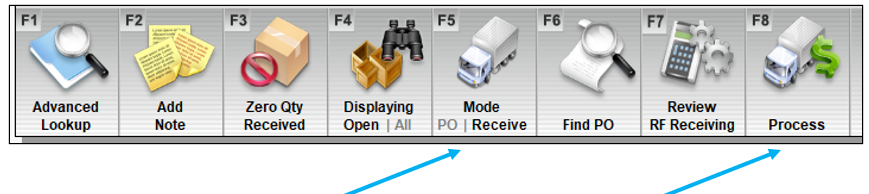
Figure 1: PO module/Receive PO/Mode Receive/Process
The Confirm Receive tab opens.
- On the bottom ribbon of the Confirm Receive tab, click F2 Attach file
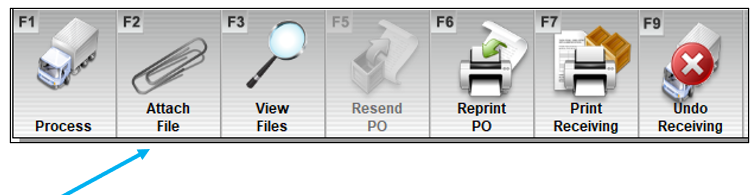
Figure 2: PO module/Confirm Receive/Attach File
The Attach File window opens.

Figure 3: Attach File window
The Attach File window has the following actions:
-
- Scan – Selecting this starts the scanning process.
- Stop – Selecting this will stop the scanning process.
- Select – Selecting this opens the Open TWAIN Driver window where you can select the device to use for the scan.
- Browse – Selecting this opens your file explorer where you can find files to load for scanning. Files selected appear in the viewing pane where you can double-click and open the file. The name of the file appears in the File Name box.
- Clear – Selecting this will clear the Attach File window of any attached files.
- Left and Right arrows below viewing pane – Selecting left/right opens pages of the document shown in the viewing pane.
- Click Scan.
The bottom of the Attach File window will show Opening scanner.
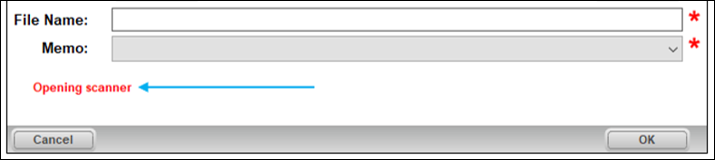
Figure 4: Opening scanner message
The Select Devices window opens.
Note: This window opens by default. To avoid this in future scans, check Use this device for future session.
- In the Select Devices window, highlight the device.
- Click Connect.
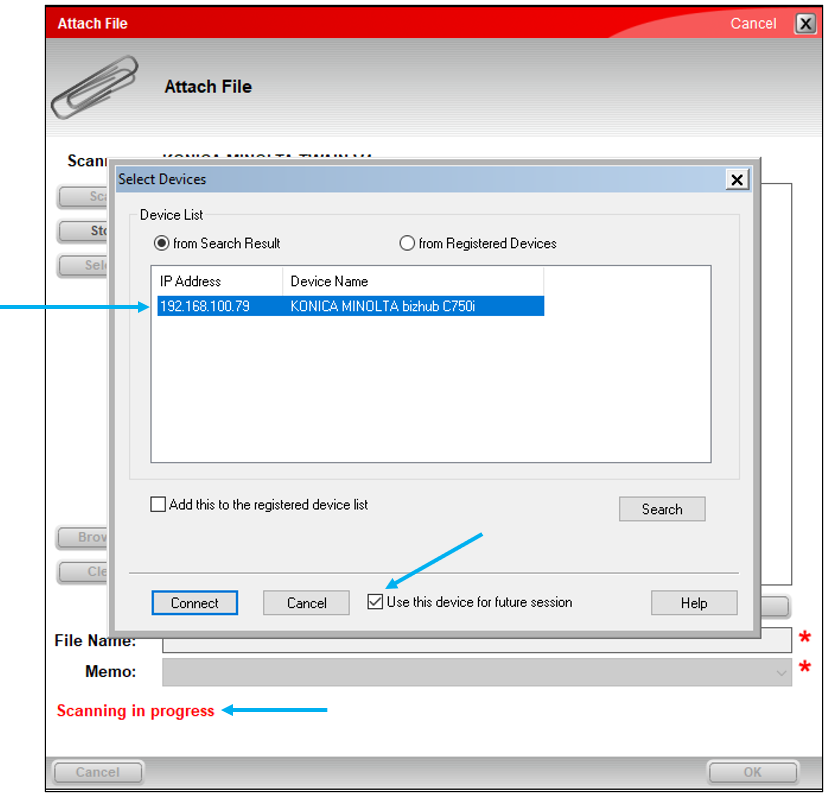
Figure 5: Select Devices window
Note: Scanning in progress shows on the bottom of the Attach File window while the device is setting up. When the scanning begins, Transferring image (page) # appears, as shown in Figure 6, until all images (pages) have been scanned.

Figure 6: Transferring image message
When the scanning is complete, the document appears in the viewing pane, the File Name box is populated, and a document type can be selected from the Memo list.
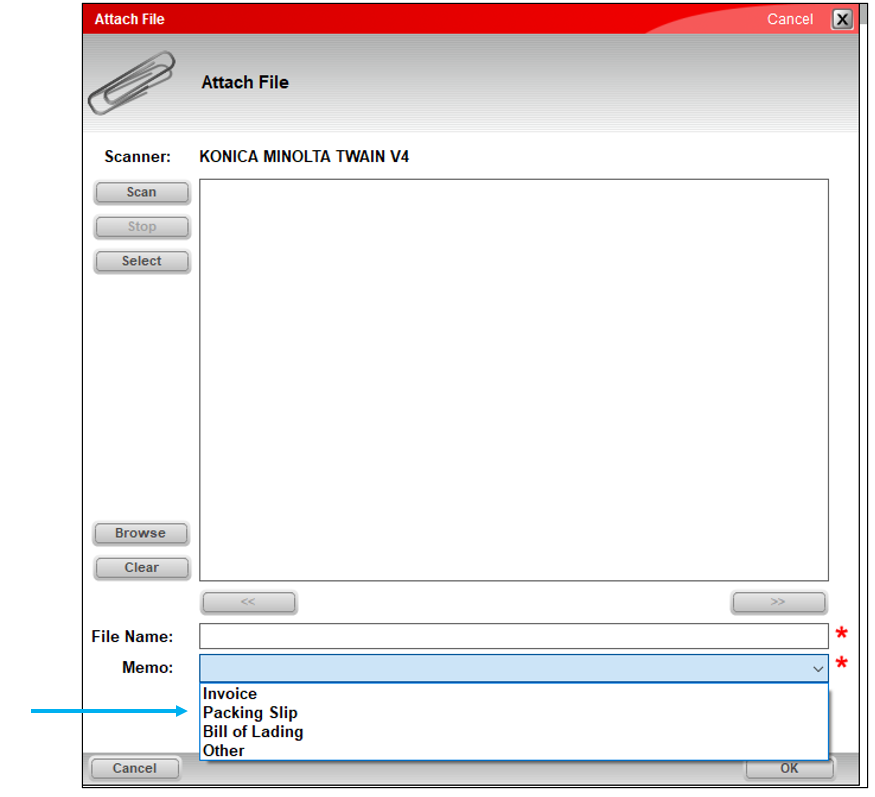
Figure 7: Scanned document in viewing pane
- Click OK.
The scanning process ends, and the scanned document link appears in the Confirm Receive tab under Attached Files. Clicking the file name opens the file.
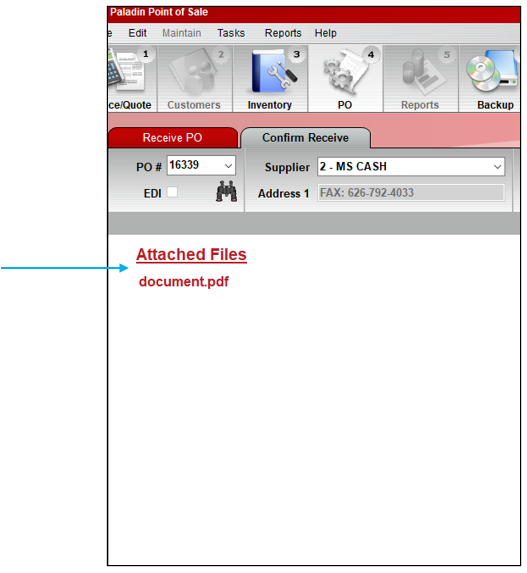
Figure 8: Confirm Receive tab/Attached Files
Find PO function to view and/or attach scanned documents
You can also use the Find PO function to both open existing POs to scan documents to and view POs with attachments.
- In Paladin, from the top ribbon, select the PO module.
- On the bottom ribbon of the Receive PO tab, toggle F5 Mode PO to Mode Receive.
- On the bottom ribbon of the Receive PO tab, click F6 Find PO.
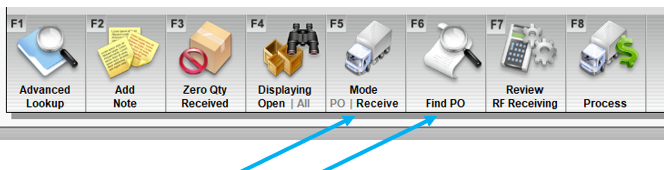
Figure 9: PO module/Mode Receive/Find PO
-
- In the Find PO window, under the Matching Purchase Orders pane, double click a PO to open. You can then go through the process of scanning and attaching files.
- In the Find PO window, under the Matching Purchase Orders pane, POs with a paper clip icon indicates that files are attached.
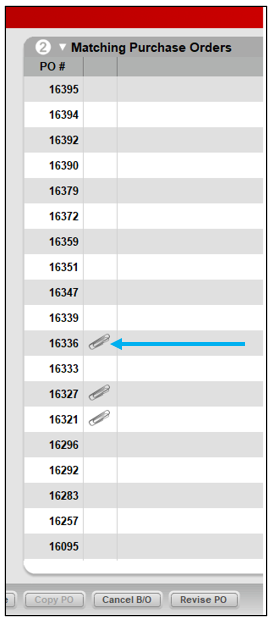
Figure 10: Matching PO/Paper clip icon
Clicking the paper clip icon opens the Purchase Order Documents window showing documents that are attached to the PO.

Figure 11: Purchase Order Documents window
- Click the magnifying glass to open and view the attachment.
Additional Functions
- You can copy a file from your file explorer and paste it into the viewing pane of the Attach File window.
- You can copy text, attachments, and images from Outlook and paste them into the viewing pane of the Attach File window.
- If Paladin is run in administrator mode, and Outlook is run in administrator mode, you can drag and drop text, attachments, and images from Outlook into the viewing pane of the Attach File window.
If you have questions or suggestions about this information, contact support@paladinpos.com.
