
This article provides instruction and information on the following:
- How to send an Orgill purchase order
- How to send an Orgill purchase order with Orgill Store Front
- How to download and process files from Orgill
- Delayed Receiving
- How to process dummy order files
- Option: Discontinuing parts
Note: After successfully downloading EDI, follow the steps in the following KBA to generate your bin tags or shelf tags: Batch and print EDI price changes on full sheet bin tags or shelf tags
How to send an Orgill purchase order
- In Paladin, on the top ribbon, select the PO module.
- In the Purchase Order tab, do one of the following actions:
- Create a PO
- Recall a Suggested Order
- Recall a saved PO
- Select Orgill from the Supplier list.
- On the bottom ribbon of the module, click F8 Confirm PO. The Confirm PO tab opens.
- On the bottom ribbon of the module, click F1 Buy.
- In the PO Number window, enter a PO Number or use the default number, then click Next.
- In the PO Complete window, click Done. Your purchase order will automatically upload to Orgill.
- Check your email account for a confirmation message from Orgill.
How to send an Orgill purchase order with Orgill Store Front
Note: If you do not know which upload process to use, contact Paladin Customer Service.
- In Paladin, on the top ribbon, select the PO module.
- In the Purchase Order tab, do one of the following actions:
- Create a PO
- Recall your Suggested Order
- Recall a saved PO
- Select Orgill from the Supplier list.
- On the bottom ribbon of the module, click F8 Confirm PO. The Confirm PO tab opens.
- On the bottom ribbon of the module, click F1 Buy.
- In the PO Number window, enter a PO Number or use the default number, then click Next.
- Open external Web browser (outside of Paladin) and browse to Orgill.com
- Log in to the Orgill storefront.
- Click Resources, Order Entry Tools, then click Order Upload.
- At the bottom of the screen, click Browse, select the ORGILL_PO.csv file located in C:\PaladinPOS\Export, then click Open.
- Click UPLOAD. Your purchase order will upload to the Orgill Store Front. You can review your items before adding them to your shopping cart.
How to download and process files from Orgill
- In Paladin, on the top ribbon, select the Inventory module.
- On the bottom ribbon, click F9 EDI.
- In the EDI Processing window, click Download Files.
- In the EDI Maintenance Processing window, select Orgill, then click OK.
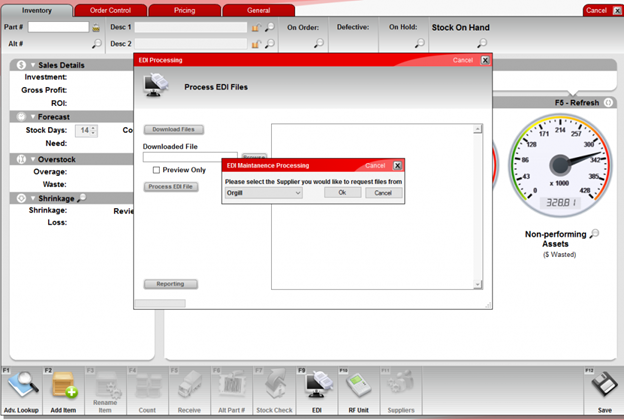
Figure 1: EDI Maintenance Processing window
- In the Download Complete window, three file types appear:
- xxxxxx.oin – Invoice file
- xxxxxx.opc – Price change file
- xxxxxx.dat – Maintenance file
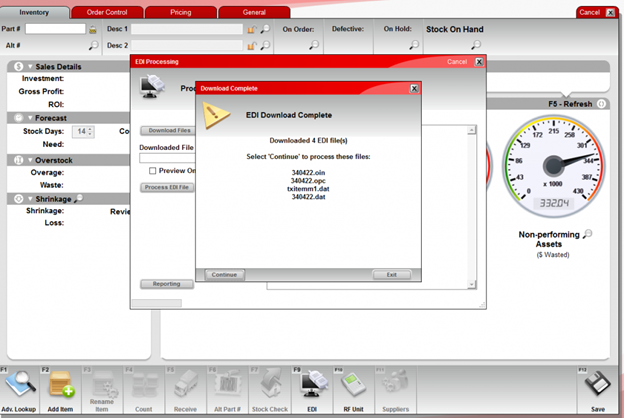
Figure 2: Download Complete window
- Click Continue.
- Select any purchase order that you want to close, then click Close PO’s.
Note: Paladin closes all filled POs; therefore, only open POs appear in the Matching Purchase Orders pane of the Find PO window.
- To review the reports associated with the corresponding file downloads, in the EDI processing window, click Reporting, click the Record number, then click Get Selected Report.
Delayed Receiving
On the occasion that data on an order arrives before the actual order, the Receive Delayed SOH option is available in the EDI Reporting window.
Note: Paladin Support will have to activate delayed receiving to use this option.
To perform this:
- In Paladin, from the top ribbon, select the Inventory module.
- On the bottom ribbon of the module, select F9 EDI.
- In the EDI Processing window, press Reporting.
- In the EDI Reporting window, highlight the order, and at the bottom of the window, press Receive Delayed SOH.
Note: If freight cost was created in the order, press Apply Freight before pressing Receive Delayed SOH.
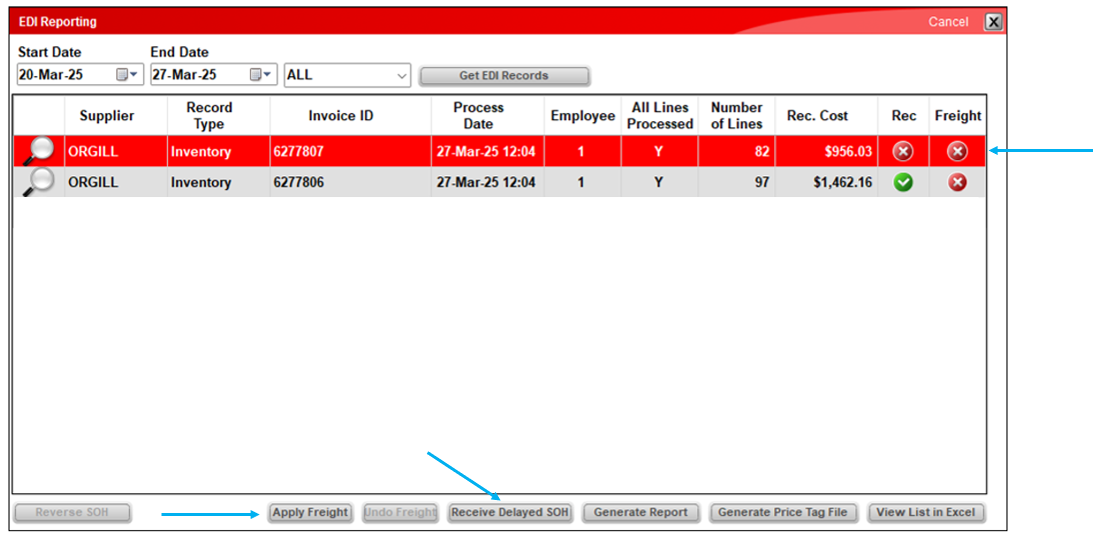
Figure 3: EDI Reporting window/ Receive Delayed SOH
How to process dummy order files
- In Paladin, on the top ribbon, select the Inventory module.
- On the bottom ribbon, click F9 EDI.
- In the EDI processing window, click Browse.
Note: You may need to browse to C:\PaladinPOS\Export\Orgill.
- In the Open window, in the Dummy Order Files folder, select the .dat file for your Orgill store number. Make sure that the file has the correct date.
Note: If you cannot see the date, click View, then click Details.
- Click Open.
- In the EDI Processing window, click Process EDI file.
- Click Reporting to view the file that will be loaded into your Obscure Inventory.
- If you have received stock for these products, you can count the items or receive the items from a purchase order.
Option: Discontinuing parts
To discontinue parts:
- In Paladin, from the main menu, select File > Setup.
- Select the Company tab.
- In the EDI pane, check Enable EDI.
- Check Require primary partnumber match to discontinue parts (Orgill Only).
- Click Save, then click Close.
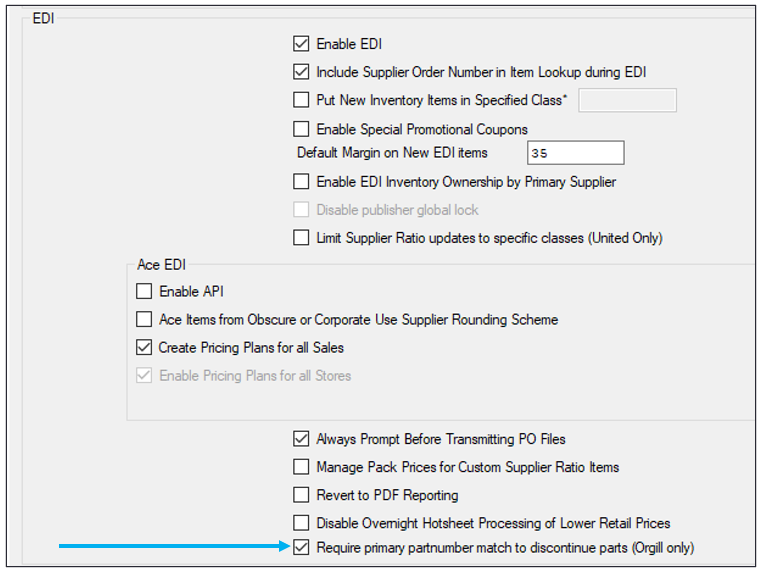
Figure 4: Require primary partnumber match to discontinue parts (Orgill Only) checkbox
When this is enabled, Orgill maintenance files will not mark a part as discontinued unless that part’s primary part number in Paladin matches the order number (Catalog Item Number) transmitted in the EDI file.
If you have questions or suggestions about this information, contact support@paladinpos.com.
