
The following Orgill Promotional Pricing files are available for download from Orgill’s PROMOPRC folder.
- Advantage Promotional Pricing file: get SCRADV.DAT
- Regular Promotional Pricing file: get SCRREG.DAT
- VP1 Promotional Pricing file: get SCRVP1.DAT
- VP2 Promotional Pricing file: get SCRVP2.DAT
The files create multiple sales lists in Paladin Configuration at File > Setup > Sales Lists
Paladin EDI does not directly use these files but can process them when performed manually.
Note: Use of the files do NOT automatically create a Pricing Plan.
This article provides information and instruction on the following:
Retrieving the files
To retrieve Promotional Pricing files:
- On your browser, enter filezilla-project.org
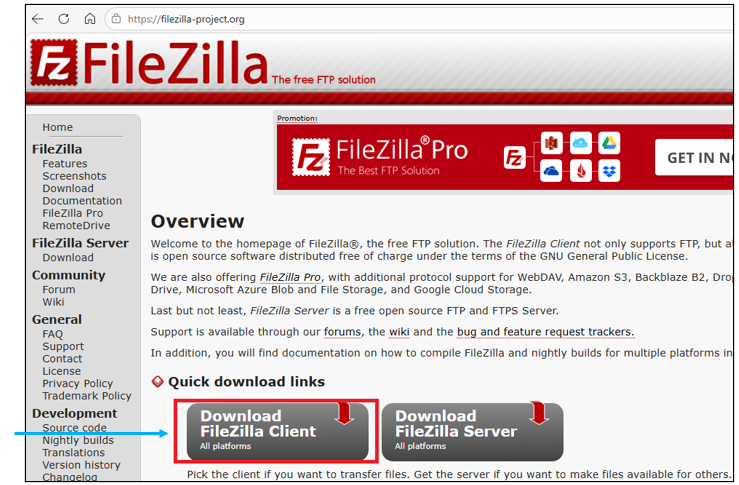
Figure 1: FileZilla site
- Download the FileZilla Client and install it.
-
Reach out to Paladin support to help you set up the connection. This will require:
-
- Host: orders.orgill.com
- Username: (provided by Paladin support)
- Password: (provided by Paladin support)
These are loaded into the corresponding fields shown in Figure 2.

Figure 2: FileZilla connection properties
The PROMOPRC folder opens.
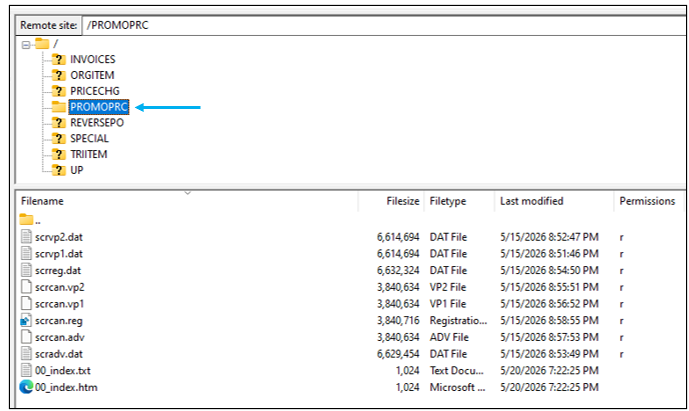
Figure 3: PROMOPRC folder
- Click on the PROMOPRC folder to populate the lower window.
- Right click and select the Promotional Pricing file to download.
- Save the file locally on your computer.
Paladin Setup
- In Paladin, select the Inventory module.
- On the bottom ribbon of the module, select F9 EDI.
The EDI Processing window opens.
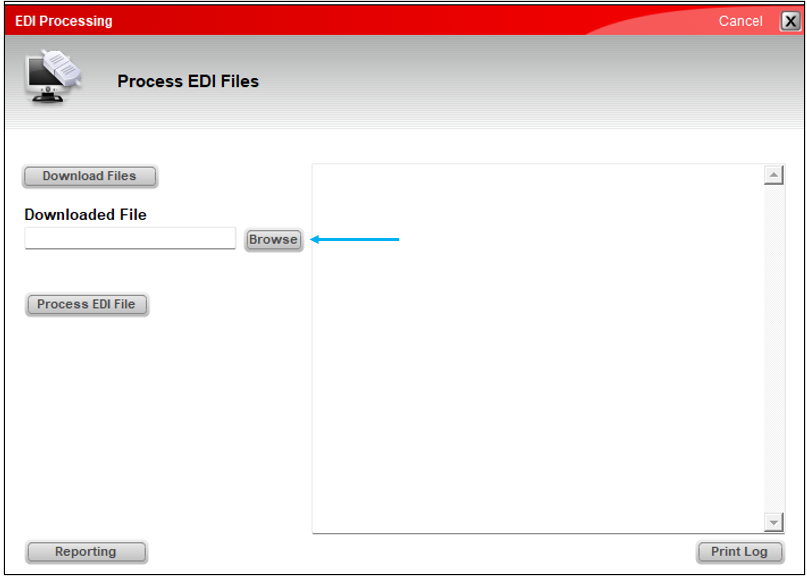
Figure 4: EDI Processing window
- Click Browse to select the Promotional Pricing file you downloaded.
- After the file is downloaded, click Process EDI File.
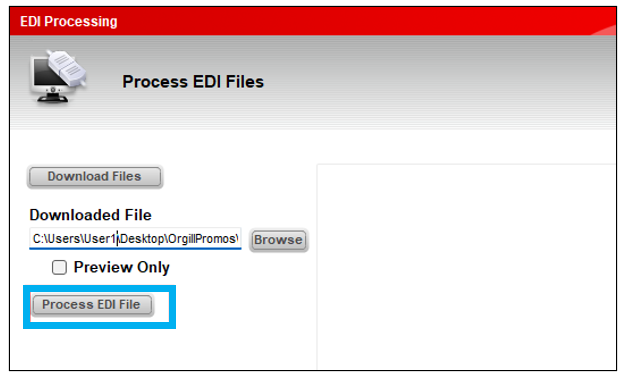
Figure 5: Process EDI Files
The process populates the EDI Processing window.
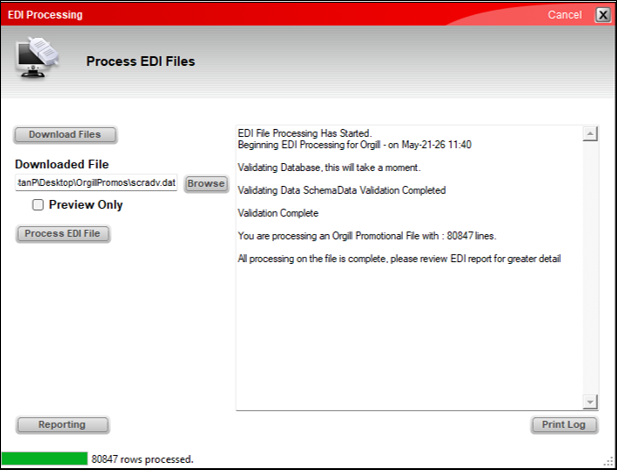
Figure 6: Processed file
- After processing is complete, click on Reporting.
The EDI Reporting window opens.
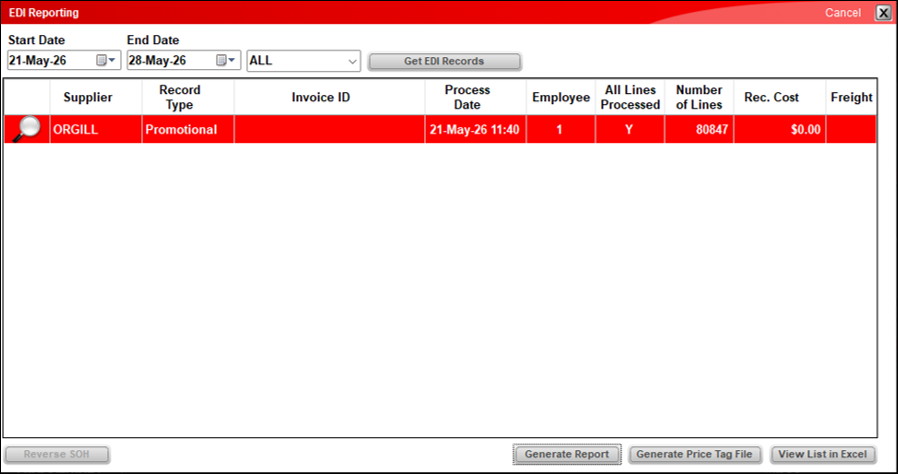
Figure 7: EDI Reporting window
- Clicking on the magnifying glass creates a Sale List Summary with updates/changes made.
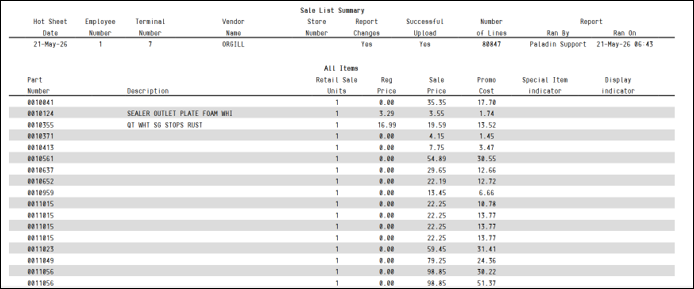
Figure 8: Sale List Summary
- After processing is complete, in Paladin, form the main menu, select File >Setup.
- Select the Sales List tab.
You will see the number of new sales lists created.
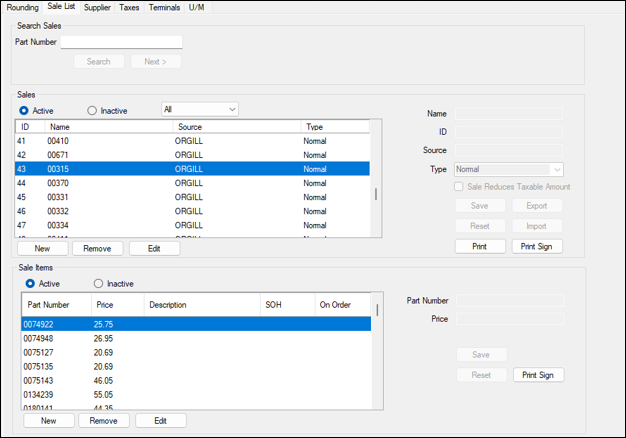
Figure 9: Sale List
If you have questions or suggestions about this information, contact support@paladinpos.com.