
This article provides instruction and information on the following:
- How to look up an inventory item
- How to view history of location settings for inventory items
- How to add inventory items to alternate locations
- How to remove inventory items from a location
How to look up an inventory item
If you do not know the specific part number or need to find multiple inventory items:
- In Paladin, on the top ribbon, select the Inventory module.
- On the bottom ribbon of the module, select F1 Adv. Lookup.
- On the top of the Advanced Lookup window, select from the following lookup options:
- Class
- Department
- Location
- Supplier
- Keyword
You can enhance these options by checking one or several of the following:
-
- Exact Phrase
- All Stores
- Include Special Order Items
Note: The All Stores and Exact Phrase checkboxes are only visible when Keyword is enabled.
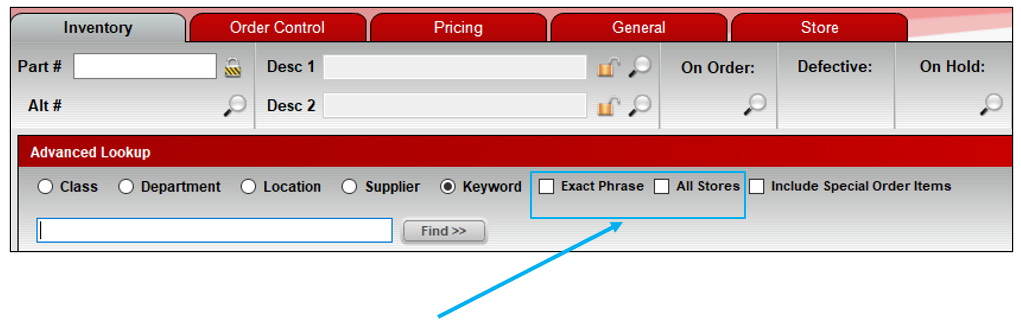
Figure 1: Exact Phrase and All Stores checkboxes
How to view history of location settings for inventory items
To view history of location settings for an inventory item:
- In Paladin, on the top ribbon, select the Inventory module.
- Select the General tab.
- in the Item Information pane, click the Location magnifying glass.
The Location History window opens providing the location history of an inventory item.
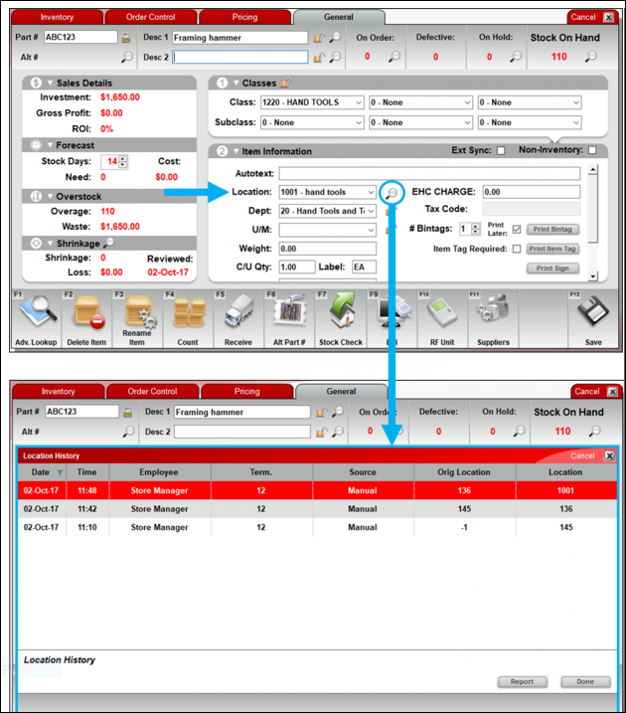
Figure 2: Location history of inventory item
All part numbers that are assigned to a specific location appear in Paladin Configuration > Loc > Inventory with this location.
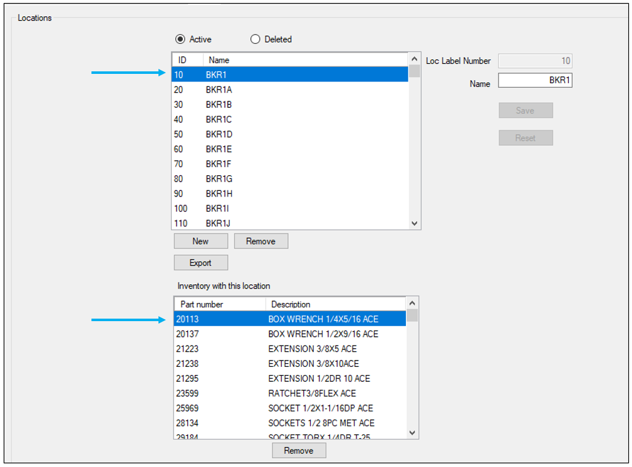
Figure 3: Part numbers assigned location
How to add inventory items to alternate locations
Important: This functionality requires Schema 4.7.1
Note: Data validation creates a default location (0 – None) in the locations table. All items that do not have a location assigned to them, will be assigned location 0. If location 0 previously existed, Paladin migrates that location to the next available number.
Often times an item will be located in alternate (multiple) locations around a store. To assign alternate locations for such items:
- In Paladin, select the Inventory module.
- In the Part # box, enter a part number and press Enter. Note: You can also use F1 Adv. Lookup on the bottom of the module to find a part.
- In the Inventory module, select the General tab.
- In the Item Information pane, press the down arrow in the Location list.
The Locations window opens.
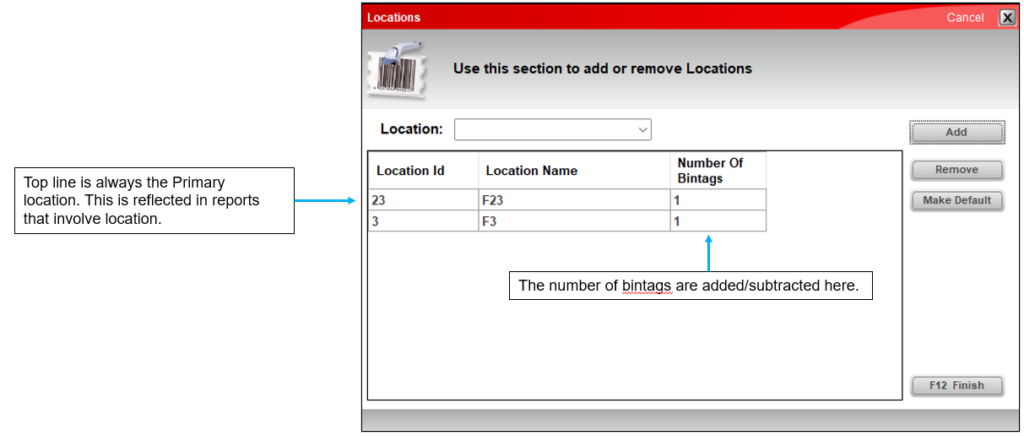
Figure 4: Locations window
- Select locations from the Location list.
- Click Add.
- Click F12 Finish.
Note: The top Location ID is always the primary location, and this is reflected in reports that involve location. Also, the number of bin tags needed is now added by selecting #Bintags list arrows in the Inventory module/General tab/ Item Information pane, which opens the Locations window where the Number Of Bintags can be adjusted.
Note: The number of Bintags value persists when removing all locations or when changing from location None to another location.
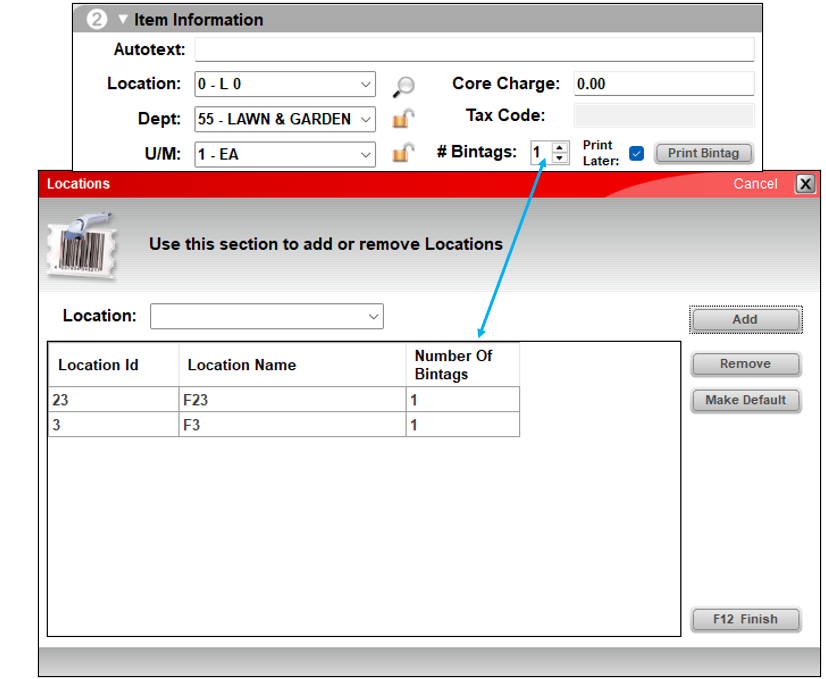
Figure 5: Adding bintags
How to remove inventory items from a location
You can also use Inventory with this location to selectively remove (disconnect) active inventory part numbers assigned to a location.
This is especially useful when you want to delete a location that is referenced by active inventory items.
When you remove an item, two things occur:
-
- The item’s location is set to the default value 0-None.
- The location is also removed from any deleted (non-active) inventory items. This additional clean-up prevents deleted items from pointing to a non-existent location if they are returned to active inventory.
To remove inventory items from a location:
- In Paladin, from the main menu, select File > Setup.
- Select the Loc tab.
- In the Locations pane, in the location ID and Name list, highlight the location you want to view. The part numbers for all the active inventory items in the location appear under Part number in the Inventory with this location list.
- Optional: To remove (disconnect) a part number (inventory item) from the selected location, in the Inventory with this location list, highlight the part number, then click Remove. Repeat this step for all of the part numbers that you want to remove.
- Optional: If you want to delete the location after you have removed all its items, with the location still highlighted, below the list of locations, click Remove.
- When you are finished, click Save, then click Close.
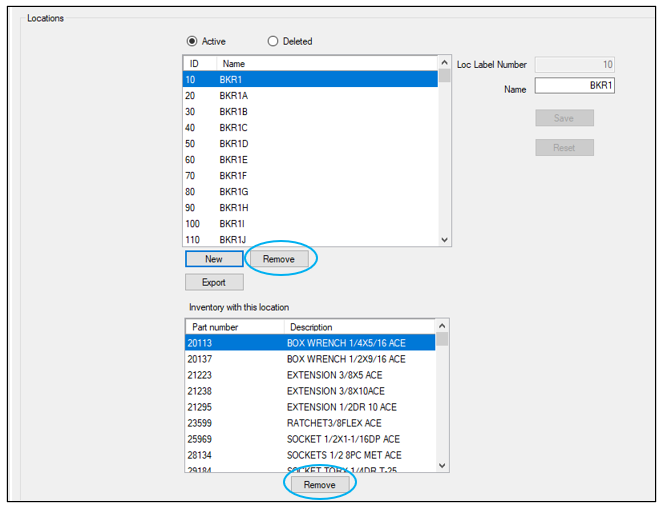
Figure 6: Remove (disconnect) active inventory part numbers assigned to a location/Remove Location
If you have questions or suggestions about this information, contact support@paladinpos.com.
