
The Farmer’s Co-op Society (FCS) integration allows FCS clients to track accounts receivable when Paladin is their point of sale.
In Paladin, FCS clients can manually generate a daily export file of all invoices to upload. FCS clients can manually browse to a customer update file and process it to add new customers and update existing customers.
This article provides instruction and information on the following:
Important: As per FSC request, Subclass 2 is used as the part number.
Set up the FCS integration
- In Paladin, from the main menu, select File > Setup.
- Select the ExternalSync tab.
- In the External Sync Configuration pane, select FCS from the Select Type list.
- In the FCS pane, check FCS Enabled.
- Click Save, then click Close.
Note: FCS does not allow multiple tenders/split payments involving store credit. If this is done, accounts receivable will be incorrect in Control Sys.
Import customer data
- In Paladin, from the top menu, select Maintain > Data Viewer.
- In the Data Viewer window, select the Customers tab.
- Select the Import tab, and from the File Type list select FCS.
- Click Browse to find your customer update file (PTSTMT006.IBM)
- Click Import.
- A taskbar at the bottom of the window runs giving the status of the import.
- When import is complete, the Information pane shows that the import/saving of customer data is Done. On the bottom of the window, a message states Import Complete.
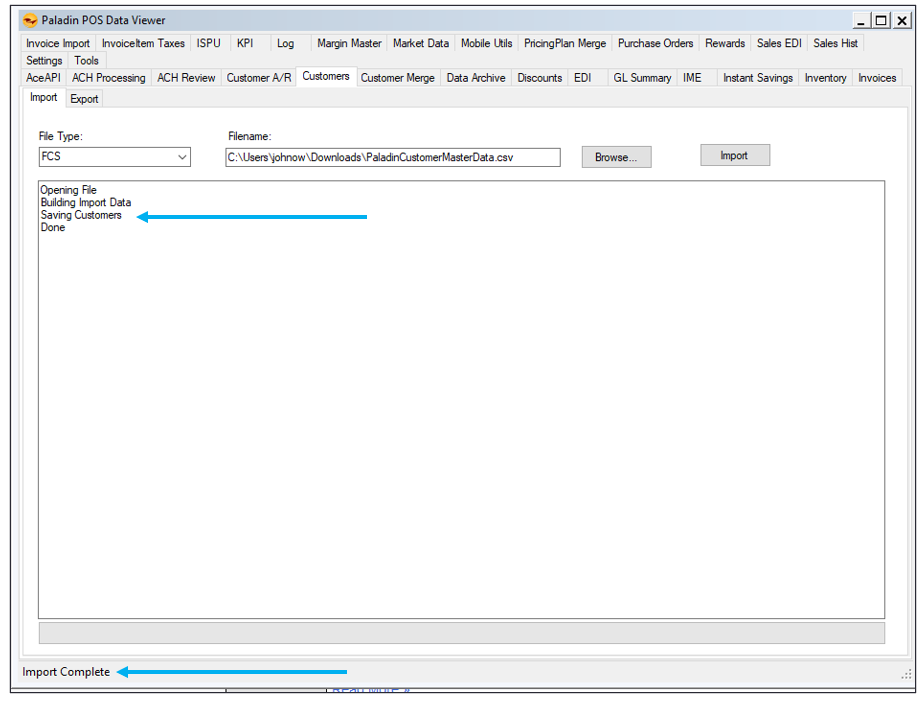
Figure 1: Import Complete message
Note: If the file/data doesn’t match the specs, the Customer Import window opens with a message stating Data in this file does not correspond to the published standard for this file type or contains data that is not allowed.
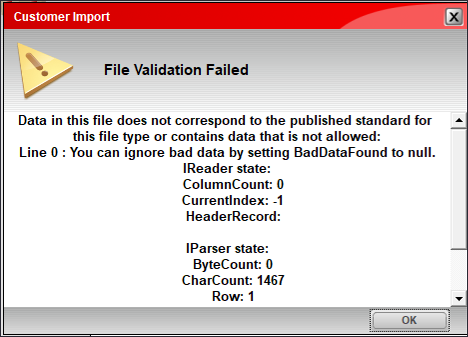
Figure 2: Customer Import window/File Validation Failed message
Export invoices
- In Paladin, from the top menu, select Maintain > Data Viewer.
- Select the Invoices tab.
- Select the Export tab.
- From the Export File Template list, select FCS.
- Select a Beginning and End date.
- Click Export.
- In your browser, navigate to the location to save the file.
Note: The file name is PTSTMT006.IBM - Click Save.
- In the Progress pane of the Data Viewer window, the upper box provides the message Writing data to file. The lower window runs giving the status of the export.
- When complete, the Progress pane clears.
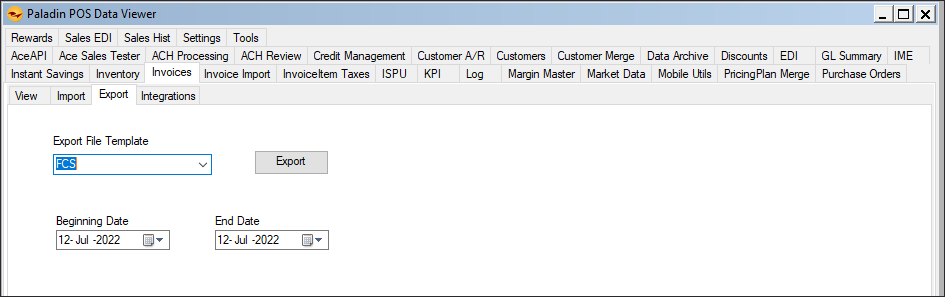
Figure 3: Paladin Data Viewer window/Progress complete/Pane cleared
Notes:
- Returns have trans type ‘R’.
- Negative amounts have trans type ‘M’.
- Negative signs are no longer included in the file.
- Paid on account descriptions say ‘PAID ON ACCOUNT’.
- Per FCS, the export file position 72-81 will now export the “PO Number” of the invoice.
If you have questions or suggestions about this information, contact support@paladinpos.com.
