
To include Automated Check Handling (ACH) data in the GL Summary, the following must be set:
- In Paladin, from the main menu, select File > Setup.
- Select the Accounting tab.
- In the Asset Accounts pane, check Include ACH.
- Enter the ACH account number in the ACH Account box.
- Click Save, then click Close.
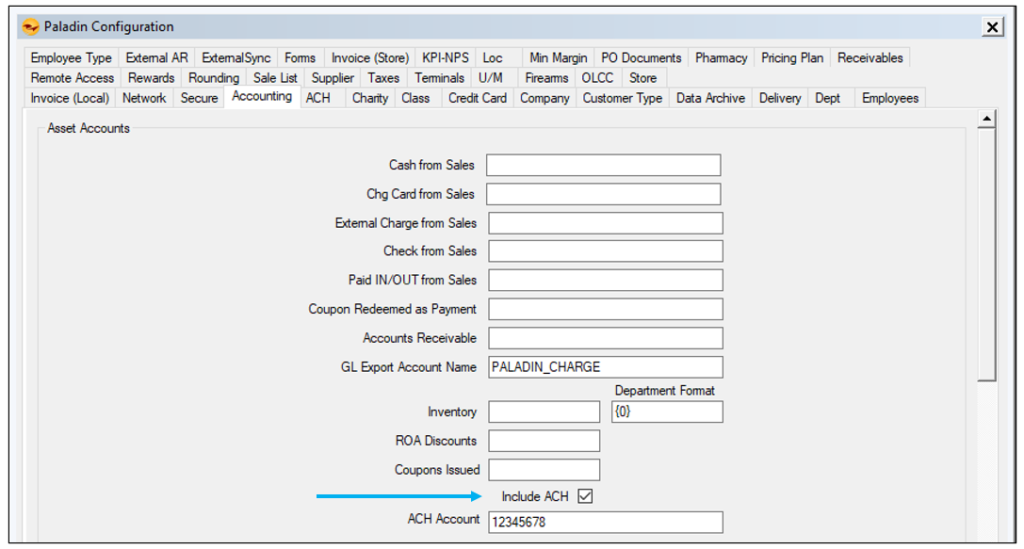
Figure 1: Accounting tab/ACH option
To assign ACH to checks during the checkout process in Paladin:
Note: Include ACH must be checked in the Accounting tab (instructions above) for the ACH checkbox to appear in the Check Processing window (referenced below).
- In Paladin, on the top ribbon, select the Invoice/Quote module.
- On the bottom ribbon of the module, Click F8 Checkout.
- On the bottom ribbon of the Checkout tab, select F4 Check and press Enter.
- The Check Processing window opens.
- Enter the check number in the Check # box.
- Enter a name in the Name box.
- Check ACH.
- Click Next, then click Done.

Figure 2: Check Processing window/ACH checkbox
The amounts checked as ACH show in the GL Summary report.
Note: For the ACH row to appear in the GL Summary report, Include ACH must be checked in the Accounting tab (Figure 1 above) , and ACH must be checked in the Check Processing window (Figure 2 above),
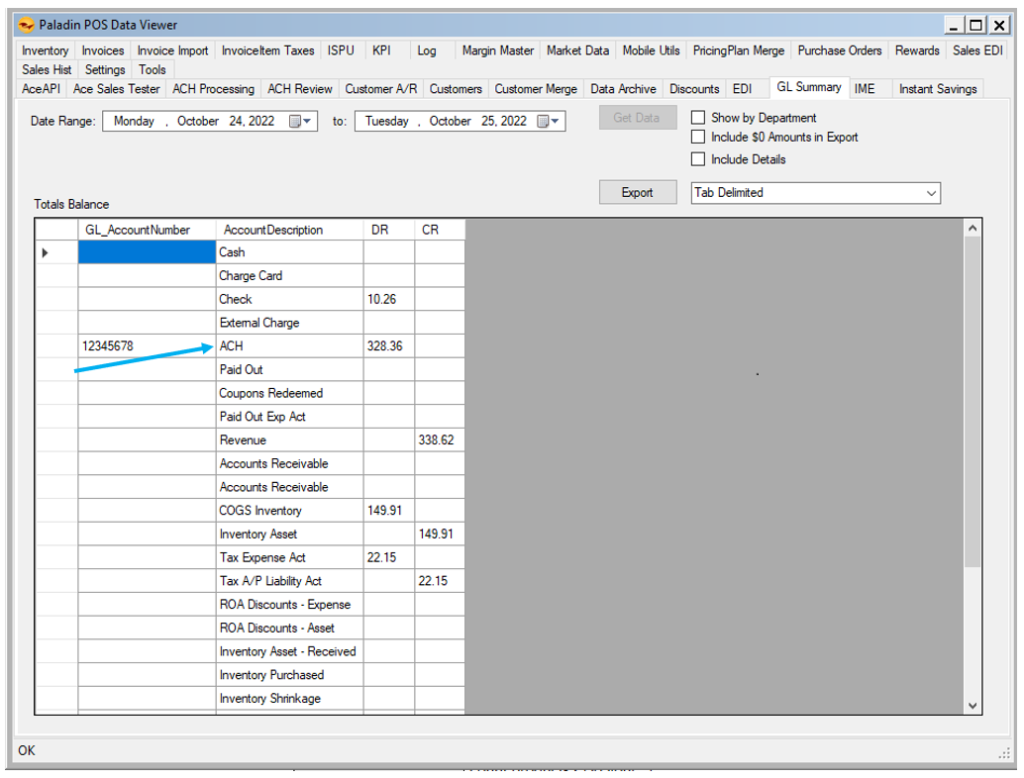
Figure 3: ACH amount in GL Summary
If you have questions or suggestions about this information, contact support@paladinpos.com.
