PaladinGo™ allows you to sell from anywhere with an Internet connection. Available for Android and IOS devices, the app’s intuitive design and easy-to-learn interface lets you make sales and process returns. The app supports payment using cash and credit cards (BlockChyp processing uses the Equinox Luxe 6200M device, and triPOS uses the Link/2500 LE device).
PaladinGo lets you:
- Add a customer to the invoice from your Paladin customer database
- Scan and add items to the invoice using the camera on your device
- Search for and add items to the invoice from your Paladin inventory database
- Add items to the invoice manually by part number
- Change the price of items at point of sale
- Modify an invoice item’s quantity and price
- Recall Quote, Special Order, and On Hold invoices
- Calculate sales tax based on the store’s sales tax settings
- Accept cash, credit card, and charge payments
- Save invoice to Paladin
For navigation, the top of the Checkout module has the following functions:
- House icon takes you back to the PaladinGo Dashboard.
- Person icon provides user information and where you go to Logout of PaladinGo.
The three vertical dots on the right side opens a list with the following:
- Recall Invoice: Opens the Recall Invoices pane showing Quote, Special Order, and On Hold.
- Save Invoice saves the invoice in the store’s Paladin terminal.
- X Clear cancels the entire invoice.
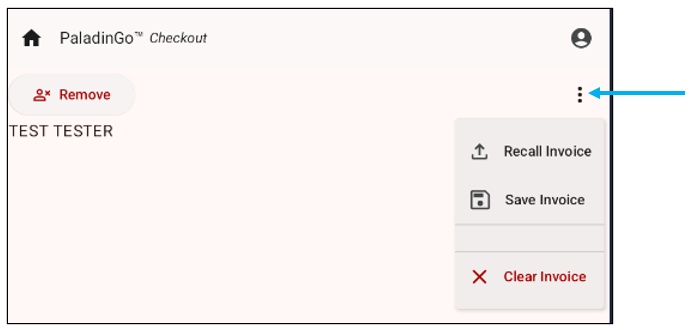
Figure 1: Top of Checkout module
The following is performed in the Checkout module:
Customer Lookup
When the module opens, the following is displayed to search for/look up a customer:
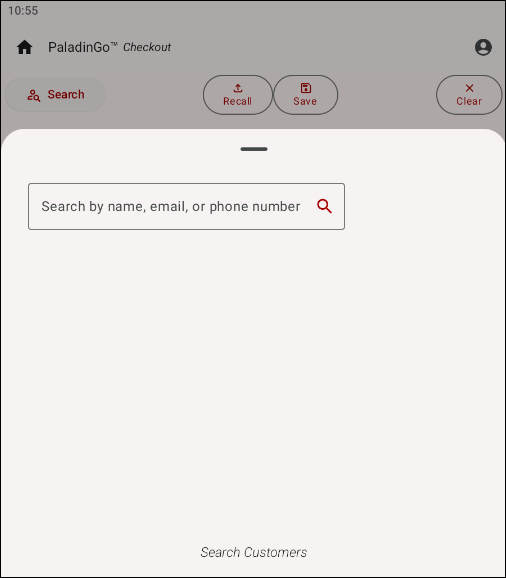
Figure 2: Search Customers
In the Search Customers screen, you can search by name, email, or phone number.
- Enter your criteria and tap the Magnifying Glass icon on your device.
The Search Customers screen populates with search results.
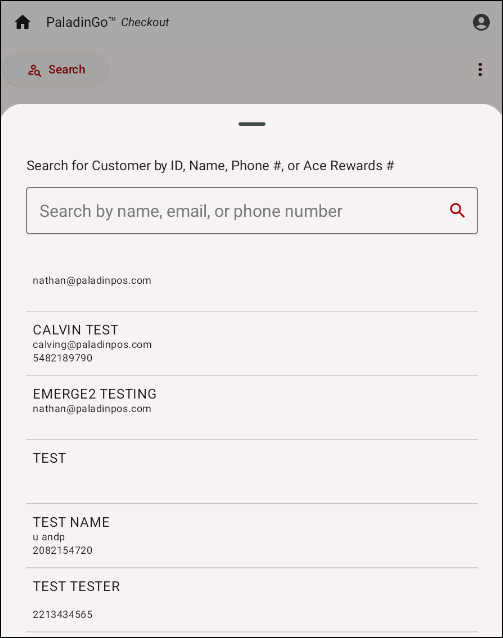
Figure 3: Customer results
- Tap on the customer name for the transaction.
The name appears on the top of the Checkout module.
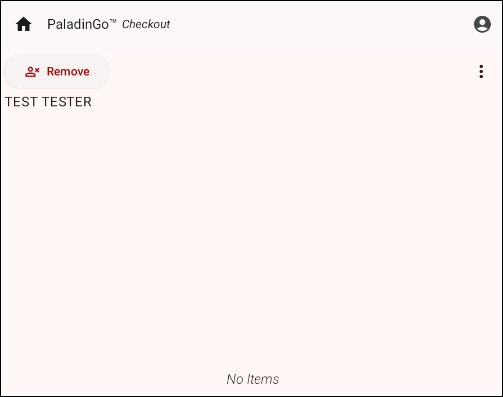
Figure 4: Customer name on Checkout module
Note: You can remove a customer by tapping Remove above the customer name in the upper left of the screen.
Adding Parts
Once a customer is selected, in the Checkout module, you have the following look up options:
- Manually enter the part number
- Scan the part
- Search for the item
- Remove/Clear an item
- Edit item quantity
- Edit Item Price
- Stock Check
Manually enter the part number
To manually enter a part number:
- In the Part Number field, enter the part number.
- Tap Add.
The part will be added to the Checkout module. If the part number does not exist in the store’s inventory, or the number was entered incorrectly, No Items is shown in the middle of the screen.
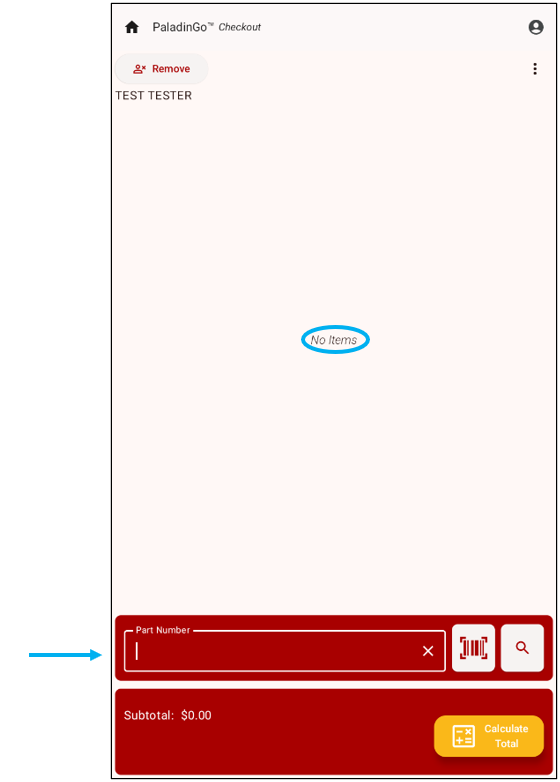
Figure 5: Part number field/No Items message
Scan the part
To scan a part number:
- Tap the QR code icon.
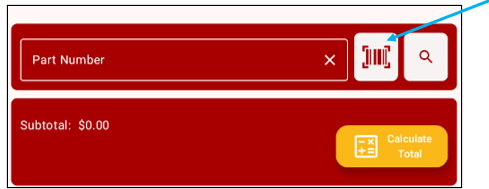
Figure 6: QR code icon
The camera of the device opens.
- Center the barcode of the item in the camera window.
When the barcode is recognized, the camera will take the image. The part will then show on the Checkout module.
Search for the item
- Tap the Magnifying Glass on the bottom ribbon of the module.
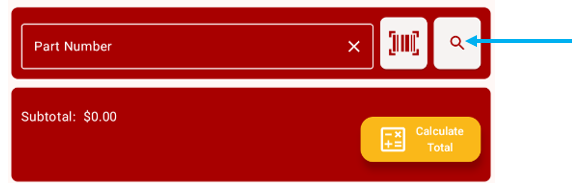
Figure 7: Magnifying glass icon
The Search screen opens.
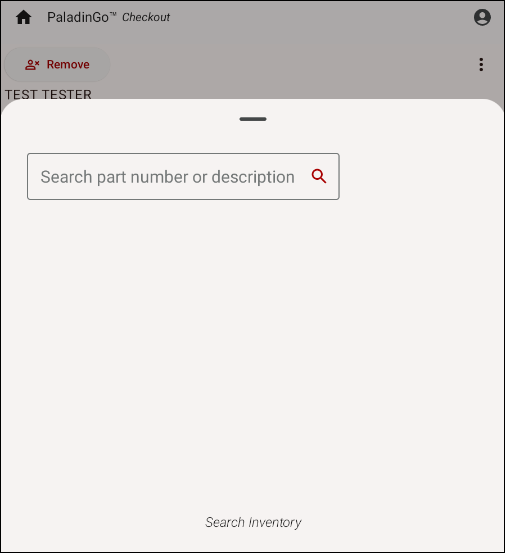
Figure 8: Search Part
- Enter either a part number or a description of the part in the Search field, then tap the Magnifying Glass icon next to the description field.
If a description is used, a screen opens with options for items in that description type. If a part number is entered, just that part will appear.
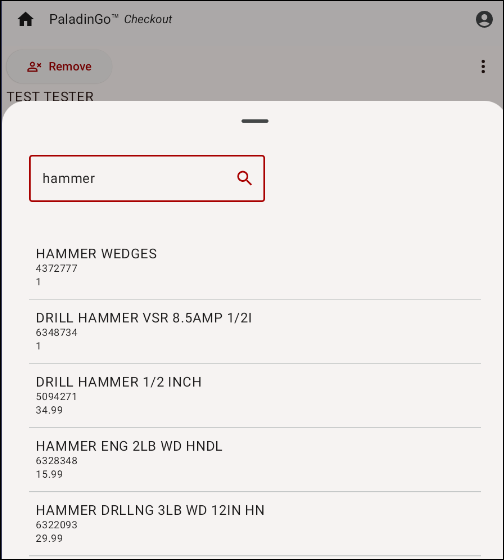
Figure 9: Parts in Search
- Select the desired part.
The part then appears in the Checkout screen.
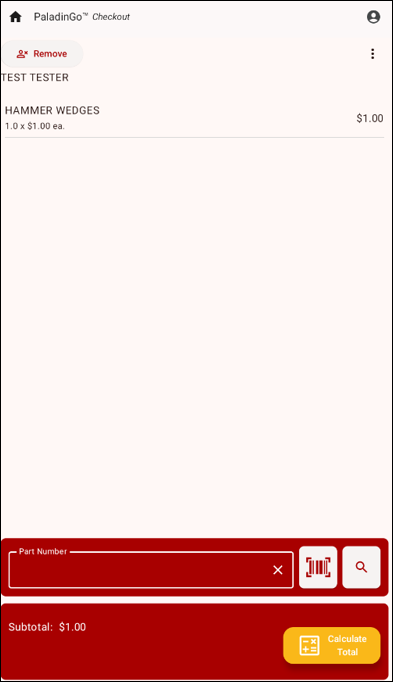
Figure 10: Part in Checkout screen
Remove/Clear an Item
To remove an item from the Checkout module:
- On the top right of the module, tap the three vertical dots and select Clear Invoice..
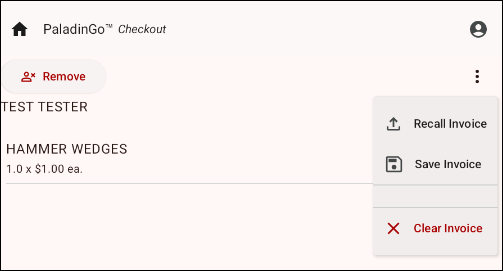
Figure 11: Clear Invoice
The entire invoice is cleared from the Checkout screen.
Edit item quantity
Once a part has been found, the order quantity can be edited.
- Tap on the specific part (note that in Figure 12, the quantity is 1.0)
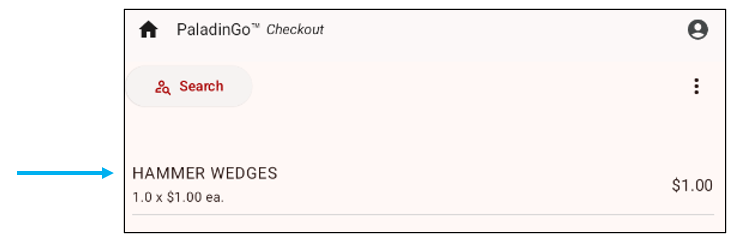
Figure 12: Part quantity
The Edit Item pane populates on the bottom of the Checkout screen.
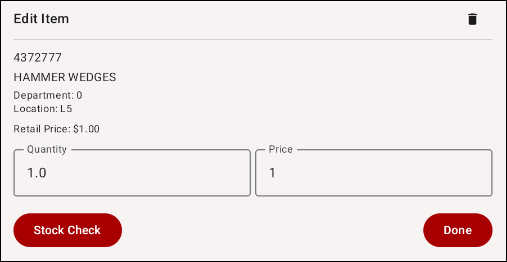
Figure 13: Edit Item
- Make change to the quantity desired in the Quantity field.
- Tap Done.
Note: If you want to remove the item, tap the trash can icon in the upper right of the Edit Item pane.
The Checkout screen populates with the part and the changed quantity (from 1.0 in Figure 12 to 4.0 in Figure 14).
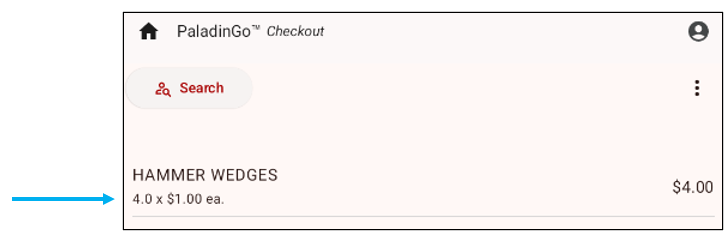
Figure 14: Quantity change
Edit Item Price
The price of an item can be edited in the Checkout module.
- Tap on the specific part.
The Edit Item pane populates on the bottom of the Checkout screen.
Figure 15: Edit Price
- Changes can be made to both the price and quantity.
- Tap Done.
Note: If you want to remove the item, tap the trash can icon in the upper right of the Edit Item pane.
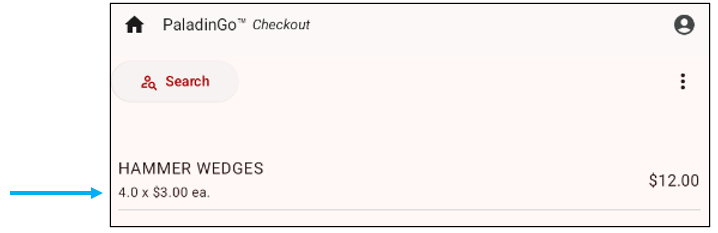
Figure 16: Price change
Note that the Retail Price has changed from $1.00 (Figure 15) to $3.00 (Figure 16).
If the Price Change is below the margin for the item, the Manager Approval Required message opens.
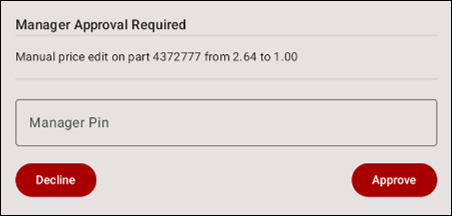
Figure 17: Manager Approval Required message
- Enter a manager pin in the Manager Pin field.
- Tap Approve.
The price change will now be applied to the sale of the part.
Stock Check
Stock check of an item can be edited in the Checkout module.
- Tap on the specific part.
The Edit Item pane populates on the bottom of the Checkout screen.
- Tap Stock Check.
Stock check for the available locations and suppliers is shown.

Figure 18: Stock Check
Note: If you want to remove the item, tap the trash can icon in the upper right of the Edit Item pane.
Finalize sale
Sales can be finalized using either:
Note: A credit card processor must be set. To do this is covered in the PaladinGo™ Settings Module KBA.
Cash
For cash transactions:
- On the bottom of the Checkout screen, tap Calculate Total.
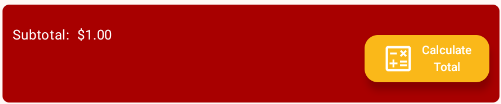
Figure 19: Calculate Total
The subtotal and any applicable tax is shown.
- Tap Checkout.
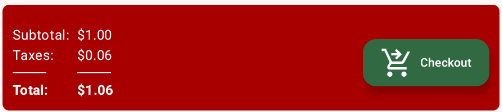
Figure 20: Taxes/Total/Checkout icon
The Customer Message populates the Checkout screen.
- At the bottom of the Customer Message, tap Cash.
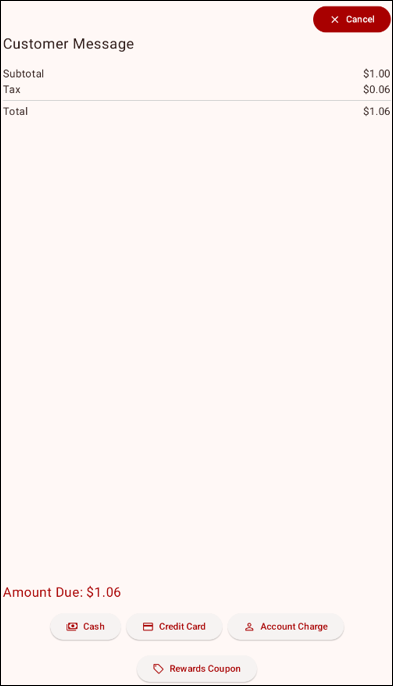
Figure 21: Cash icon
The Enter Cash Payment Account pane opens.
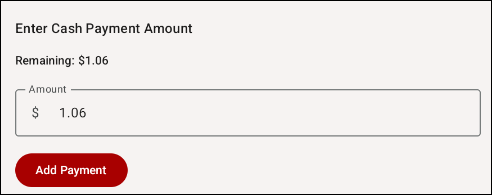
Figure 22: Enter Cash Payment Account pane
- Tap Add Payment.
The Invoice Complete pane opens.

Figure 23: Invoice Complete pane
An email can be entered in the Email (optional) box.
- Tap Complete to finalize the sale.
The cash sale is complete, and you can either continue to add items, or tap the House icon in the upper right to be taken back to the Dashboard page.
Credit Card
For credit card transactions:
- On the bottom of the Checkout screen, tap Calculate Total.
Figure 24: Calculate Total
The subtotal and any applicable tax is shown.
- Tap Checkout.
Figure 25: Taxes/Total/Checkout icon
The Customer Message populates the Checkout screen.
- At the bottom of the Customer Message, tap Credit Card.
Figure 26: Credit Card icon
The Enter Card Payment Amount pane opens.
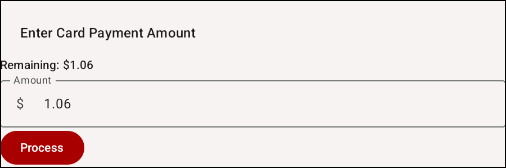
Figure 27: Enter Card Payment Amount pane
- Tap Process.
Account Charge
Note: For Account Charges, the customer must have a Paladin account with a Credit Limit established. This is done through Paladin’s Customers module Credit tab.
- For Account Charges, at the end of the checkout process, tap Account Charge.
The Enter Charge Payment Account pane opens showing the amount of the charge.
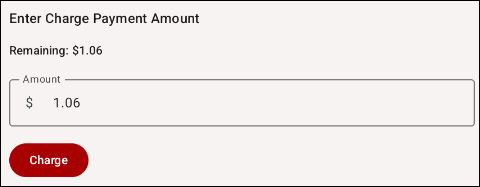
Figure 28: Enter Charge Payment Account pane
- Tap Charge.
The Invoice Complete pane opens.
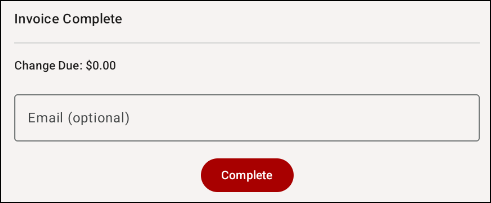
Figure 29: Invoice Complete pane
- Enter the email associated with the account (optional), then press Complete.
PaladinGo Sales in Paladin
Cash, credit card sales, and account charge can be viewed in Paladin.
Note: For security purposes, the following images are for a cash sale.
- In Paladin, select the Invoice/Quote module.
- On the bottom ribbon of the module, select F1 Advanced Lookup.
- Select the History tab.
Enable search parameters (this example is Invoice).
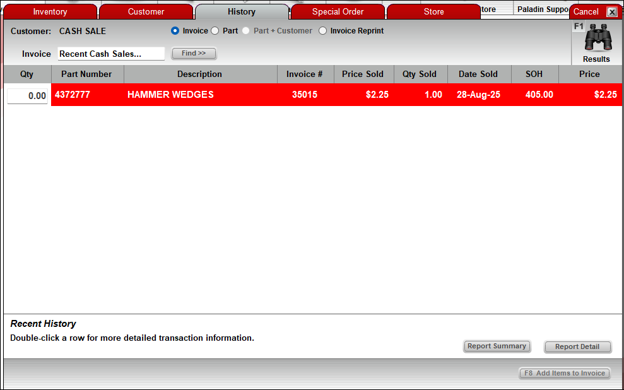
Figure 30: Paladin Invoice/Quote/History tab
- To open an invoice for the sale, highlight and double-click on it.
A PDF Invoice opens.
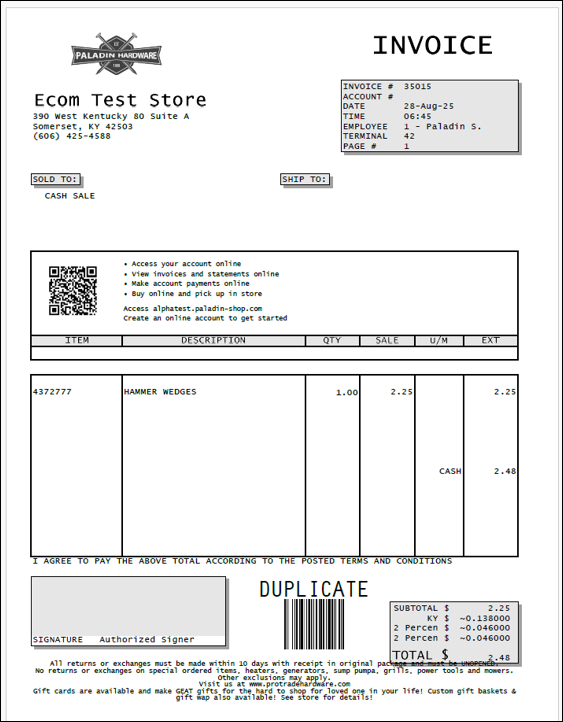
Figure 31: PDF Invoice
Recall invoice
To recall an invoice:
- On the top right of the Checkout module, tap the three vertical dots to open the list.
- Select Recall Invoice.
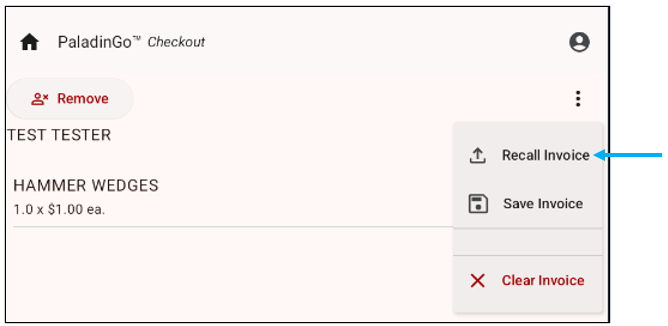
Figure 32: Recall Invoice
The Recall Invoice pane populates on the bottom of the Checkout screen.
Select from the following tabs for the invoice to recall:
- Quote
- Special Order
- On Hold

Figure 33: Recall Invoice
The Checkout module populates with the invoice recalled.
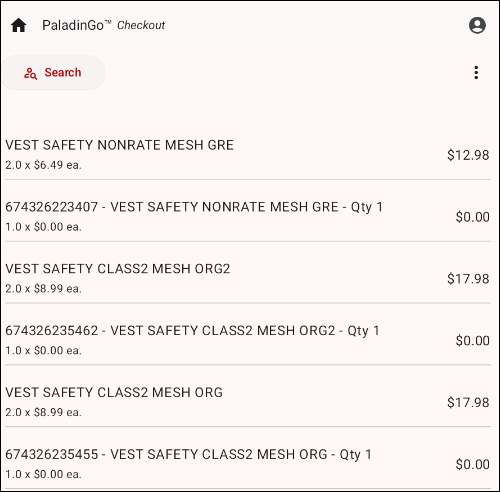
Figure 34: Recalled invoice
Save invoice to Paladin
To store the invoice to Paladin:
- On the top right of the Checkout module, tap the three vertical dots to open the list.
- Tap Save Invoice.
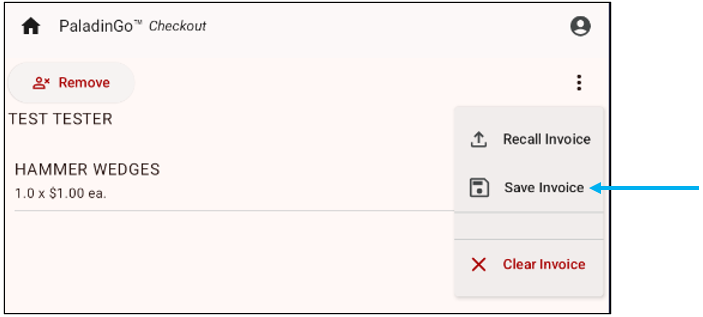
Figure 35: Save/floppy disk icon
The Store Invoice pane opens where you can store the invoice to Paladin as a:
- Quote
- Special Order
- On Hold
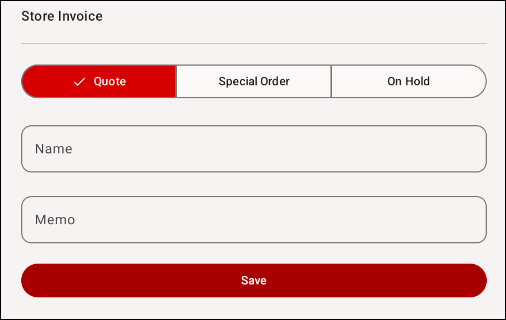
Figure 36: Store Invoice pane
There are several advantages to using the Store Invoice function:
- When purchase are made off site, the sale can be made, and the printed invoice is created/received in-store
- When long lines occur at checkout terminals, invoices can be created so that when customers reach the checkout terminal, the cashier just needs to recall the invoice and finalize the sale.
- When changes are made (pricing updates), managers can recall the invoice and make the changes/updates.
To store the invoice to your store’s Paladin terminal.
- Enable one of the following options:
- Quote
- Special Order
- On Hold
- Enter a name in the Name field (required)
- Enter a note in the Memo field (not required but can be helpful)
- Tap Save.
- In the store’s Paladin terminal, from the top ribbon, select the Invoice/Quote module.
- On the bottom ribbon of the module, select F6 Recall Transaction.
- On the top of the Recall Transaction window, enable the option selected in the mobile device (Quote, Special Order, On Hold).
- Check Show for all customers.
- Locate and highlight the invoice you saved from PaladinGo.

Figure 37: Recall Transaction window
- Click F12 Recall.

Figure 38: Recalled invoice
- In the Invoice/Quote tab, click F8 Checkout.
- In the Checkout tab, finalize the invoice.
If you have questions or suggestions about this information, contact support@paladinpos.com.