
Important: Lane 7000 and 8000 require NETePay version 5.7.33
Note: The following procedures must be done in the following order:
Set up the Lane 7000 or Lane 8000 device
- Plug in the Lane 7000/8000 device(s) to an electrical outlet ONLY. Do not connect it to the computer.
- On the computer where the Lane 7000/8000 device will be connected, go to http://datacapepay.com
- From the Client Controls list, download dsiEMVUS, dsiPDCX, and DSIClientX.
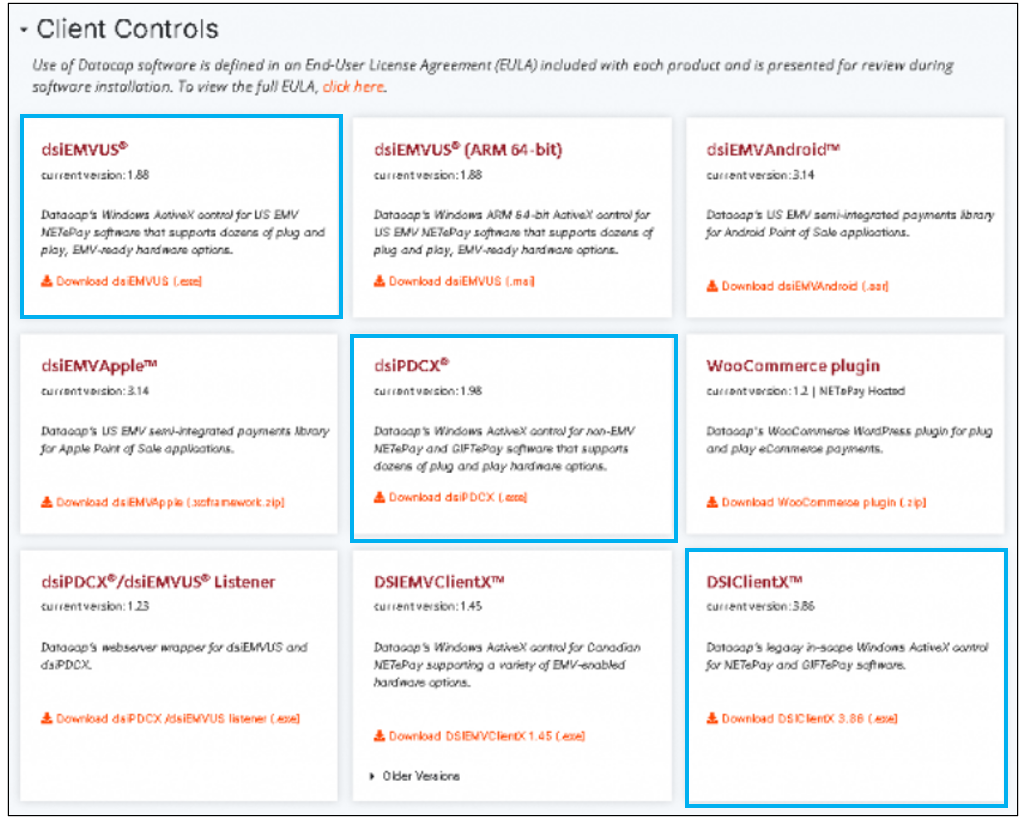
Figure 1: Client controls
- From the Device Drivers list, download the Ingenico Driver.
Install NETePAY
Important: Lane 7000 and 8000 require NETePay version 5.7.33
Note: Continue with the following ONLY if NETePay is either 1.) needs to be moved (NETePay Swap), or 2.) if they do not have NETePay installed on a different computer.
To install NETePAY:
- Go to Download – Datacap Systems, Inc. and click on the ePay Software link.
- Choose INSTALL NETEPAY.
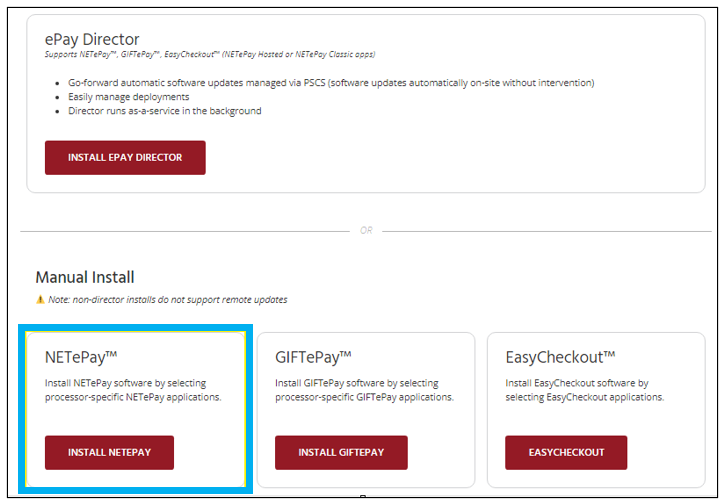
Figure 2: INSTALL NETEPAY
-
Choose NETEPAY CLASSIC.
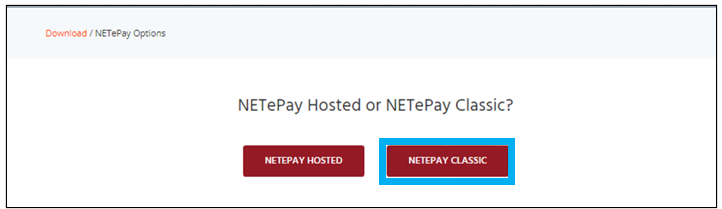
Figure 3: NETEPAY CLASSIC
-
In US EMV Applications, choose WORLDPAY (MERCURAYPAY).
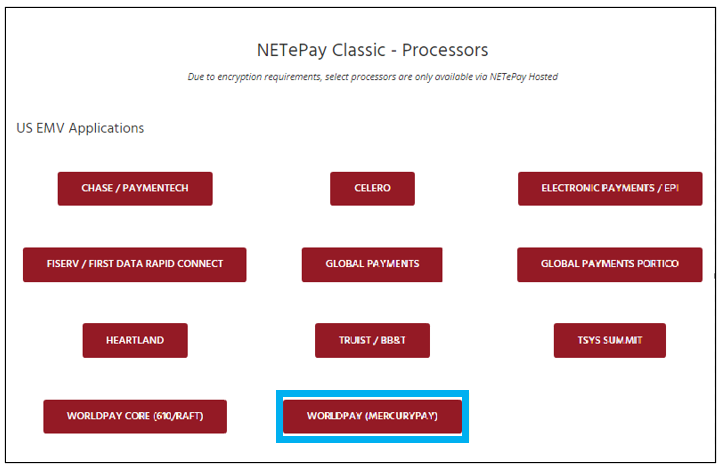
Figure 4: WORLDPAY (MERCURYPAY)
- Agree to the End-User License Agreement (EULA).
- Install NETePay Worldpay (MercuryPay) – MPH 5.07.33 (in red font).
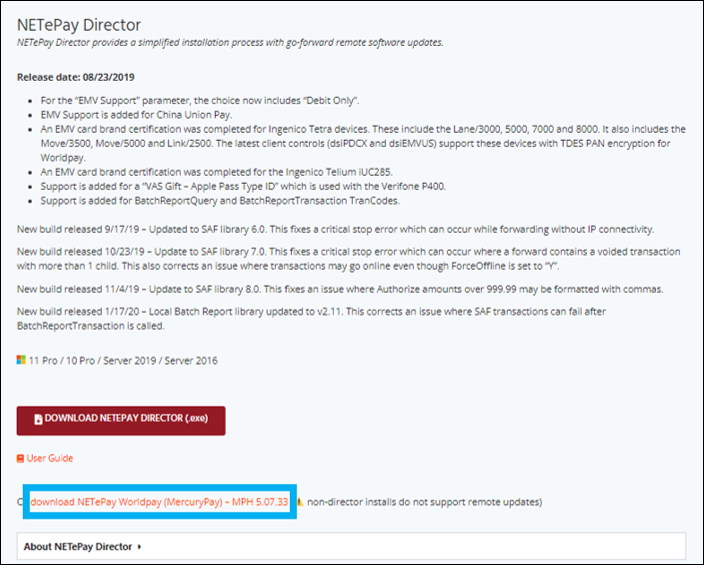
Figure 5: NETePay Worldpay (MercuryPay) – MPH 5.07.33
Note: During each installation, click Accept to all defaults.
The icon for the application will be on the desktop.

Figure 6: NETePay desktop icon
Set up NETePay
- On the desktop, start NETePay.
Note: If a message opens that says NETePay is already running, open Services and stop this process: NETePay Service
- In the NETePay (Mercury Payment Systems) window, click Setup (from the menu), then click Setup Information.
- In the License Required – Request Serial Number window, click Obtain Serial Number, then click OK.
- In the Setup Merchant Parameters window, click Load New Parameters.
- When asked to Attempt Activation?, click Yes.
- In the Collect Merchant Information window, click I have my Deployment ID.
- In the Enter Deployment ID window, enter the Deployment ID that you received from the Account Manager of the store, then click OK.
- In the NETePay Merchant Info window, do one of the following steps:
- If the information is correct, click Yes, This is the Correct Merchant.
- If the information is incorrect, click Cancel, then repeat steps 4-6.
- Verify that NETePay successfully retrieved the parameters that are associated with the Deployment ID, then click OK.
- When the Setup Merchant Parameters appear, verify that the values retrieved from the Datacap PSCS server are correct.
- Set EMV Support to Credit and Debitvc dxs
- Set Contactless Support to EMV.
- Click OK to the main status window. NETePay is ready to process transactions.
- On the Windows menu, type Services, and find NETePay.
- Right-click NETePay and select Properties.
- Change the Startup type to Automatic, then click OK.
- Start the service.
- Minimize NETePay.
Set up Paladin
- In Paladin, from the main menu, select File > Setup.
- Select the Credit Card tab.
- In the Credit Cards pane, in the Processor list, select Mercury EMV.
- In the MerchantID box, enter: MerchantID (from DSL).
- In the NetEPayServer box, enter the the computer name of the Paladin server running NETePay.
- Server: x1.mercurypay.com (This is the PDCX Host).
- Gift Server: g1.mercurypay.com
- In the NetEPayServer box, enter the IP address of the Paladin computer that is running NETePay.
Note: To find a computer’s name, in File Explorer, right-click This PC and select Properties.
- In the IP Port box, enter 9000.
- DO NOT select Datacap dsiEMVUS for Signatures. Signatures are no longer collected by Paladin for EMV purchases.
- Open Firewall ports 9000 and 9001 for domain and private. To do this, open a Command Prompt with administrator permission and run this script:
netsh advfirewall firewall add rule name=”NetEpay In” dir=in profile=domain,private action=allow protocol=TCP localport=9000,9100 - Click Save.
- Click the Network tab.
- In the Change credit card device list, select the Lane 7000/8000 model.
- Click Save, then click Close.
- Close and restart Paladin.
- In Paladin, from the main menu, select File > Setup.
- Select the Network tab.
- In the Network pane, click Initialize. If the error message shown in Figure 7 opens, restart Paladin and follow steps 15 – 17.
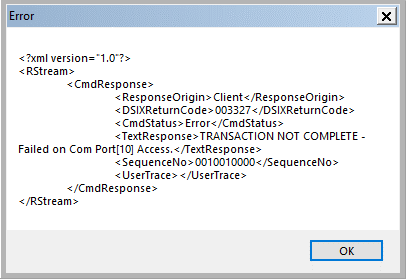
Figure 7: Initialize Error message
- If there are no error messages when the device has been initialized, a Welcome message opens on the device, and Paladin displays the following Success message.
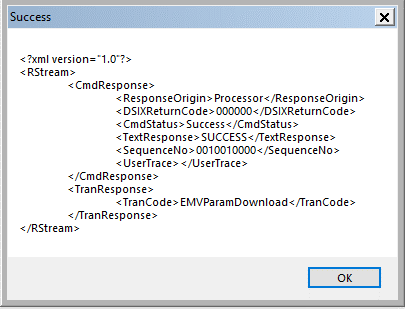
Figure 8: Initialize Success message
- Click Save, then click Close.
- Test the transactions:
-
- Debit
- Credit
- Return(s)
- Gift card load and redeem
If you have questions or suggestions about this information, contact support@paladinpos.com.
