
To set up Buy One Get One (BOGO) dollars-off sales:
- In Paladin, from the main menu, select File > Setup.
- Select the Sale List tab.
- In the Sales pane click New.
- In the Name box, enter a name for the BOGO sale.
- In the ID box, enter a unique identification for the sale.
- In the Source box, nothing is required.
- Select Local Instant Savings from the Type list.
- If you live in a state that reduces taxable amounts on BOGO sales, check Sale Reduces Taxable Amount.
- Click Save.
- In the Sale Items pane click New.
- In the Part Number box, enter the Part Number of the first item.
- In the Price box, enter the price.
- Click Save.
- For each XYZ item to be included in the BOGO sale, repeat steps 3-13.
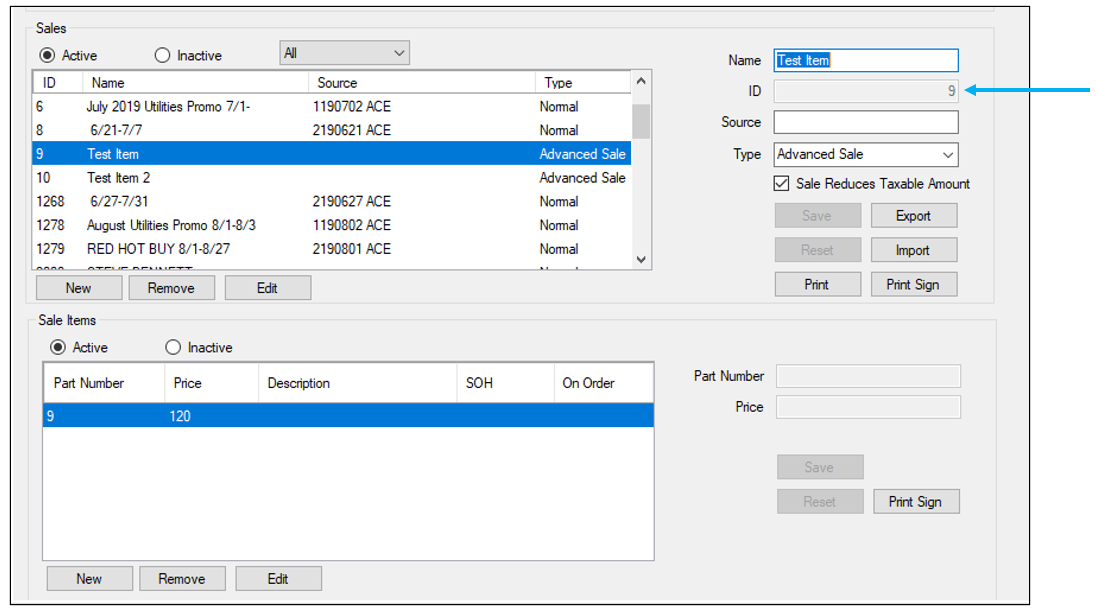
Figure 1: Sales ID
- In the Pricing Plans pane, click Create New Pricing Plan.
- In the Pricing Plan tab, click New.
- In the Name box, enter the name of the BOGO sale.
- Check Apply to all transactions.
- In the Sale List Range Start box, enter the Unique Sale ID number of the first sale list.
- In the Sale List Range End box, enter the Unique Sale ID number of the second sale list. For example, if you created the first sale list as ID number 22, and the second as 23, then add 22 as the sale list range start and 23 as the sale list range end.
- In the Discount or Markup list, select Advanced Sale.
- In the Advanced Settings pane, check Enable Advanced Settings.
- In the Advanced Settings pane, in each of the following boxes, enter the following information:
|
Name of box |
Enter this information |
|
Sale Type |
Mix And Match |
|
When a Customer Buys |
1 |
|
The Customer Receives a Discount on |
6 |
|
Discount Type |
Dollar Off Item |
|
Discount Amount |
1.39 |
|
Sale Limitations |
Max Quantity of Items Discounted |
|
Limit Quantity |
6 |
|
Description |
$1.99EA OR 6 FOR $4.99 |
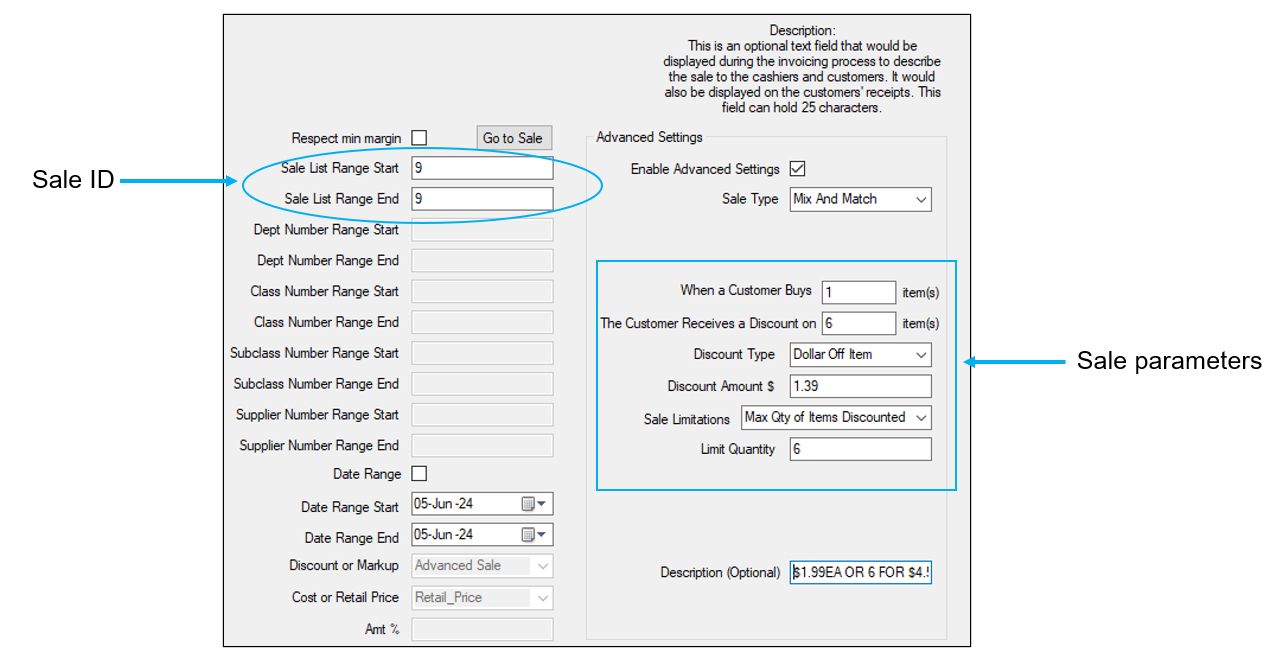
Figure 2: Advanced settings for BOGO Dollar Off sales
- Click Save, then click Close.
- Close and restart Paladin for the sale to take effect.
Note: The mix and match formula for this sale type example would be:
- 6 x 1.99 = 11.94 retail price
- 11.94 – 4.99 = 6.95 discount needed
- 6.95 / 5 = 1.39 discount amount
When the item is sold, its attributes are shown on the invoice as follows:
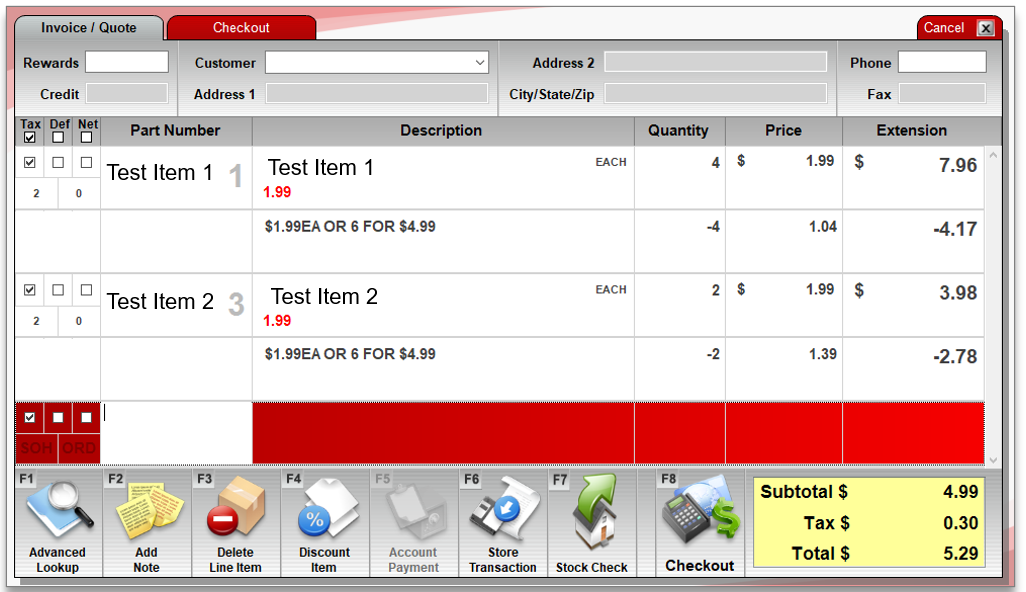
Figure 3: Sale shown on invoice
If you have questions or suggestions about this information, contact support@paladinpos.com.
*Content is subject to change. For the most recent version, visit the Help Portal.
Printed on: 6/07/26
