
Because theft, computer failure, electrical outages, and natural disasters can occur, it is vital to protect your store by maintaining backup copies of your data.
Paladin sets up your system so that Scheduled Tasks in Microsoft Windows™ can automatically generate a file on Terminal-1 and place a copy on Terminal-2. That way you have two copies of the same file. The backups are scheduled to occur every night. However, because this occurs in Microsoft Windows, the backups are not controlled by Paladin.
To learn more about Paladin recommendations, refer to: Best Practices: Backing up data
Note: Paladin implements automation to remove old backups greater than 90 days and are not the first or the last of the month backups. To protect your data from worst case scenarios, refer to: DataWise™ automatic off-site backups
This article includes provides instruction and information on the following:
How to create a daily backup file and copy it to a USB drive
- Insert the USB drive into the server or terminal where you will create the backup (usually Terminal 1).
- On the same terminal, open Paladin.
- On the top ribbon, select the Backup module.
- In the Backup window, click Yes.
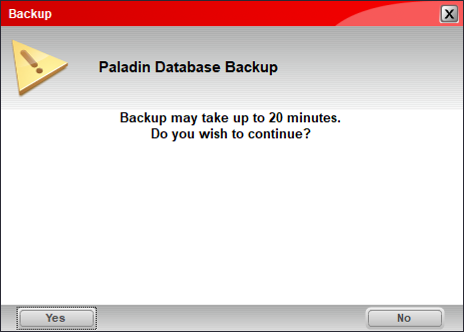
Figure 1: Backup window
- A window with a black screen opens. Wait for the window to close. This indicates that your backup is complete and a file has been created.
- Close Paladin.
Next, you will transfer the file to your USB drive.
- On the desktop, double-click Shortcut to Backups or Paladin Backups.
- Verify that the first file in the Backups directory has the current date and time in the Date Modified column. This is the file you just created and will copy to the USB drive.
- On the keyboard, press the Windows Start key + E or use another method to open a File Explorer window.
- Look for the USB drive in the first column. It will appear as a drive letter in a format: USB Drive (E:)
- Click the USB drive to show its contents.
- Drag the backup file from the Backups directory window to the USB drive window. You should see a copy of the backup file appear in the USB drive contents.
Alternate methods:- Right-click the backup file, then click Copy. Click in the USB drive content pane and click Paste.
- Right-click the backup file, click Send To, then click the USB drive.
- Right-click the USB drive and click Eject.
- A message will inform you that you can remove the USB drive.
Important: Take the USB flash drive home with you every night and bring it back the following business day. Make sure to keep the USB drive in a safe place to prevent it from being damaged or lost.
How to verify that two (2) backups are being created daily
- From your Windows File Explorer, select View, then click Details.
- On the desktop, double-click Backups or Shortcut to Backups.
- The time stamp for the manual backup file should occur at the end of business day.
- The time stamp for the automatic backup should occur around 11:15 pm.
Note: Contact Paladin Customer Service if any of the following conditions occur:
-
- There are no backups in this folder.
- The file size for any backup file is less than 1000KB.
- The file sizes do not increase over time.
How to delete backup files to create more space on the Terminal 1 or Terminal 2 servers
Notes: If you need to free up space on the hard drive for Terminal 1 or Terminal 2, you can delete any backup files that were created more than 90 days ago.
- Terminal 2 is the backup server for Terminal 1.
- When you create a backup file on Terminal 1, it is saved on Terminal 1 and copied to Terminal 2.
-
- On the desktop, double-click Shortcut to Backups or Paladin Backups.
- Locate any backup files created more than 90 days ago. If the file dates are not visible, from your Windows File Explorer, select View and click Details.
- Delete backup files that were created more than 90 days ago: Highlight the files, press and hold the CTRL key, then click each file that you want to delete. This will batch the items to be deleted.
- Click File, click Delete, then click Yes.
- On the desktop, right-click the Recycle Bin, click Empty the Recycle Bin.
- In the Delete File window, click Yes.
- If you deleted more than 1GB of data, defragment the hard drive.
If you have questions or suggestions about this information, contact support@paladinpos.com.
