
PaladinGo™ takes point of service functionality from terminal to tablet anywhere an intranet/Internet connection is available – in-store or out in the field.
PaladinGo complements your store’s Paladin Point of Sale and system for line-busting and remote location transactions. Its capabilities includes payment processing through Blockchyp, access to customer and inventory information, and the ability to apply quantity price breaks, rewards to transactions, and building quotes and special orders. PaladinGo supports both manual entry and barcode scanning using the device’s camera.
If you are experiencing issues pairing a PaladinGo device to Paladin Point of Sale, please contact Paladin Customer Support.
Important: The screen captures (Figures) in this article represent how the modules appear on Android devices. With this, modules and their attributes will appear slightly different on iOS devices, but the functionality is identical. Please follow the written instructions as they are the same for both platforms.
This article provides instruction and information on the following:
- Setting up devices on PaladinGo
- Preparing devices in Paladin
- Navigating PaladinGo
- Log out of PaladinGo
- How to update the app
Important: There are two Paladin Configuration settings that need to be set: Employee Access and Inventory Alerts (alerts to show in the Count module when scanning items). On how to set these, refer to the PaladinGo™ Paladin Configuration Settings KBA
Setting up devices on PaladinGo
PaladinGo™ can run on Android tablets and phones and on Apple iPads and iPhones (iOS).
Android devices
Note: PaladinGo is only supported on Android 13 API .
To get the PaladinGo app on an Android device:
- With your device, go to the Android App Store via Google Play.
- In the Search field, enter PaladinGo (this is not case sensitive).

Figure 1: Google Play/Search for PaladinGo
- Tap the PaladinGo icon and follow prompts to install PaladinGo on the device.
![]()
Figure 2: PaladinGo icon
iOS devices
Note: iPhones require iOS 18.4 or later. iPads require iPadOS 18.4 or later.
- On your Apple iOS device, go to PaladinGotm in the Apple App Store.
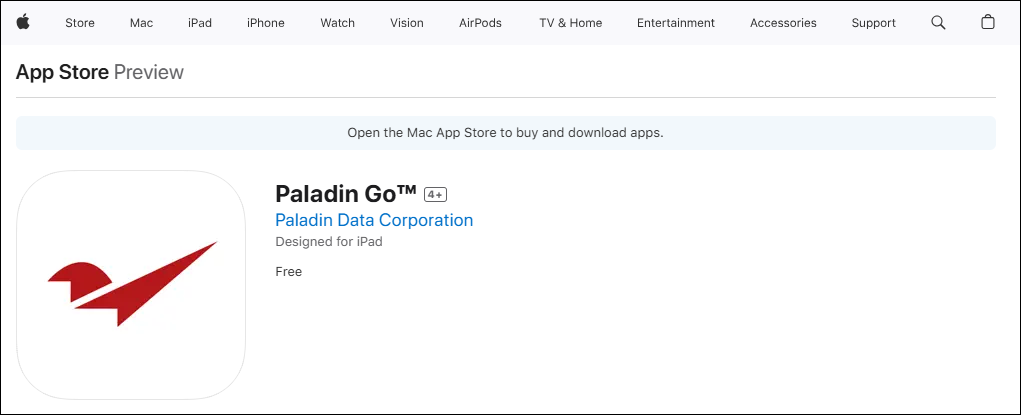
Figure 3: Apple App Store/PaladinGo
- Download the app. and follow prompts to install PaladinGo on the device.
Preparing devices in Paladin
Note: Paladin build, greater than or equal to 2.2509.8995.1, is required.
For PaladinGo to operate, Paladin needs to be running on the terminal associated with PaladinGo. PaladinGo should run seamlessly, but if there is a problem getting PaladinGo to recognize the Employee ID and PIN, check that the Paladin Service Core is running on the terminal:
- Click on the Windows icon in the bottom task bar.
- Start typing Service.
- In the Services window, place you cursor in the Services pane and type P.
The Paladin POS Services Core status should show as Running.
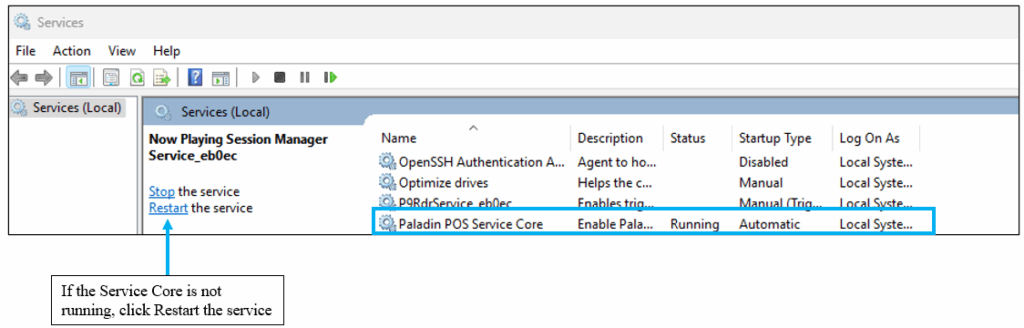
Figure 4: Paladin POS Service Core
If it is not running, click Restart the service. If this does not start the service, contact Paladin Support.
Once it is established that the Service Core is running:
- In Paladin, on the top menu, select Maintain > PaladinGo™.
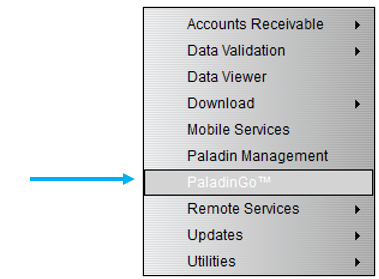
Figure 5: Maintain list/PaladinGo™
- In the PaladinGo™ Utility window, in the Settings tab:
- Check Enable Local Service.
- Check Enable Routing.
- In the Routing Server box, check that the default is mobile3.paladinpos.com
- Click Save.
- Select the Device Manager tab.
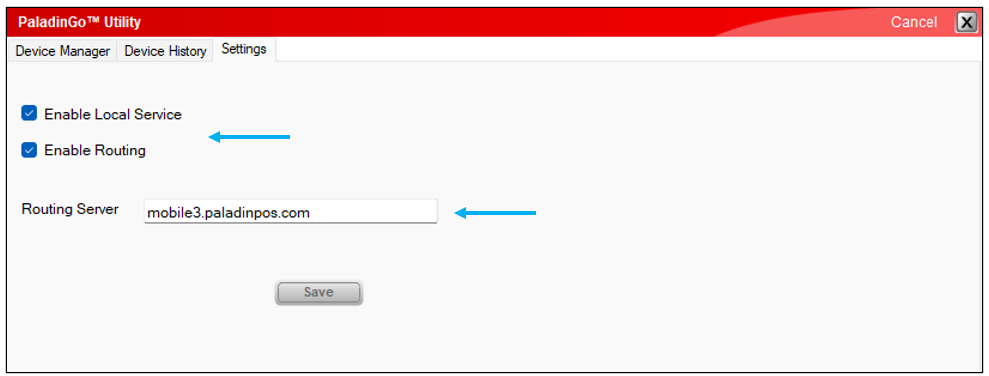
Figure 6: PaladinGo™ Utility window/Settings tab
- In the Device Manager tab, click Sync New Device.
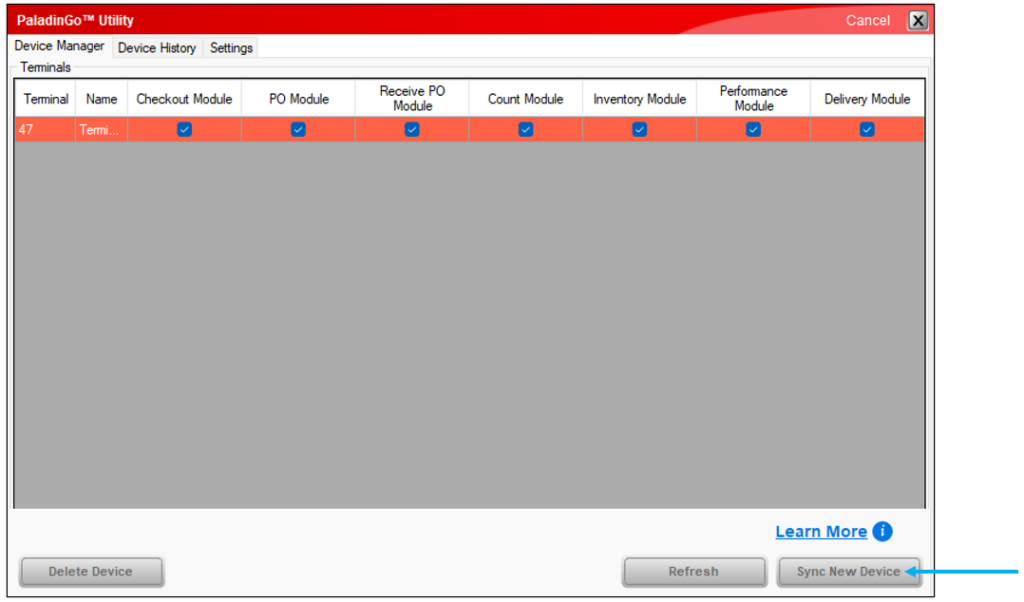
Figure 7: PaladinGo™ Utility/Device Manager/Sync New Device
The Scan QR Code window opens.
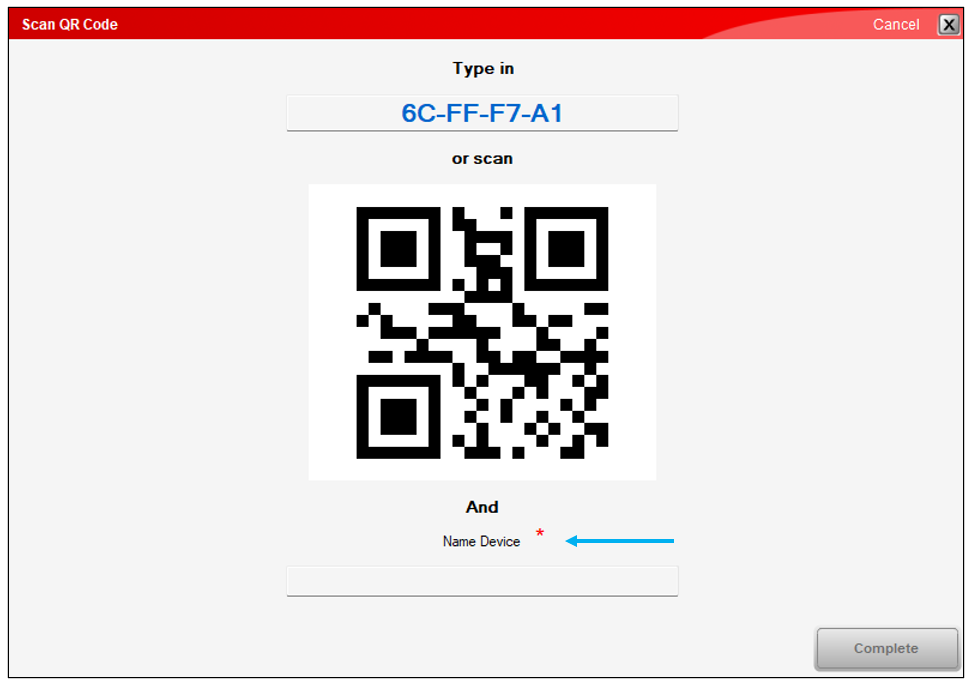
Figure 8: Scan QR Code window
- Name the device (required)
- On the device, in the Sync this device page, tap the QR code icon in the Sync Code field.
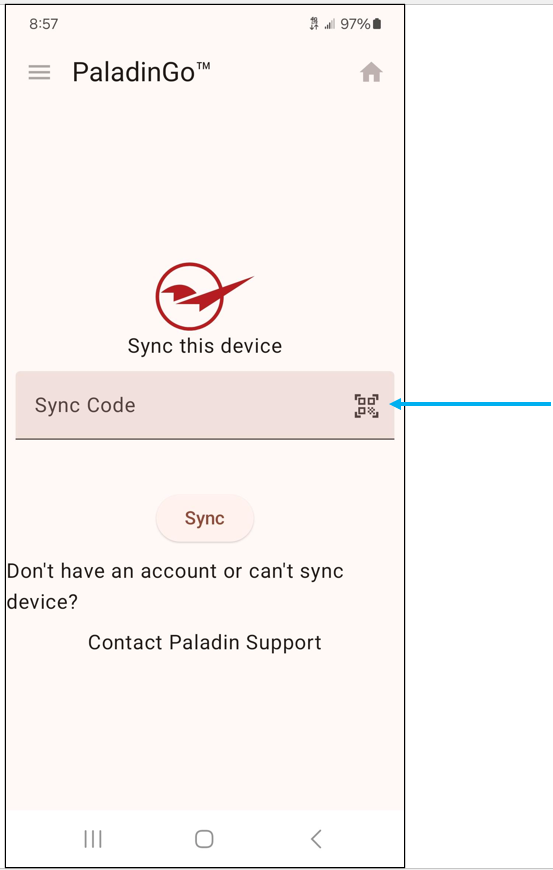
Figure 9: Sync this device with your main POS/SCAN
- Hold the device up to the QR code in the Scan QR Code window.
A message appears asking to allow PaladinGo to take pictures and record video.
- Select While using the app.
Note: If you do not select this option, your camera will not function to scan items/parts.
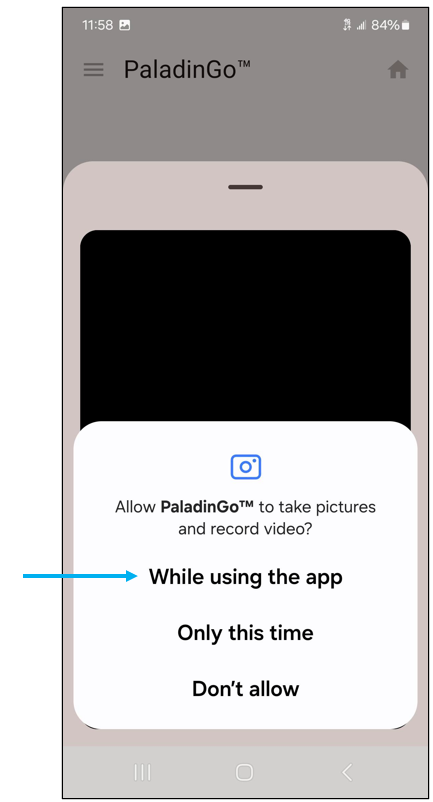
Figure 10: Allow pictures and video
On the device, the Sync this device page will now show the sync code for that device.

Figure 11: Sync this device with your main POS/device sync code
- On the device, tap Sync.
- In Paladin, in the Scan QR Code window, click Complete.
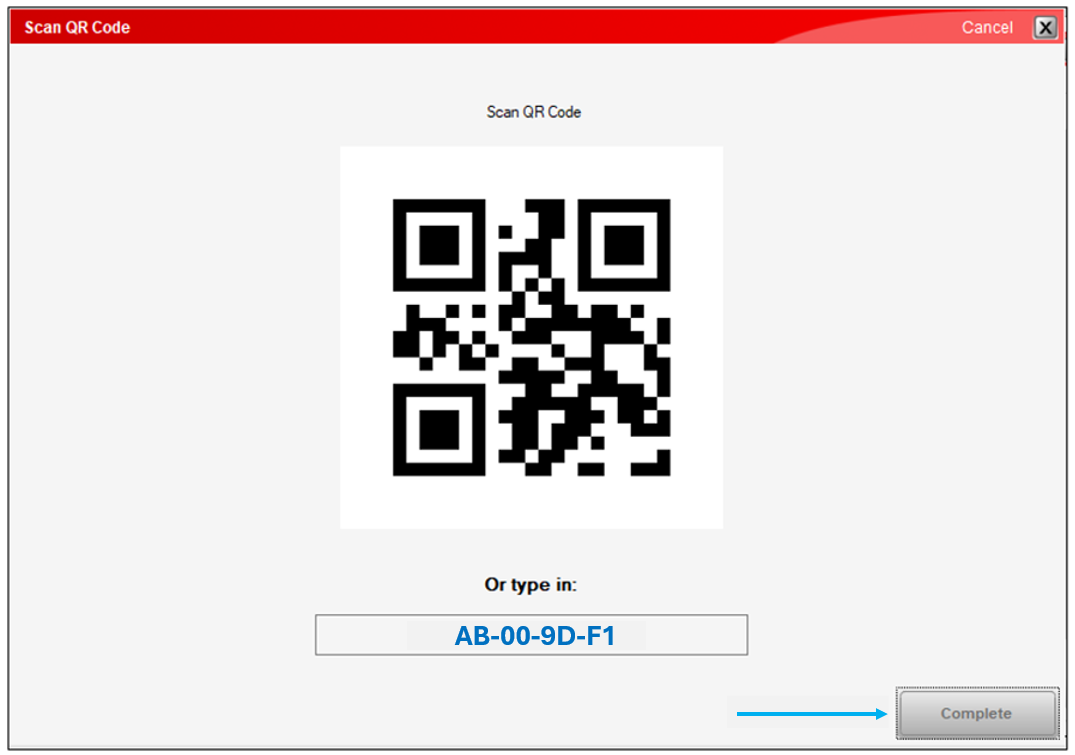
Figure 12: Scan QR Code window/Complete
- In the PaladinGo™ Utility window, in the Device Manager tab, in the Terminals pane, the device’s information appears. The following are the options that can be set for each device:
-
- Module Selection: Modules can be selected to be employed on each device. In the example of using the device exclusively for Checkout, the Checkout Module option can be checked, and all other modules unchecked. Note: By default, all modules are checked.
- Learn More: The Learn More link opens the PaladinGo Knowledge Base Article (KBA), which gives all information and instruction on setting up and using PaladinGo.
On the bottom of the window, Delete Device, Refresh a device, or Sync New Device can be activated( you can sync multiple mobile devices).
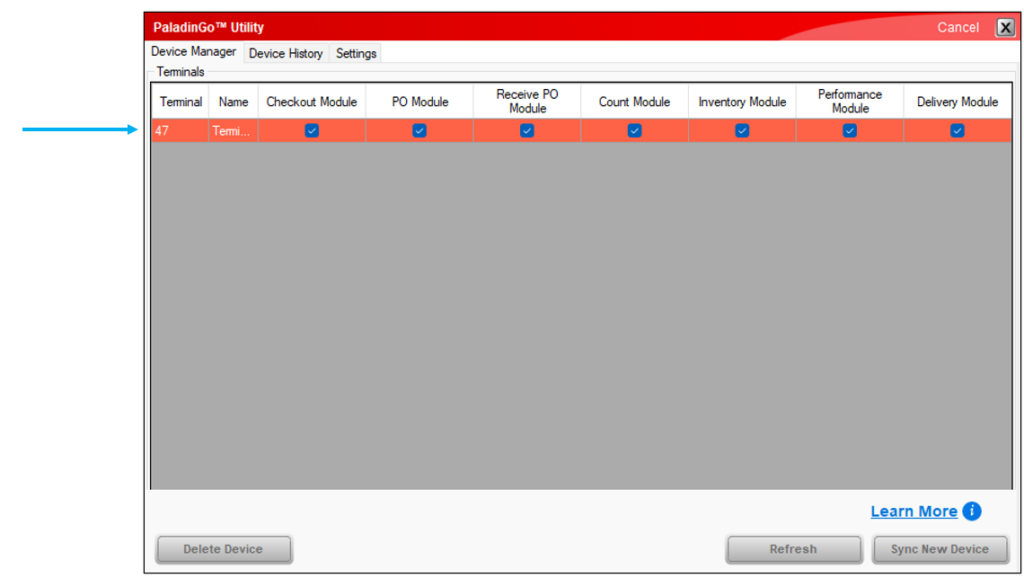
Figure 13: PaladinGo™ Utility/Device Manager/Terminals/Device information
The Device History tab provides the following information on devices:
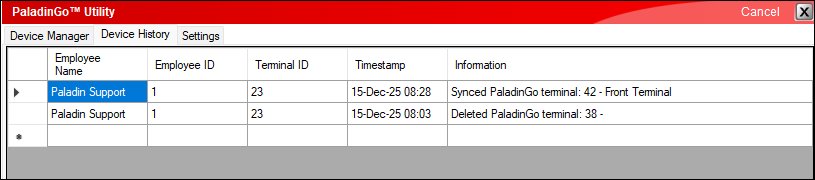
Figure 14: Device History
Navigating PaladinGo
Important: This section gives a high-level introduction of the modules in PaladinGo. Each module has its own KBA.
On the device, sign in to PaladinGo by selecting a store from the Select store list, entering the Employee ID and PIN (password), then tap Login.

Figure 15: Login
The Dashboard page opens with all module activated.
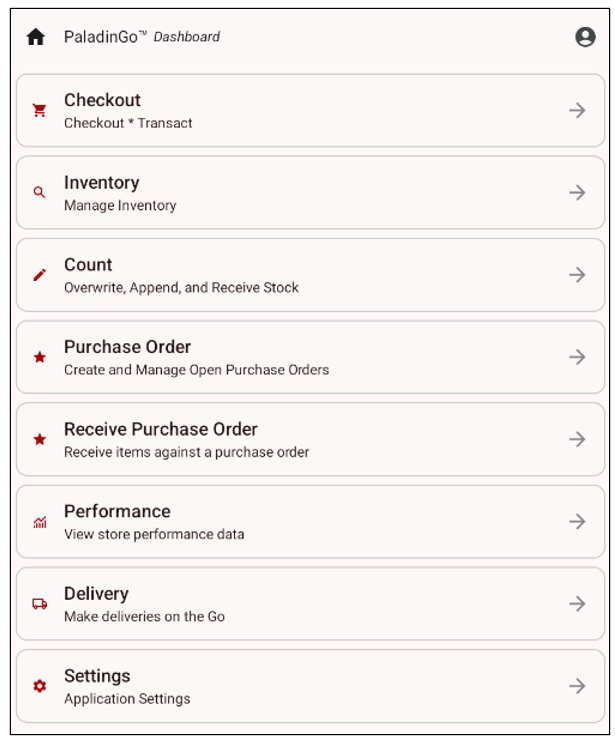
Figure 16: PaladinGo™ Dashboard
You have the option to turn on or off the following modules:
- Checkout
- Inventory
- Count
- Purchase Order
- Receive Purchase Order
- Settings
To enable modules:
- In Paladin, from the top menu, select Maintain > PaladinGo™.
- In the PaladinGo™ Utility window, in the Device Manager tab, check each module desired for the device.

Figure 17: Device Manager
As shown in Figure 17, all modules are checked.
On top of the Dashboard are two icons:
- House icon – Takes you back to the dashboard from any module.

Figure 18: House icon/Top of dashboard
- Person icon – Shows Employee ID, version of the app, and Device name.
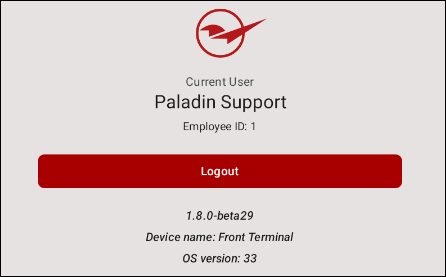
Figure 19: Info window
Log out of PaladinGo
To Log out of PaladinGo:
- Tap the person icon in the upper right of the top banner.
The Info window opens.
- On the bottom of the window, tap Log out.
Figure 20: Info window/Log out
How to update the app
All updates to the app are done through Google’s App store.
- On the device that the app is installed on, on the top right of the App store page, tap the circle. This will have any avatar you set for your Google account. For our example, it is a circle with a red dot.

Figure 21: App update
- In the Manage your Google Account window, tap Manage app & device.
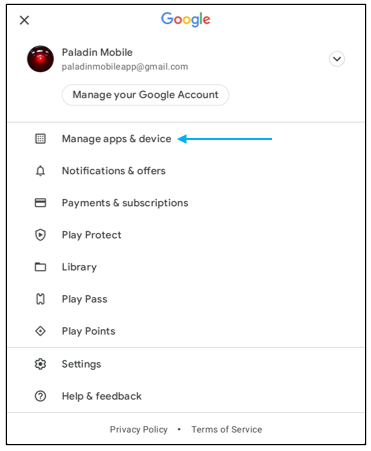
Figure 22: Manage your Google Account window/Manage app & device
- In the Manage apps & device window, under Updates available, tap See details.
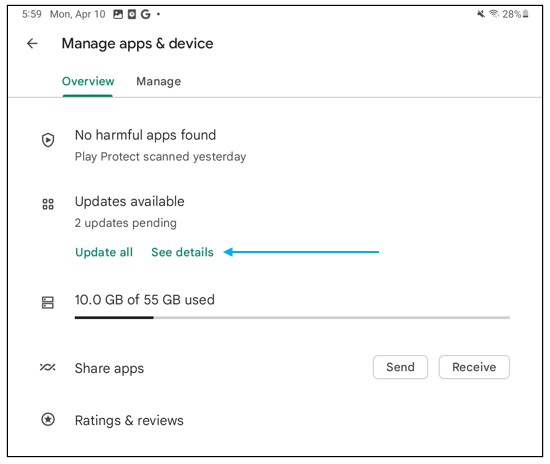
Figure 23: Manage apps & device window/Updates available/See details
- In the apps page, on the top left, tap the ellipses […]. If you want auto updates, tap Enable auto update.
Updates will be automatic going forward, and there will be no need to visit the app store for updates.
- Tap Update.
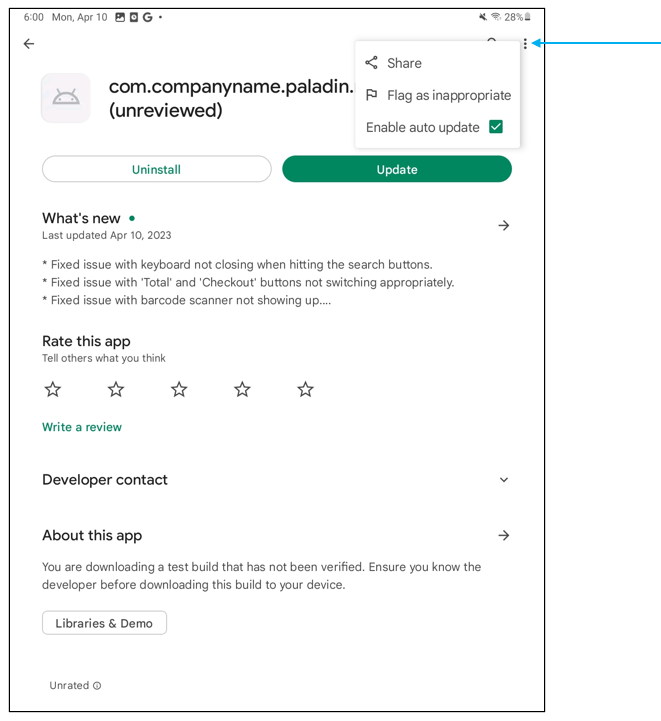
Figure 24: Enable auto update/Update
The app will be updated.
Note: There is also the option in the Manage apps & device window, under Updates available, to Update all.
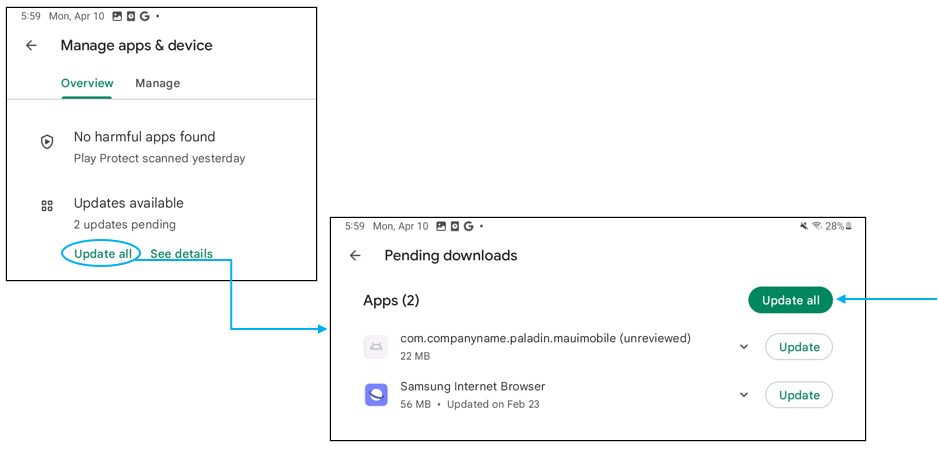
Figure 25: Manage apps & device window/Updates available/Update all
If you have questions or suggestions about this information, contact support@paladinpos.com.
