Join the mobile revolution and expand your business with the Paladin Mobile2Checkout app. Available for any Android device, the app’s intuitive design and easy-to-learn interface lets you make sales and process returns from anywhere with an Internet connection.
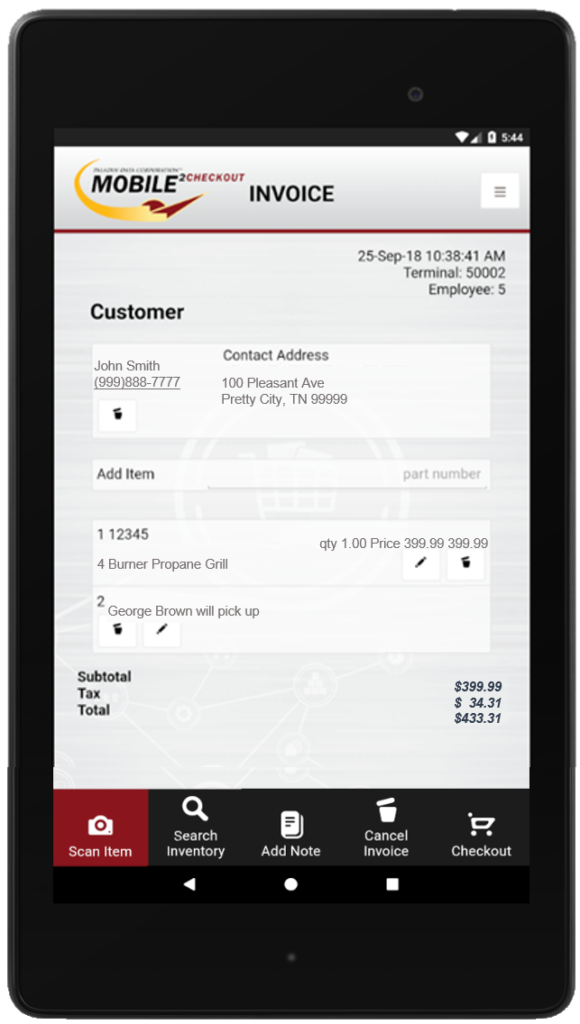
Figure 1: Mobile2Checkout Invoice screen
The Mobile2Checkout app supports these familiar invoicing features:
- Add a customer to the invoice from your Paladin customer database
- Scan and add items to the invoice using the camera on your device
- Search for and add items to the invoice from your Paladin inventory database
- Add items to the invoice manually by part number
- Modify an invoice item’s quantity and price
- Add invoice notes
- Calculate sales tax based on the store’s sales tax settings
- Accept cash, credit card, and charge payments
- Process item returns
- Store a transaction for later processing in Paladin
- This feature is useful when you want create the invoice on a mobile device, then apply pricing plans on an in-store Paladin terminal later.
To access the Mobile2Checkout app, enter your employee ID number and password. All transactions sync with Paladin and appear on your daily balancing reports.
This article provides instruction and information on the following:
- Set up the Mobile2Checkout app on your Android device
- Open the app
- Start the app
- Sign in with your credentials
- Create a new invoice
- Add a customer from the Paladin customer database
- Add items to the invoice
- Add a note to the invoice
- Start the checkout process and complete the transaction
- Email the receipt
- Process return items
- Store a transaction
Set up the Mobile2Checkout app on your Android device
Paladin Support must set up the Mobile2Checkout app. To contact Paladin support, call 1-800-725-2346, option 2 or email support@paladinpos.com.
Open the app
To open the Mobile2Checkout app on your Android device, tap the icon.
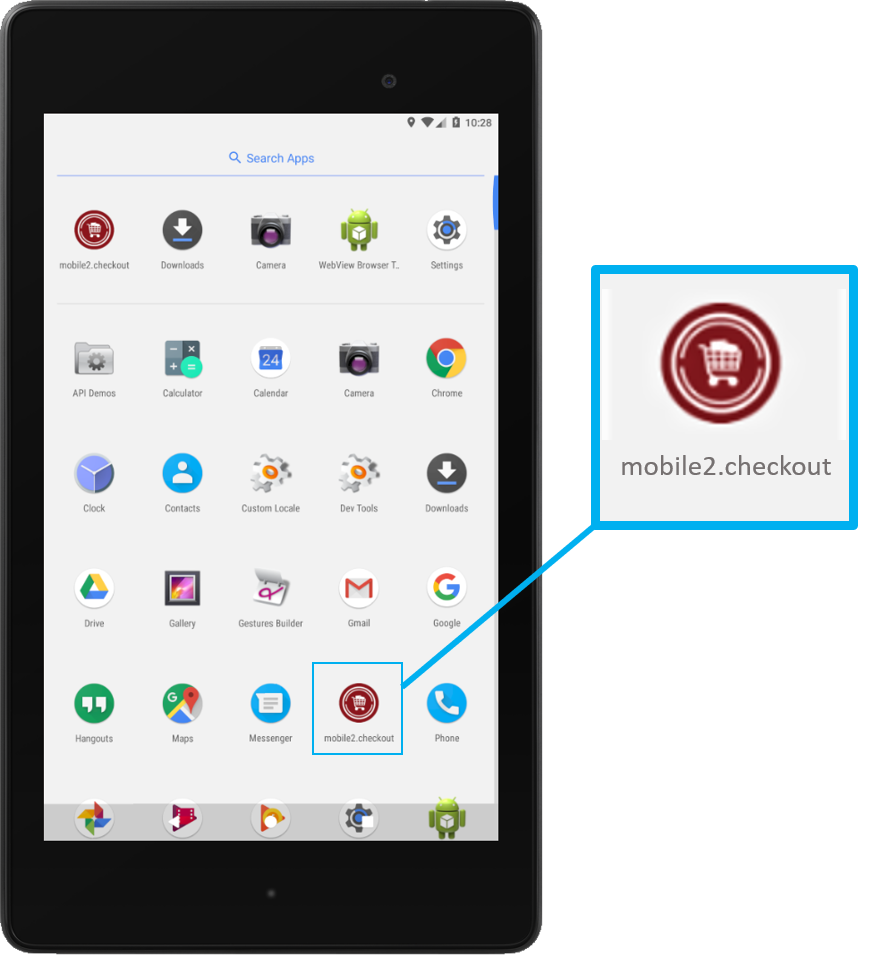
Figure 2: mobile2.checkout icon
Start the app
Note: If the Mobile2Checkout app is already running on the device, this step may not be required.
- In the Company and Code boxes, enter the Mobile2Checkout app credentials provided by Paladin Support. In many cases, these credentials will be filled in by the app automatically.
A message appears briefly to let you know that the app has connected to your Paladin system.
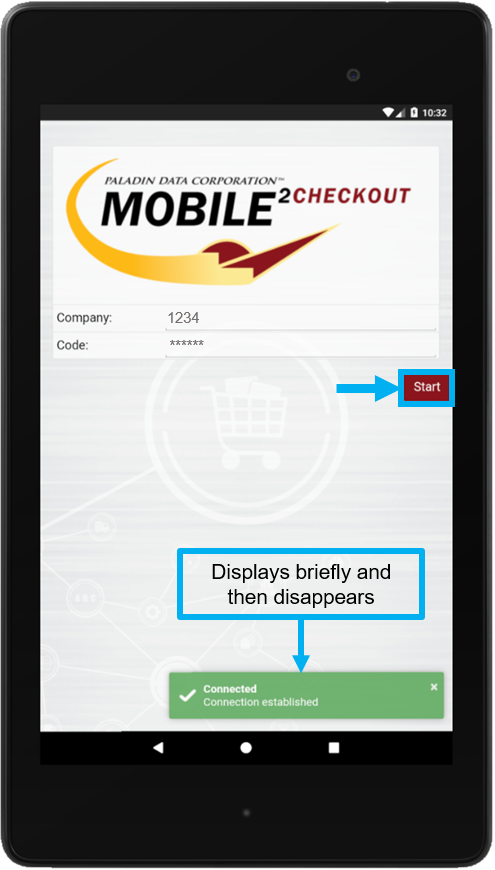
Figure 3: Connection established message
- Tap your store. If you store has multiple locations, tap the appropriate store for the sale.
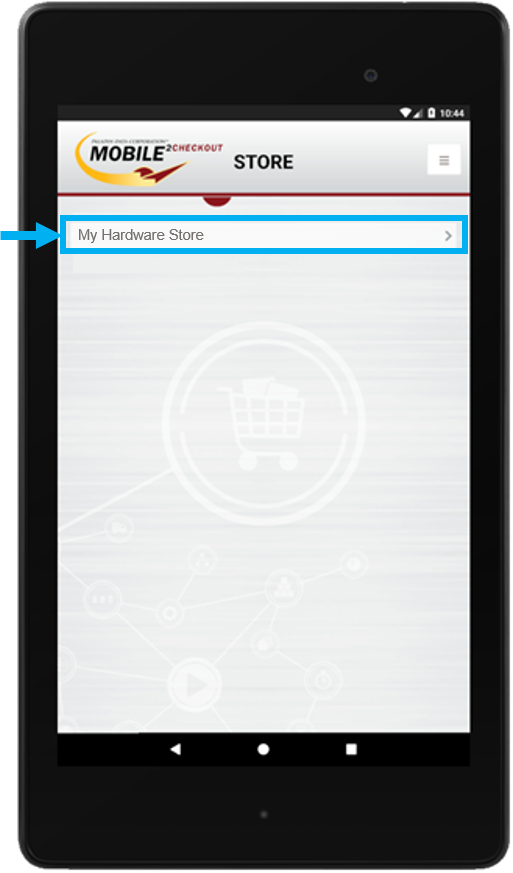
Figure 4: Store(s) selection screen
Sign in with your credentials
Enter your Employee ID and Password, then tap Login.
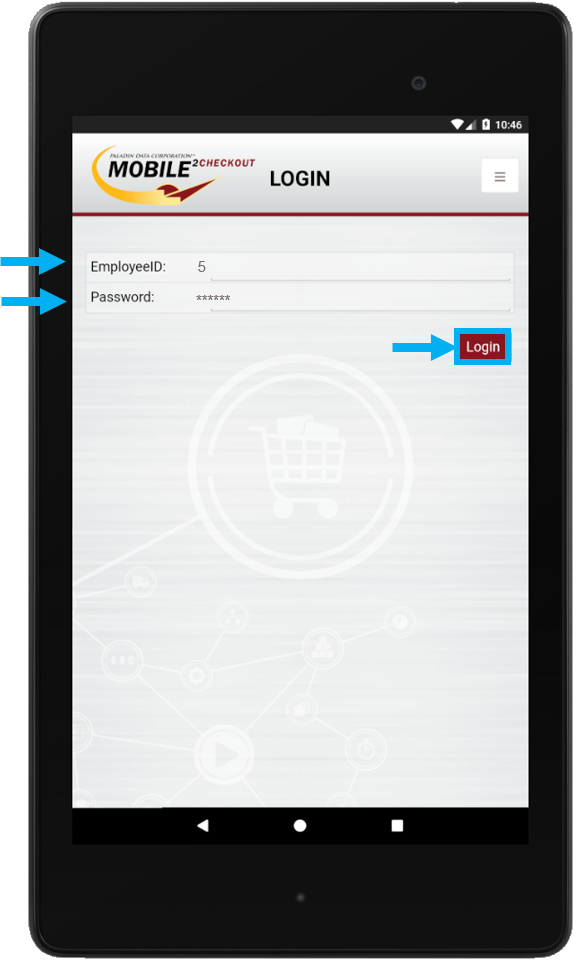
Figure 5: Login screen
Create a new invoice
Tap Start New Invoice to open the INVOICE screen.
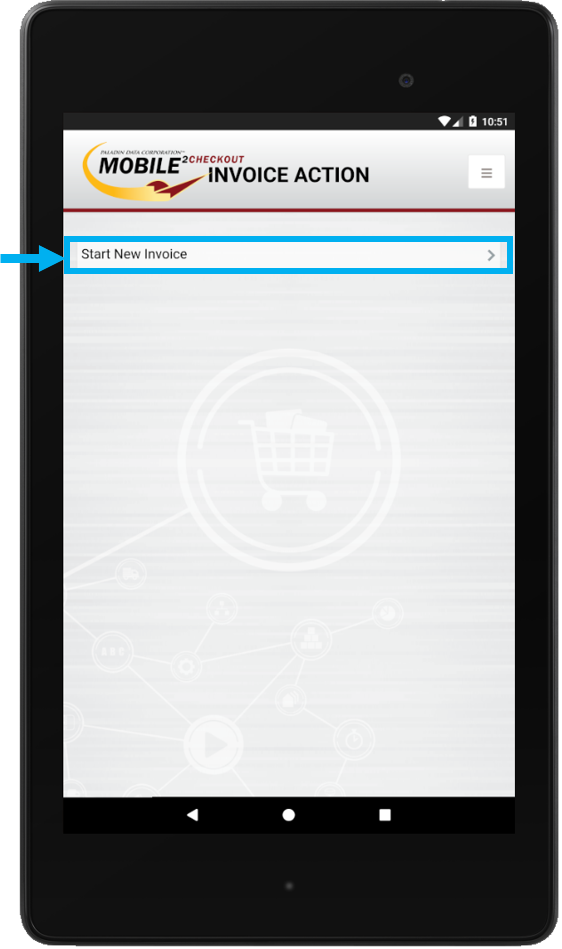
Figure 6: Invoice Action screen
Add a customer from the Paladin customer database
To add a customer to the invoice, tap the Customer magnifying glass and search for the customer. Tap Type to select a search option.
Tip: If this search feels familiar, it is. We incorporated the power of our Paladin Advanced Lookup search feature, including its multiple search options, into the Mobile2Checkout app.
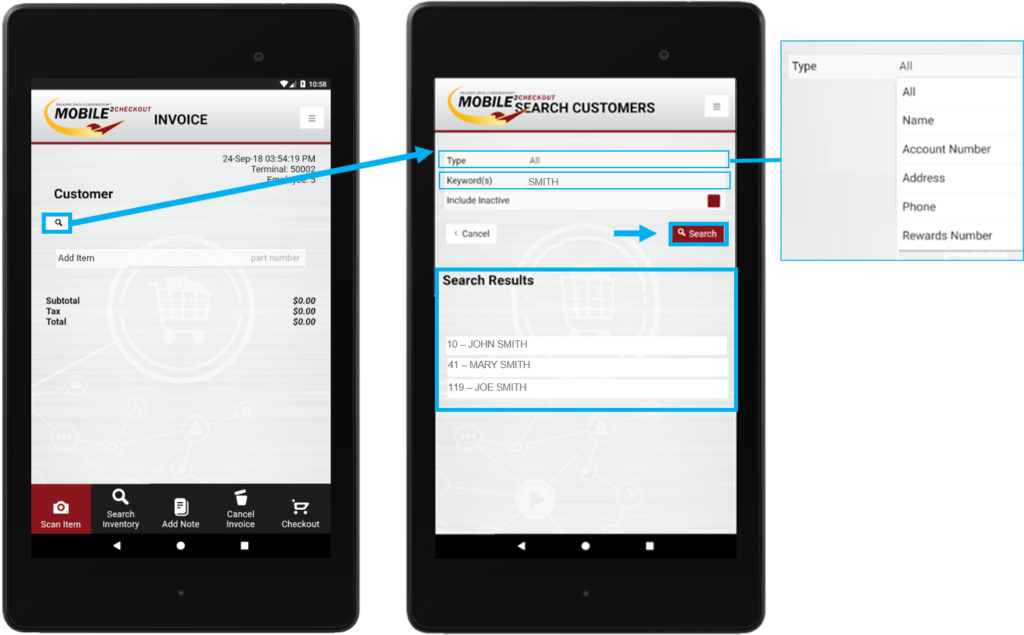
Figure 7: Search Customer
Tap any search result to add the customer to the invoice.
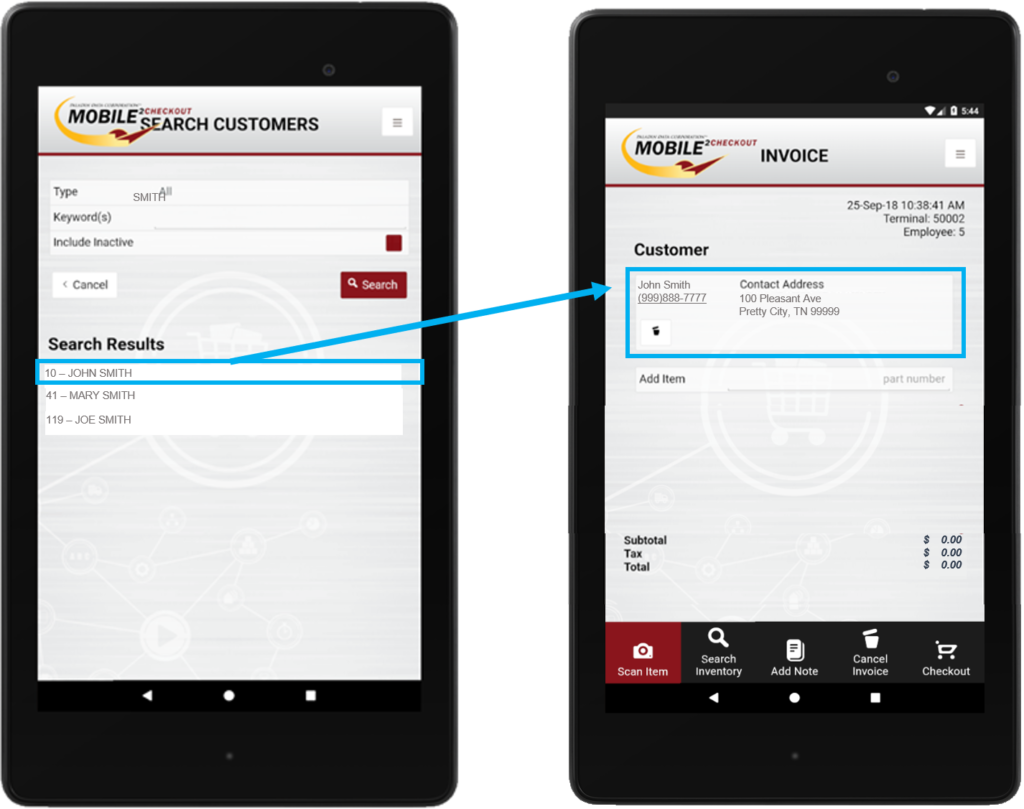
Figure 8: Enter customer to Invoice
Add items to the invoice
You can add items to the invoice in the following ways:
- Tap Scan Item
- Tap Search Inventory
Tap Scan Item, then scan the item’s barcode with the camera on your device.
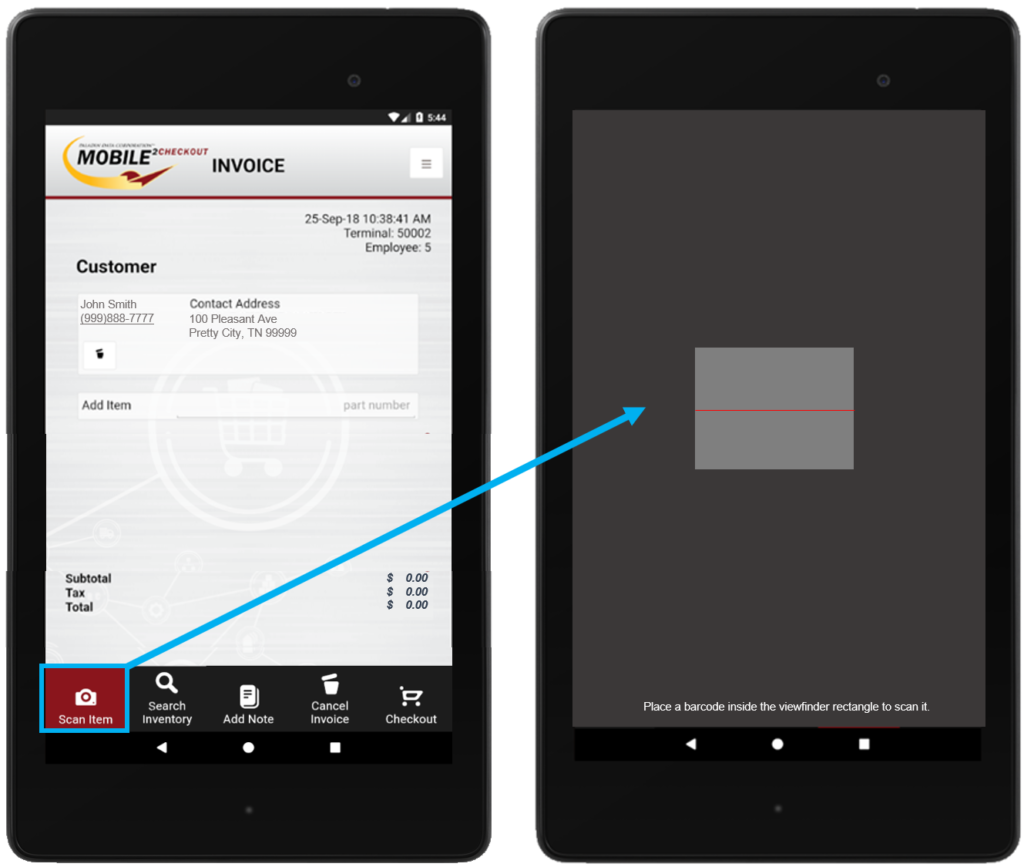
Figure 9: Tap scan item function
Note: Barcode scanner accessories for Android tablets can also be used to scan and add items to the invoice.
Tap Search Inventory and search for the item by name or part number. To add a search result to the invoice, tap it.
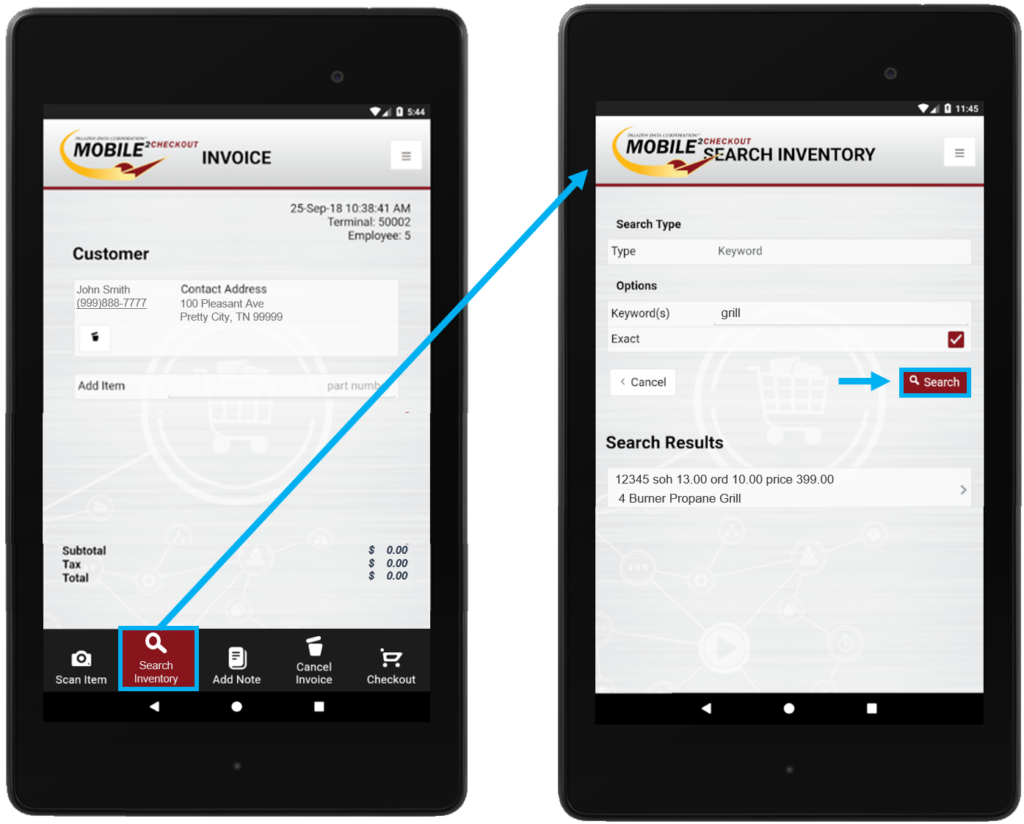
Figure 10: Tap search inventory function
Enter the part number in the Add Item box.

Figure 11: Add item function
To change the quantity or price after you add an invoice item, tap the pencil icon.
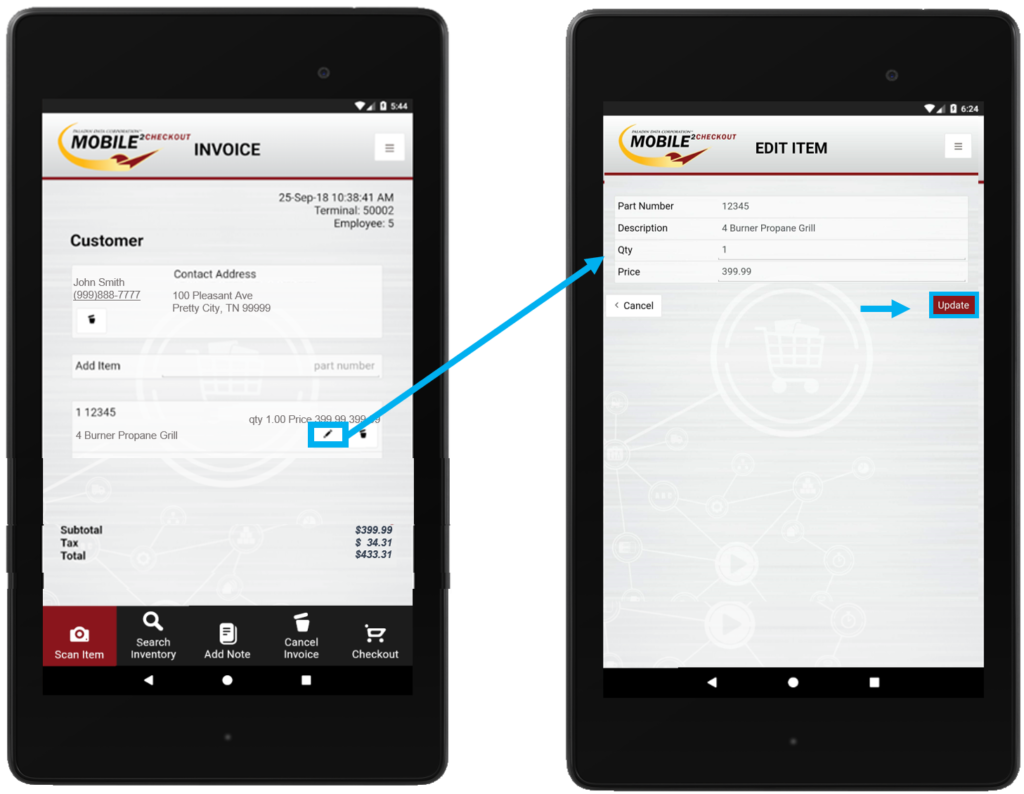
Figure 12: Pencil icon
Add a note to the invoice
To insert a note on the invoice, tap Add Note, then enter the note text.
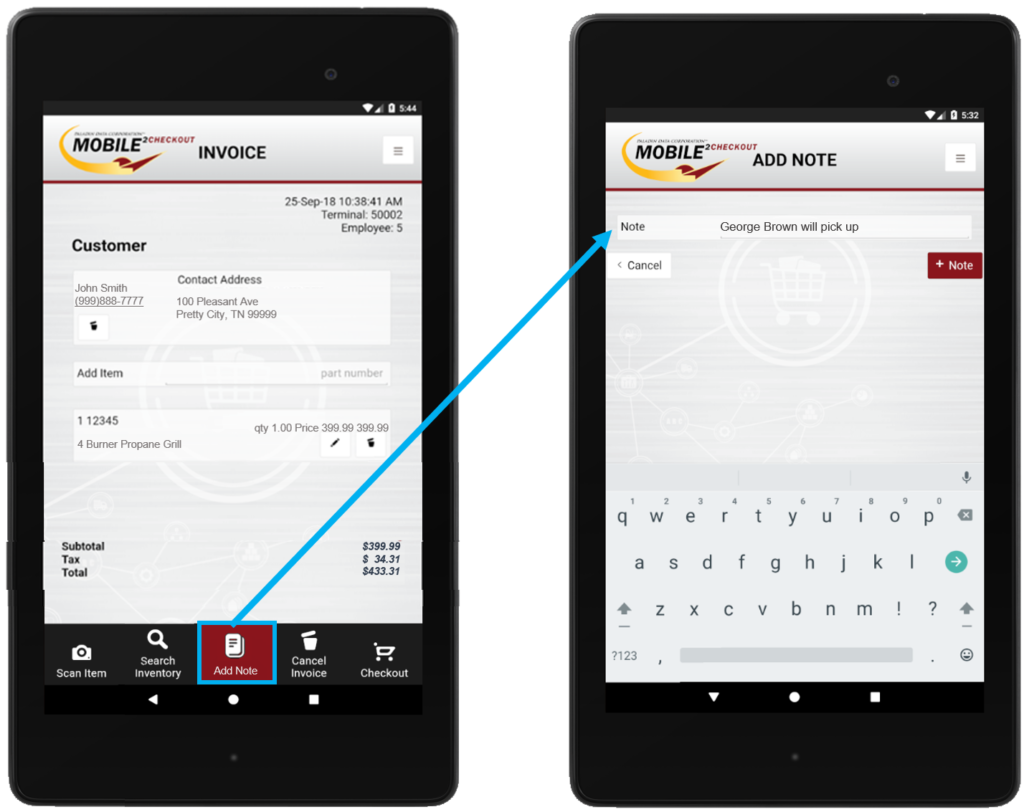
Figure 13: Add Note function
Tap Note to add the note line item to the invoice.
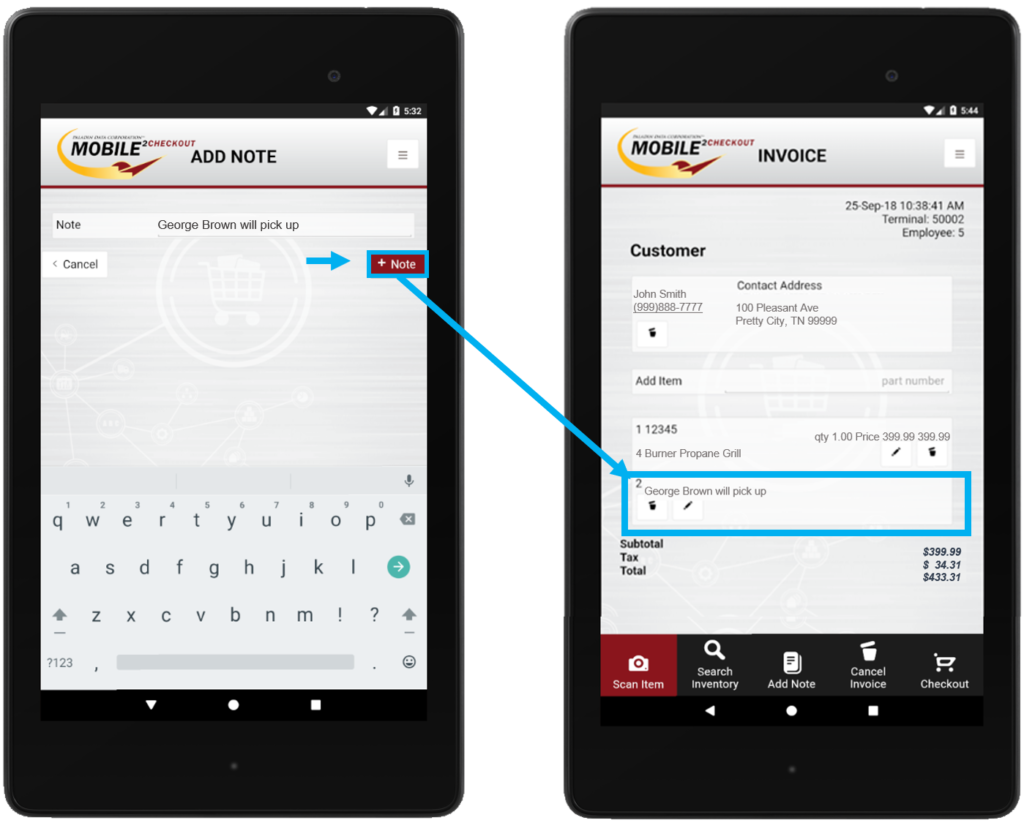
Figure 14: Add the note line item to invoice
Start the checkout process and complete the transaction
When you are ready to collect payment, tap Checkout, then select a payment type.
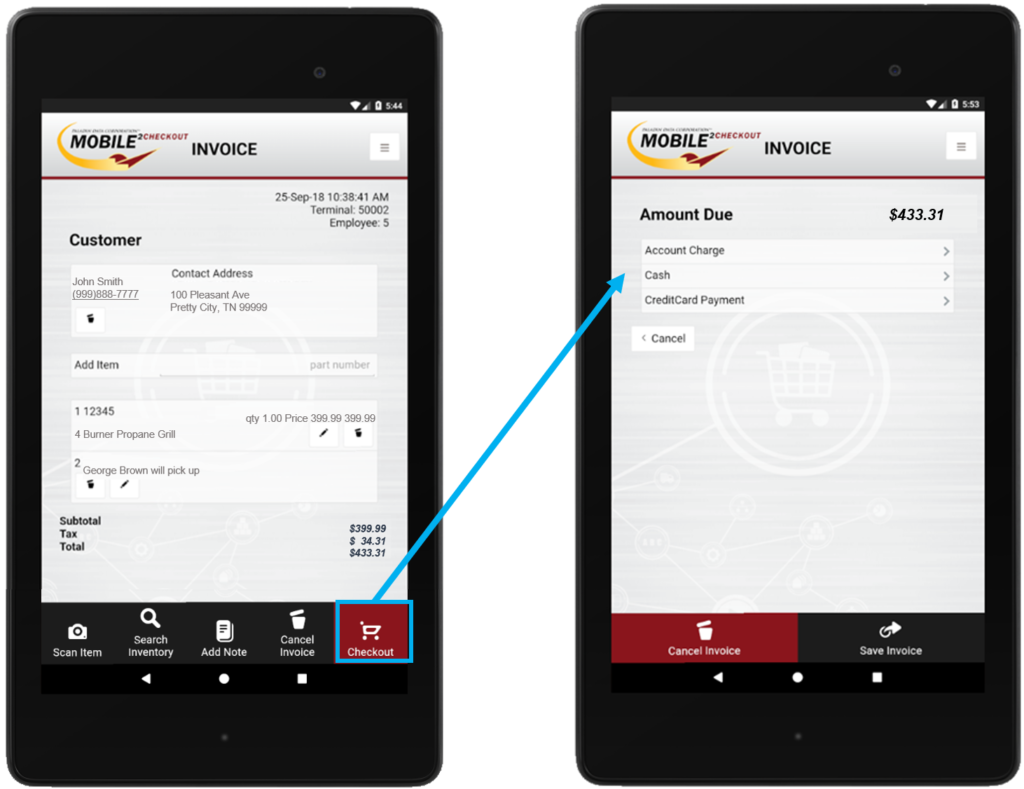
Figure 15: Checkout/Payment type
Mobile2Checkout can process the following payment types:
Account Charge: Charge the customer’s account and collect the customer’s signature.
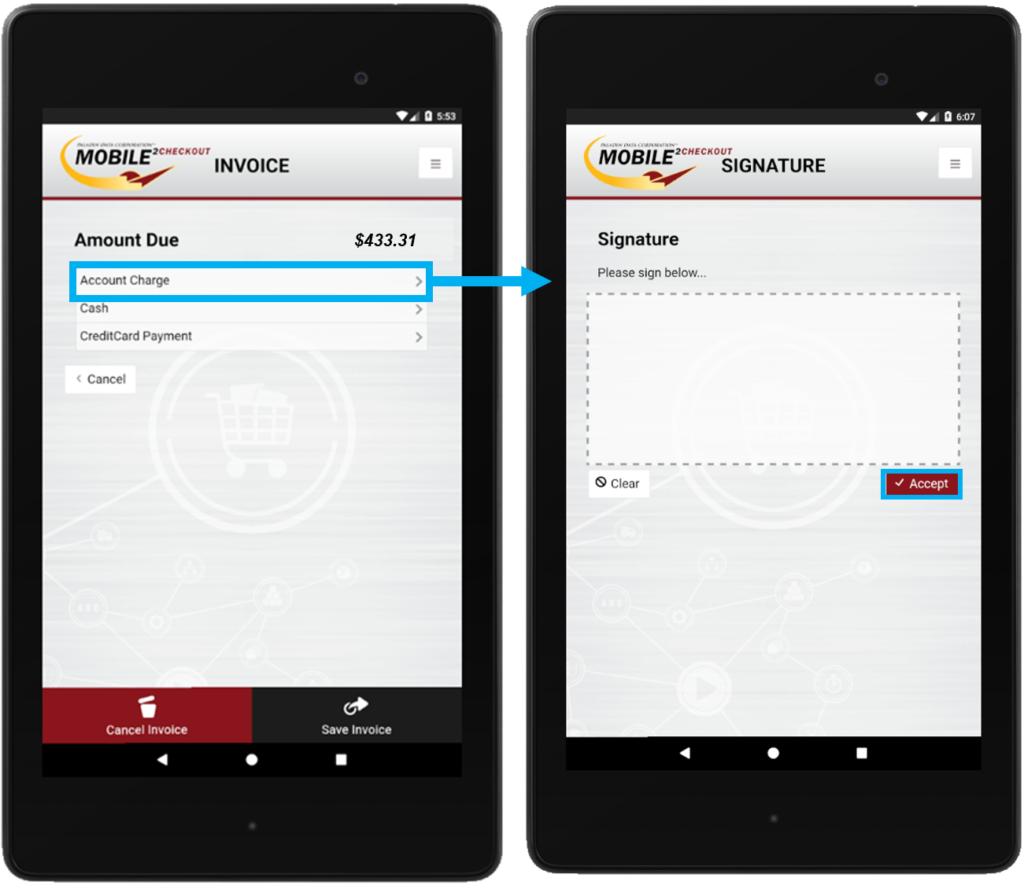
Figure 16: Account Charge
Cash: Accept a cash payment.
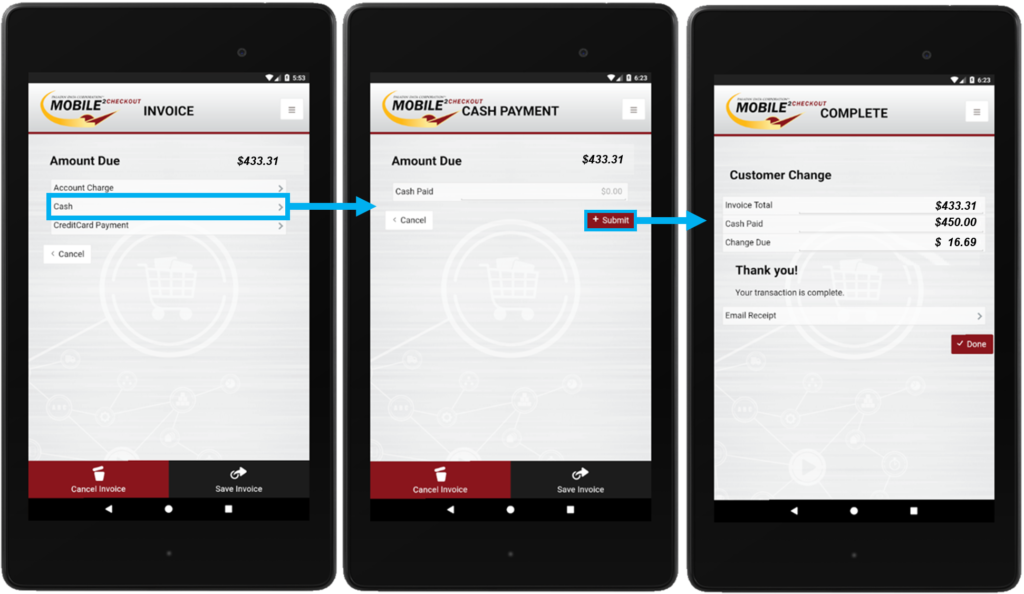
Figure 17: Cash payment
Credit Card: Process a credit card payment and collect the customer’s signature.
Note: Contact Paladin Support to obtain the point-to-point encryption (P2PE) credit card device for your Worldpay card processing account.
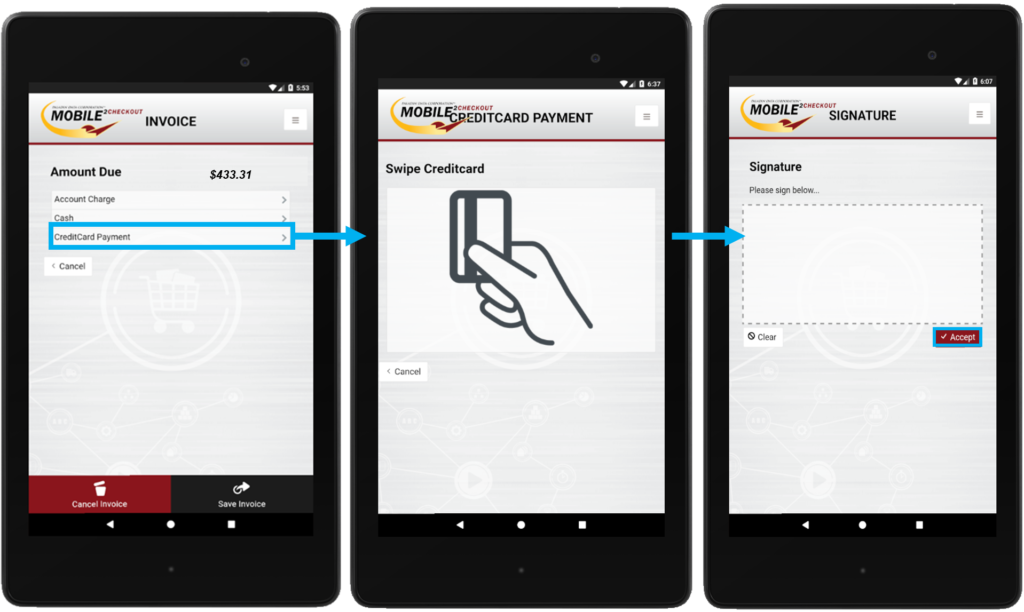
Figure 18: Credit card payment/Signature screen
Email the receipt
Note: You must have the email account set up in the default Mail app on your Android device to use the email feature.
After the transaction is complete, if you select a Paladin customer that has an email address on file, the invoice is automatically sent to that email address.
If you did not select a customer, or if the Paladin customer does not have an email on file, an Email Receipt option appears. If you want to specify an email for the receipt, tap Email Receipt, enter an email address, then tap Send. Otherwise, tap Done.
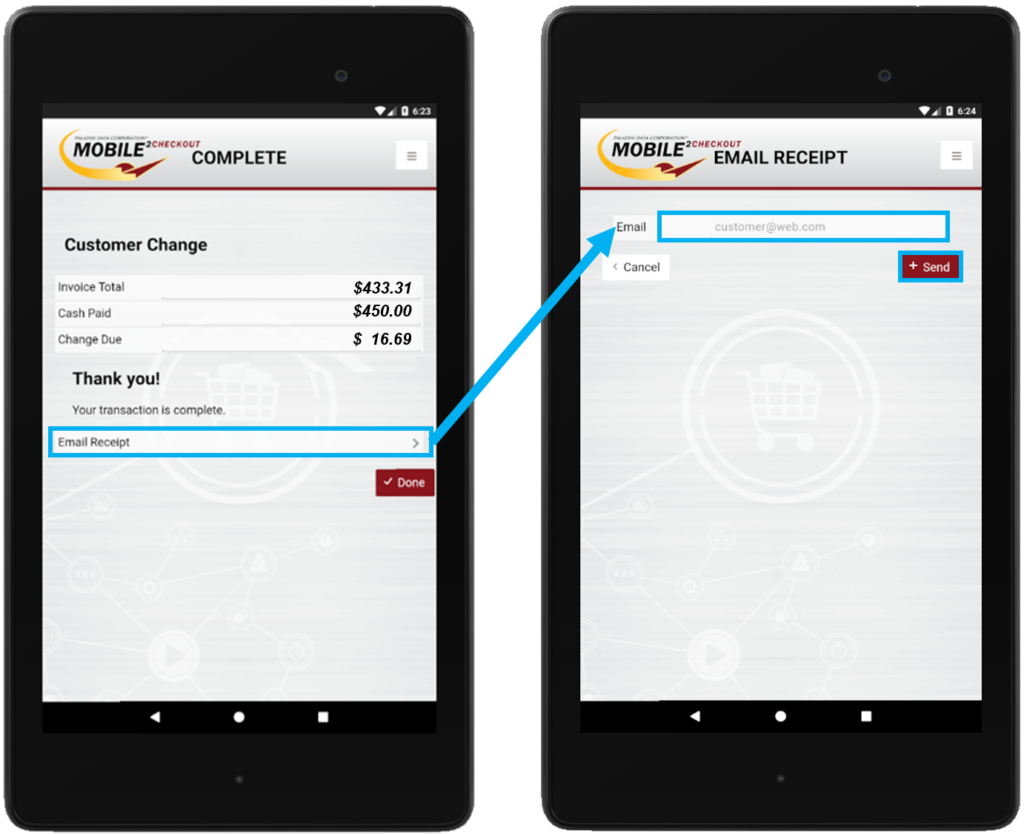
Figure 19: Email Receipt
Process return items
To process a returned item, follow the steps for Add items to the invoice, except you will enter a negative quantity.
Store a transaction
When you start the checkout process, you can store the transaction and complete the transaction later on a store terminal running Paladin. To store the transaction, after you click Checkout, when the screen where you select a payment type appears, tap Save Invoice, then enter a Name and Memo to identify the transaction when you recall it later.

Figure 20: Save Invoice
To recall the Mobile2Checkout transaction in Paladin, in the Invoice /Quote module, click F6 Recall Transaction, then select Quote ─ Order. The Mobile invoice appears in the list with the name and memo that you entered on your mobile device.
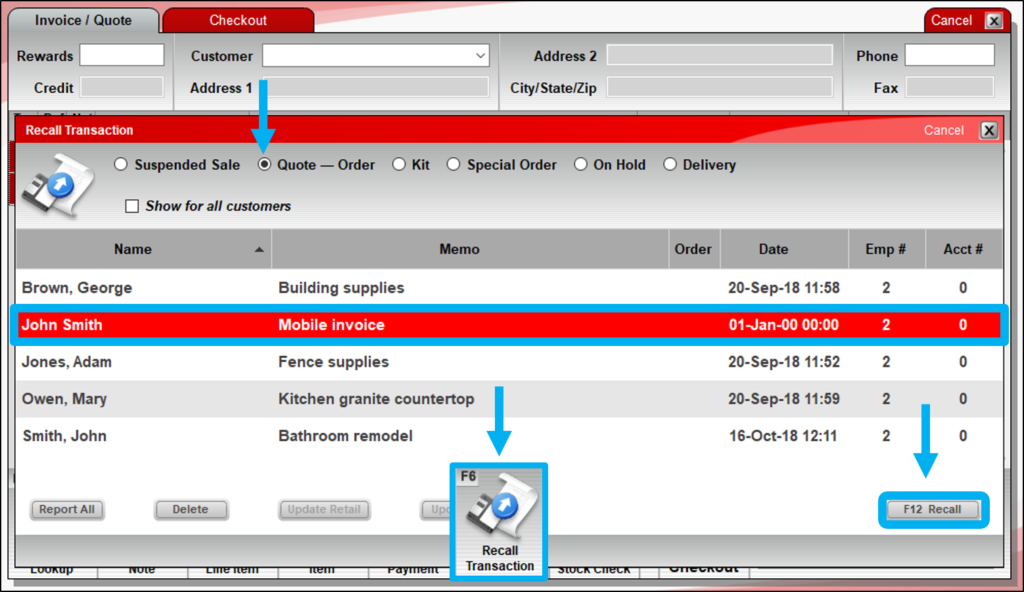
Figure 21: Recall Transaction
Proceed with the checkout procedure in Paladin.
If you have questions or suggestions about this information, contact support@paladinpos.com.
